Smart Studio Apartment Organization for Small Spaces
Look, I get it. You've got maybe 400 square feet to work with, and somehow you're supposed to fit a bedroom, living room, kitchen, and bathroom all in one space. It's like trying to solve a three-dimensional puzzle while your cat sits on the instructions. But here's the thing — studio living doesn't have to feel cramped or chaotic. I've worked with dozens of people who thought their small apartment was a lost cause, and honestly, they just needed the right organizational strategy.
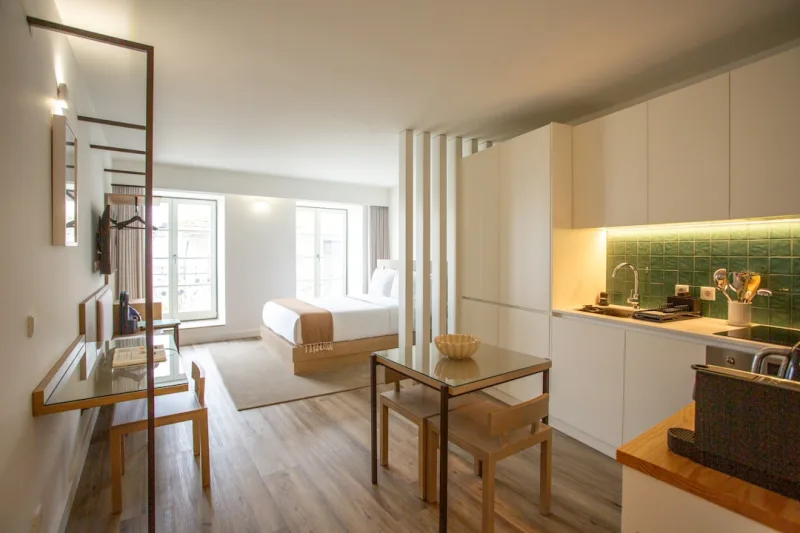
The key to making a studio apartment actually livable is understanding that every single inch matters. You can't afford wasted space or dead zones. We're talking vertical storage, furniture that pulls double duty, and systems that keep clutter from piling up faster than you can say "where did all this stuff come from?" I've put together a complete guide that's gotten actual results for real people living in tiny spaces.
Whether you're a recent graduate, a remote worker, or someone who just prefers the minimalist lifestyle, this guide will walk you through transforming your studio into an organized, functional, and honestly pretty stylish space. Let's dive in.
What You'll Need
Before you start rearranging furniture like you're on a home makeover show, let's talk about the essentials. You don't need to break the bank here — a lot of these items are budget-friendly, and some you might already have lying around.
- Vertical shelving units — $45-$120 (The The Home Depot has solid options)
- Under-bed storage containers — $30-$80 (clear ones so you can see what's inside)
- Over-the-door organizers — $15-$35
- Floating wall shelves — $25-$75 per shelf
- Drawer dividers and organizers — $20-$50
- Multi-functional furniture pieces (ottoman with storage, sofa bed) — $200-$600
- Wall-mounted desk or fold-down table — $50-$200
- Closet rod extensions and hanging organizers — $30-$60
- Command hooks and adhesive strips — $10-$25
- Bins and baskets for categorizing items — $40-$100 (various sizes)
- Label maker — $15-$30 (sounds silly, but it's a game-changer)
- Pegboard system for wall storage — $25-$80
Step-by-Step Guide
Step 1: Do a Complete Purge and Audit
I know, I know — nobody likes throwing stuff away. But this is non-negotiable. You cannot organize clutter; you can only hide it better, and that never works long-term. Pull everything out of your studio — and I mean everything. Clothes, books, kitchen gadgets, those mystery cables you're saving "just in case." Put it all on your bed or the floor.
Now, be honest with yourself. That bread maker you got three years ago? Haven't used it. Those jeans from 2015? They're taking up real estate. Be ruthless. Keep only what you actually use or what genuinely makes you happy. This step alone usually frees up 20-30% of your space.
Step 2: Establish Your Zones
Studio apartments need clear zones because there's literally no separate rooms to define spaces. You'll want to mentally (and physically) divide your space into distinct areas: sleeping zone, living zone, working zone, and kitchen zone. This doesn't mean building walls — it means using furniture placement, rugs, and lighting to signal to your brain when you're "changing rooms."
Position your bed in a corner or against a wall. Your living area should be near a window if possible. Your desk or work station? That should be away from your bed — trust me, you don't want to work where you sleep. This psychological separation actually helps your studio feel bigger.
Step 3: Maximize Your Vertical Space
This is where most people mess up. They arrange furniture along the walls and leave the walls bare. Huge missed opportunity. Your walls are prime real estate in a small space. Install floating shelves above your desk, your bed, and anywhere you can mount them. Add tall, narrow bookcases that draw the eye upward. Hang pegboards for hobby supplies or kitchen tools.
The Home Depot and Better Homes & Gardens & Gardens both have fantastic guides on wall mounting if you're nervous about installation. Wall-mounted storage instantly creates the illusion of more floor space — and it actually gives you more usable storage. It's a win-win.
Step 4: Invest in Multi-Functional Furniture
This is where you get creative. Your sofa shouldn't just be a place to sit — can it convert to a bed for guests? Your coffee table shouldn't just hold magazines — can it open up for storage? An ottoman at the foot of your bed can hold blankets and serve as extra seating. A wall-mounted desk folds down when you're not working, instantly giving back your floor space.
Yes, this furniture costs more upfront, but you're essentially buying the function of multiple pieces in one. That's smart spending when square footage is limited.
Step 5: Organize Your Closet Like Your Life Depends On It
 Boho DIY Room Makeover: Full Revamp Under $200
Your closet is your secret weapon in a studio. Make it count. Use slim hangers to fit more clothes — that simple swap gains you about 20% more hanging space. Add a second rod at the halfway point if your closet is tall enough. Install shelves above the main rod. Use hanging organizers on the inside of the door for accessories, belts, and scarves.
Hang your clothes by category and color — this isn't just Pinterest aesthetic, it genuinely helps you get dressed faster and realize what you actually own. Store off-season items in under-bed containers with clear labels.
Step 6: Create Systems for Daily Clutter
Mail piles up. Keys go missing. Your laptop has nowhere to live. Invest in baskets and bins that match your aesthetic and label them clearly. Keep a landing zone near your door for bags, shoes, and daily essentials. Designate a drawer for tech cables and chargers. Have a small basket in your kitchen for takeout menus and cooking notes. Systems prevent clutter from creeping back in.
Step 7: Light and Mirrors (The Secret Sauce)
This isn't technically organization, but it changes everything. Mirrors make spaces feel larger — place one across from a window if possible to bounce light around. Layer your lighting with a main overhead light, a desk lamp, and maybe a small reading light. Good lighting makes your organized space actually visible and usable. A cramped, dark space always feels worse, no matter how organized it is.
Pro Tips
Honestly, go vertical or go home. I can't stress this enough. If you're still shoving everything into the floor-level, you're doing it wrong. Every wall is storage potential.
Use clear containers. You can't use what you can't see. Clear bins let you know exactly what you have without opening every single one.
Create a "maybe" box. Put items here if you're unsure about keeping them. If you haven't thought about them in three months, donate them.
Go digital where possible. Stack of paperwork? Scan important documents and shred the rest. This alone can free up serious drawer space.
Embrace the one-in-one-out rule. When you buy something new, something old has to go. This prevents the slow creep of stuff.
Shop your own apartment first. Before buying new storage, see if you have items that could work. That cute basket in your closet could organize your kitchen.
Don't buy storage until you've purged. Storage for clutter is just organized clutter. Purge first, then see what you actually need.
Cost Breakdown
← Scroll to see full table →
| Item | Quantity | Unit Price | Total Cost |
|---|---|---|---|
| Vertical shelving units | 2 | $85 | $170 |
| Under-bed storage containers | 3 | $35 | $105 |
| Over-the-door organizers | 2 | $22 | $44 |
| Floating wall shelves | 4 | $50 | $200 |
| Drawer dividers and organizers | 1 | $35 | $35 |
| Bins and baskets | 6 | $15 | $90 |


