Look, I get it. Your master bedroom is looking tired. Maybe the walls are still that beige color from 2012, your nightstands have seen better days, and honestly? You're not sure where to even start. The thing is, you don't need to drop thousands of dollars to create the bedroom you've been dreaming about. I've been down this road more times than I can count, and I'm telling you right now — some of my favorite bedroom transformations happened on shoestring budgets.
Here's the thing about bedroom makeovers: they're incredibly personal, but the fundamentals are always the same. You need good light, a fresh color scheme, and pieces that make you actually want to spend time in that room. The best part? You can nail all of that without spending a fortune. We're talking strategic shopping, DIY solutions, and knowing exactly where to splurge versus where to save.
I've put together everything you need to give your master bedroom the upgrade it deserves. Whether you've got $500 or $2,000 to work with, these ideas will help you create a space that feels brand new — and actually feels like yours.
What You'll Need
Before you grab your credit card, let's talk materials. Most of these items are readily available at The The Home Depot, local paint suppliers, and online retailers. Here's what typically goes into a solid bedroom refresh:
- Paint (2-3 gallons for walls and accents): $30-60
- Paintbrushes and rollers (quality matters here): $15-25
- Drop cloth and painter's tape: $10-15
- New bedding set (duvet, pillows, sheets): $80-200
- Nightstands or floating shelves (DIY or budget-friendly): $40-150
- Lighting fixtures (pendant lights, lamps): $50-150
- Throw pillows and blankets: $30-80
- Curtains or window treatments: $40-100
- Accent furniture (bench, chair, or ottoman): $50-200
- Wall art or decor: $20-60
- Storage solutions (baskets, organizers): $25-75
Step-by-Step Guide
Step 1: Plan Your Color Palette
Start here. Seriously. I cannot stress this enough — picking your colors first makes everything else fall into place. Spend a weekend looking at inspiration on HGTV or Better Homes & Gardens & Gardens. Grab a handful of paint chips from the store and live with them for a few days. Which ones make you feel calm? Which ones feel energizing but not overwhelming?
My recommendation? Pick one main wall color and one accent color. Keep it simple. Neutrals like soft gray, warm beige, or pale blue are timeless and won't feel dated in six months. If you want something bolder — deep navy, sage green, charcoal — consider using it on just one accent wall or on your ceiling.
Step 2: Prep and Paint Like a Pro
This is where your budget really stretches. A fresh coat of paint does more for a room than almost anything else, and you can absolutely do it yourself. Move everything away from the walls, lay down your drop cloth (trust me on this), and tape off your trim carefully.
Invest in decent brushes and rollers — cheap ones shed bristles and create streaks. Two coats is the bare minimum. Let that first coat dry completely before applying the second. And here's a pro tip: paint the ceiling last so you're not constantly stepping around wet walls.
Step 3: Choose Your Bed as Your Anchor
Your bed is literally the focal point of the room, so pick new bedding that speaks to your color palette. You don't need expensive designer sheets to feel luxurious. Check out brands that offer great quality at reasonable prices. A solid duvet, quality pillows, and coordinating sheets will transform your space instantly.
 Budget Apartment Renovation: DIY Hacks That Actually Work
Pro move: layer your bedding. Start with a quality base sheet, add your duvet, throw a linen throw blanket across the foot of the bed, and add a couple of throw pillows in complementary colors. It looks intentional and expensive, even if you pieced it together smartly.
Step 4: Light Up the Space
Bad lighting kills a bedroom vibe faster than anything. Look, you need multiple light sources. This isn't optional. At minimum, you want overhead lighting (ceiling fixture or flush mount), bedside task lighting (lamps), and ambient lighting (maybe a wall sconce or dimmable options).
If your overhead fixture looks ancient, swap it out. The Home Depot has tons of mid-range options that look way more expensive than they are. Add a lamp to each nightstand — they don't have to match, and honestly, mixing styles looks more interesting.
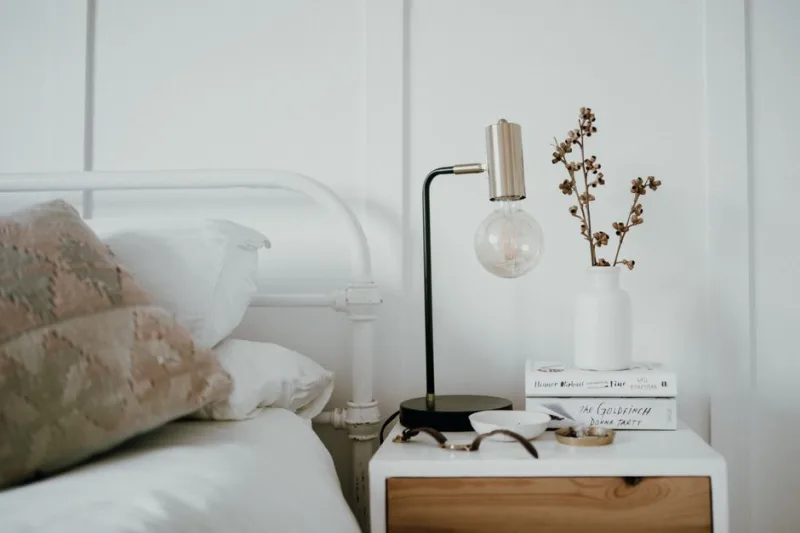
Step 5: Style Your Nightstands and Surfaces
This is where you show personality. Your nightstands don't need to be fancy — a simple floating shelf works just fine if you're trying to save money. What matters is how you style them. Keep one side of your lamp clear for a book, add a small plant or two, maybe a pretty tray to corral your phone charger and glasses.
The rule I follow: three things per nightstand looks balanced and intentional. Keep it simple. Keep it clean. Keep it YOU.
Step 6: Add Softness and Texture
Throw pillows, area rugs, and soft blankets aren't just pretty — they make your room feel finished. A layered rug under your bed adds warmth and defines the space. Throw pillows in varying textures (linen, velvet, knit) and sizes look way more curated than a matching set.
Window treatments matter too. Curtains that puddle slightly on the floor feel more intentional than shades pulled tight. Look for natural fabrics in neutrals or subtle patterns.
Step 7: Hang Art and Add Decor Strategically
This is the final touch that makes everything cohesive. A gallery wall above your bed, a large statement piece, or even a simple tapestry behind your headboard transforms the entire look. Don't be afraid of negative space though — a couple of really good pieces beats a cluttered gallery wall every time.
Pro Tips
- Shop secondhand first. Facebook Marketplace and estate sales are goldmines for nightstands, dressers, and even headboards. You can refinish a beat-up dresser for under $50 in supplies.
- DIY your headboard. Peel-and-stick wallpaper, fabric on a frame, or even paint a geometric design behind your bed. Costs next to nothing but looks custom.
- Lighting temperature matters. Warm white bulbs (2700K) feel cozy. Cool white (4000K) feels clinical. Choose warm. Always.
- Invest in your mattress and pillows. This is where you don't cheap out. You spend eight hours a night here. Good sleep is worth it.
- Use mirrors strategically. A mirror opposite a window bounces light around and makes the room feel bigger. Bonus: it's usually affordable.
- Keep your eye on seasonal sales. January and August are huge for bedding sales. Stock up then.
Cost Breakdown
← Scroll to see full table →
| Category | Budget Option | Mid-Range | Higher Investment |
|---|---|---|---|
| Paint (walls & accents) | $30 | $50 | $75 |
| Bedding Set | $80 | $150 | $300 |
| Lighting | $50 | $120 | $250 |
| Nightstands/Shelves | $40 | $100 | $250 |
| Curtains & Window Treatments | $40 | $80 | $150 |
| Throw Pillows & Blankets | $30 | $75 | $150 |
| Wall Art & Decor | $20 | $50 | $100 |
| Area Rug |