Modern Studio Apartment Makeover for Cozy Homes
Look, I get it. You've got a studio apartment, and right now it feels less like a sanctuary and more like a storage unit with a bed in it. But here's the thing — studio living doesn't have to mean sacrificing style or comfort. I've worked with countless people who thought their 400 square feet was just too limiting, and honestly? They were wrong. With the right makeover strategy, your studio can become the kind of space you actually want to spend time in.
The secret isn't about having more space — it's about being intentional with every inch you've got. We're talking smart furniture choices, clever storage solutions, and a modern aesthetic that makes your place feel intentional and put-together. I've transformed my share of cramped studios into cozy, Instagram-worthy homes, and I'm here to walk you through exactly how to do it yourself.
This makeover doesn't require a contractor or your entire savings account. You'll be amazed at what you can achieve with some thoughtful planning, a weekend or two, and maybe $1,500 to $3,000 depending on how much you want to upgrade. Let's get started.
What You'll Need
Before you start rearranging furniture or painting walls, let's gather your materials. Here's what I typically recommend for a solid studio transformation:
- Paint (2 gallons of modern neutral color) — $40-60
- Floating shelves (set of 3-4) — $80-150
- Multipurpose storage ottoman — $150-300
- Modern area rug (5x8 ft) — $150-400
- Wall-mounted desk or compact dining table — $200-500
- LED strip lighting — $30-80
- Throw pillows and blankets (set of 4-5) — $100-200
- Curtain rods and modern drapes — $80-200
- Potted plants and planters (4-5 plants) — $60-150
- Wall art and mirrors — $100-250
- Paint supplies (brushes, drop cloth, tape) — $30-50
- Under-bed storage containers (set of 2) — $50-100
- Bedside table or wall-mounted shelves — $80-200
Step-by-Step Guide
Step 1: Declutter and Plan Your Layout
This is where everything starts, and honestly, it's the most crucial step. I cannot stress this enough — you need to get rid of stuff. I'm talking about those jeans you haven't worn in three years, the kitchen gadgets you never use, and the decorative items that don't spark joy. Pull everything out and ask yourself if it serves a purpose or makes you happy. If it's neither, it goes.
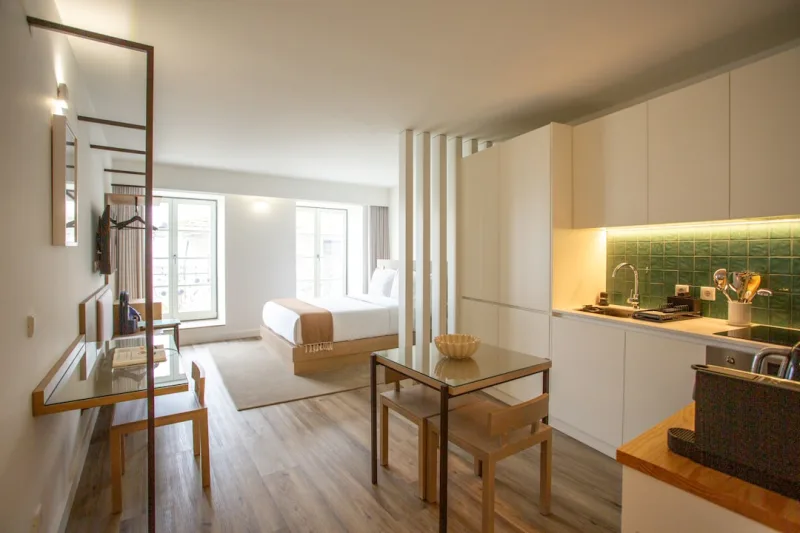
Once you've cleared the clutter, measure your space carefully. Figure out where your bed should go — usually against the longest wall. Plan where your work area, living area, and sleeping area will be. This zoning is crucial in studios because it psychologically separates your activities.
Step 2: Choose Your Color Palette
Modern doesn't mean cold and boring — let me be clear on that. I typically recommend starting with a neutral base like soft gray, warm white, or greige (that gorgeous gray-beige hybrid), then layering in accent colors through decor. Paint your walls first; this is the foundation everything else sits on. Check out Better Homes & Gardens & Gardens for inspiration on modern color combinations that feel both contemporary and inviting.
Don't paint every wall a bold color in a small space — that's a mistake I see constantly. Use an accent wall strategically, or keep walls neutral and bring personality through furniture and accessories instead.
Step 3: Invest in Multi-Functional Furniture
Here's where your money actually matters. A regular coffee table is a luxury you don't have. Instead, grab a storage ottoman that doubles as seating and hidden storage. Your bed? Consider a platform with built-in drawers underneath. The The Home Depot has fantastic options for space-saving furniture that doesn't look cheap or cramped.
A wall-mounted desk is non-negotiable if you work from home. It takes up almost no floor space but gives you a dedicated work zone. When you're not using it, it's just a sleek shelf.
Step 4: Create Vertical Storage Solutions
Since floor space is premium real estate, go up. Install floating shelves above your desk, bed, or in corners. These aren't just functional — they're design opportunities. Style them thoughtfully with books, plants, and decorative objects. The key is balance; don't cram them full.
Wall-mounted storage is your best friend. Use the space above your bed, beside your closet, and in awkward corners. This keeps your floor clear and makes the space feel larger.
Step 5: Layer Your Lighting
 Budget Apartment Renovation: DIY Hacks That Actually Work
Bad lighting will ruin even the most beautifully designed studio. You need multiple light sources. Keep your overhead light, but add a desk lamp, bedside lamp, and some subtle LED strip lighting. I typically install LED strips behind floating shelves or along the headboard for that modern, ambient vibe. It's cheap, easy, and transforms the entire mood of your space.
Step 6: Add Soft Furnishings and Personality
Now comes the fun part. Your throw pillows, blankets, curtains, and area rug are where you can really express style. Choose cohesive colors but vary textures — linen, velvet, chunky knit. This creates visual interest without feeling chaotic. HGTV has incredible inspo galleries if you're struggling to visualize how different textures work together.
Step 7: Bring in Plants and Greenery
Honestly, plants are the easiest way to make a space feel alive and intentional. They soften hard lines, improve air quality, and add color without being commitment-heavy. Start with low-maintenance varieties like pothos, snake plants, or ZZ plants. Put them on shelves, hang them in corners, or set them on your windowsill.
Step 8: Strategic Mirror Placement
A large mirror opposite a window reflects light and makes your space feel infinitely larger. It's a simple psychological trick that actually works. Lean a full-length mirror against a wall, hang one above a console table, or place smaller mirrors throughout to bounce light around.
Pro Tips
Use rugs to define zones. An area rug under your seating area visually separates it from your sleeping zone. It's cheap spatial division that actually feels intentional.
Keep your color palette to 3-4 main colors. Too many colors make small spaces feel chaotic. Stick to your neutral base plus 2-3 accent colors that appear throughout the space.
Don't buy everything at once. Start with the big pieces — bed, desk, storage — then slowly add accessories. This prevents that "I just bought an entire room" feeling and lets you make thoughtful choices.
Hang curtains high and wide. This is a trick designers use constantly. Mount your curtain rod near the ceiling and let the curtains extend to the floor. It makes your ceilings seem higher and your windows appear larger.
Keep your closet organized. Storage doesn't just mean extra furniture. Properly organizing your existing closet frees up mental space and keeps your studio feeling calm. Use slim hangers, shelf dividers, and vertical storage inside.
Add a statement light fixture. If you're going to splurge somewhere, make it a beautiful pendant light or modern chandelier. It becomes instant art and anchors the space.
Cost Breakdown
← Scroll to see full table →
| Item Category | Estimated Cost | Priority Level |
|---|---|---|
| Paint & Painting Supplies | $70-110 | High |
| Furniture (Bed, Desk, Storage) | $500-1,200 | High |
| Storage Solutions | $150-400 | High |
| Area Rug | $150-400 | Medium |
| Lighting | $80-200 | Medium |
| Window Treatments | $80-200 | Medium |
| Soft Furnishings & Decor | $200-400 | Low |
| Plants & Greenery | $60-150 | Low |
| Total Estimated Cost | $1,290-3,460 | N/A |
FAQ
Q: Can I do this makeover on a smaller budget?
A: Absolutely. Start with paint and decluttering — that's basically free except for supplies. Then focus on one multi-functional piece of furniture like a storage ottoman. Skip expensive art initially and use items you already own, or grab


