Minimalist Studio Apartment Layout with DIY Hacks: Transform Your Tiny Space
Okay, so you've got a studio apartment. Maybe it's 400 square feet, maybe it's 350. Either way, you're staring at this one open room and thinking, "How on earth am I going to make this feel like an actual home and not just a box I sleep in?" I've been there — honestly, I spent six months in a studio in Brooklyn that was basically a closet with ambitions. The good news? With the right layout strategy and some clever DIY tricks, you can absolutely pull this off.
The secret isn't buying expensive furniture or knocking down walls. It's about being intentional with your space. Here's the thing — minimalism isn't just about having less stuff (though that helps). It's about creating zones that actually work for your life, maximizing vertical space, and using smart storage solutions that don't scream "I'm cramped in here." I'm going to walk you through exactly how to do this without spending a fortune.
We're talking DIY hacks that'll make your studio feel double the size. Floating shelves, strategic furniture placement, hidden storage — the good stuff. Let's get into it.
What You'll Need
Before you grab your tools, here's what you'll actually want to have on hand. Some of this you might already own, which means more money for coffee (priorities).
- Floating shelves and brackets — $30-80 per shelf (The The Home Depot)
- Wall-mounted desk or folding desk — $60-200 (IKEA or The Home Depot)
- Under-bed storage containers — $25-50 (Target or Walmart)
- Command hooks and strips — $8-20 (various retailers)
- Vertical curtain rods — $15-40 (The Home Depot)
- Area rug (defines zones) — $40-150
- Paint (accent wall) — $20-35 per gallon
- Pegboard and hooks — $20-60 (The Home Depot)
- Basic tool kit (stud finder, drill, level) — $40-100 if you don't have one
- Lighting (wall sconces, LED strips) — $25-80
Pro move: Check Facebook Marketplace or Craigslist for used shelving and desks. I've scored some incredible deals on barely-used stuff.
Step-by-Step Guide
Step 1: Define Your Zones Without Physical Walls
This is the foundation of making a studio work. You need your brain to believe these are separate spaces, even though they're technically one room. Start by identifying where you'll sleep, work, eat, and chill. Use furniture placement and area rugs to create invisible boundaries — this actually works way better than you'd think.
Place your bed in the corner or along the longest wall. Put your work area near the window if possible (natural light is everything). Your seating area? That's somewhere you can look out at your living space, not directly at your bed. An area rug under your couch or seating area instantly makes it feel like its own corner.
Step 2: Go Vertical With Storage and Shelving
Horizontal space is your enemy in a studio. Vertical space is your best friend. Floating shelves are literally the MVP here — they give you storage without eating up floor space. I'd recommend going at least 6 feet high on your walls. That's tons of real estate nobody's using.
Find your studs with a stud finder, mark them with a pencil, then install floating shelves according to their weight capacity (usually instructions are right on the box from The Home Depot). Use them for books, plants, baskets, and decorative stuff. The key is mixing function with aesthetics — don't just stack random boxes up there.
Pegboards are also criminally underrated. Mount one behind your desk or in your entryway. It's adjustable, looks intentional, and gives you tons of storage flexibility without feeling cluttered.
Step 3: Install a Wall-Mounted Desk or Work Surface
A traditional desk eats 20-30% of your studio's usable floor space. That's brutal. A wall-mounted desk folds down when you need it and disappears when you don't. This changes the game — your living area actually feels like a living area during non-work hours.
You can buy pre-made options or DIY this with a quality hollow-core door and some hinges (way cheaper, honestly). Mount it at standard desk height (around 30 inches) and add a fold-down leg for support. The Home Depot has great bracket options that can hold 50+ pounds.
Step 4: Maximize Under-Bed and Closet Space
Under your bed is basically free storage. Get those low-profile storage containers and organize them by category — seasonal clothes, extra bedding, you know the drill. Label everything. Labels sound boring but they're the difference between organized and chaotic.
 Budget Apartment Renovation: DIY Hacks That Actually Work
In your closet, install shelving above the hanging rod and use those vertical hanging organizers. One thing Better Homes & Gardens & Gardens taught me years ago: folding some clothes instead of hanging everything saves massive space and actually makes your closet feel less overwhelming.
Step 5: Use Lighting to Define Spaces
This is underrated as heck. Different lighting in different zones makes them feel separate. Install a wall sconce near your bed for reading. Use a desk lamp in your work area. String some LED strips along shelving for ambient light. One overhead light makes everything feel flat and depressing — trust me on this.
Step 6: Create a Cohesive Color Palette
Minimalism doesn't mean boring beige everything, but it does mean being intentional with color. Pick 2-3 main colors and stick with them. Light colors (whites, soft grays, warm creams) make spaces feel bigger. One accent wall in a deeper tone? That's actually a smart move for adding depth without clutter.
Pro Tips
Use mirrors strategically. A large mirror opposite a window bounces light around and makes the space feel bigger. This isn't new advice, but it genuinely works every single time.
Get a bed with built-in storage underneath. Platform beds with drawers are game-changers for studios. It's one piece doing two jobs, which is the whole minimalist philosophy.
Keep your color palette consistent with soft furnishings too. Your curtains, throw pillows, and rug should feel like they belong together. This creates visual harmony, which makes tight spaces feel less chaotic.
Install wall-mounted shelving before moving in furniture. Trust me — it's infinitely easier when you don't have your entire life blocking the walls.
Choose furniture with legs instead of skirted bases. When you can see the floor under your couch and chair, the room feels more spacious. It's a visual trick that actually works.
Invest in multi-functional pieces. An ottoman that opens for storage, a console table that becomes your desk, a bookshelf that becomes a room divider. Every item should earn its place.
Cost Breakdown
← Scroll to see full table →
| Item | Low Cost | High Cost | Estimated Budget |
|---|---|---|---|
| Floating Shelves (3 units) | $80 | $240 | $150 |
| Wall-Mounted Desk | $60 | $200 | $120 |
| Under-Bed Storage | $25 | $50 | $40 |
| Lighting (sconces + LED strips) | $25 | $80 | $50 |
| Area Rug | $40 | $150 | $80 |
| Paint & Supplies | $20 | $50 | $35 |
| Pegboard & Hooks | $20 | $60 | $40 |
| Tools (if needed) | $0 | $100 | $40 |
| Total | $270 | $930 | $555 |
Honestly? You can do a really solid studio transformation for $500-700 if you're strategic and patient. That's doable.
FAQ
Q: Won't floating shelves make my studio feel more cluttered?
A: Only if you load them with random stuff. The key is keeping them curated — think books, plants, and a few meaningful items. Empty space on a shelf is actually beautiful and helps your room breathe. HGTV has some great examples of styled floating shelves that prove this works.
Q: Can I do this without a stud finder?
A: You can, but honestly, st
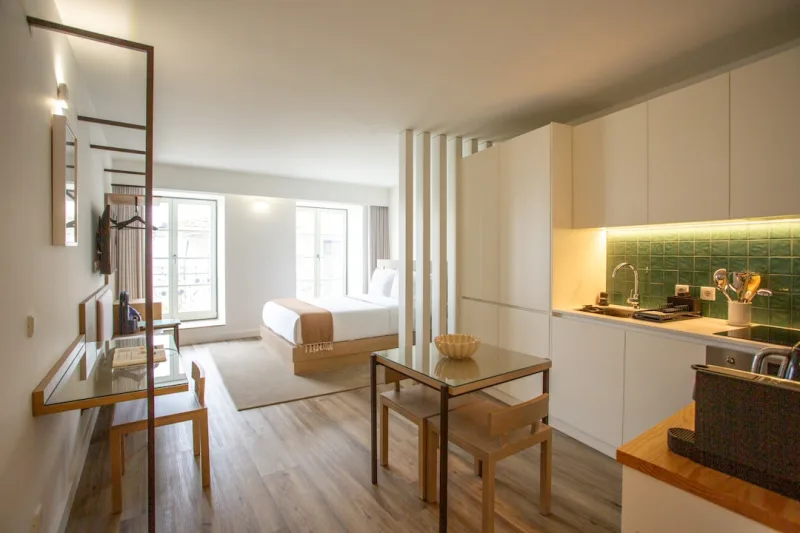
📷 Photo by Aquilion Property on Unsplash


