Designer Studio Apartment Inspiration for Modern Homes
Okay, let's be real — studio apartments don't have to feel cramped or generic. I've seen countless tiny spaces transform into absolute showstoppers with the right design approach, and honestly, it's one of my favorite projects to tackle. There's something really satisfying about maximizing every single square foot while keeping things sophisticated and stylish. The trick isn't about fitting more stuff in; it's about being intentional with what you choose and how you arrange it.
Here's the thing: a well-designed studio can actually feel more upscale than a sprawling apartment. You're forced to curate everything carefully, which means no clutter, no wasted space, and a cohesive aesthetic that just feels intentional. Whether you're renting or own your space, I'm going to walk you through exactly how to create a designer studio that makes people genuinely impressed when they walk in.
The best part? You don't need a massive budget to pull this off. Smart choices, strategic furniture placement, and a clear design vision can transform your studio into something that looks like it came straight out of an interior design magazine.
What You'll Need
Before we dive into the transformation, let's talk about the essentials. These are the foundational pieces and materials that'll give your studio that designer feel without completely draining your wallet.
- Statement area rug — $150-400 (defines spaces and adds visual interest)
- Multifunctional furniture piece (ottoman with storage, murphy bed, or sofa bed) — $300-800
- Floating shelves (set of 2-3) — $60-150
- Quality lighting fixtures (pendant, floor lamp, desk lamp) — $200-500
- Paint supplies (accent wall paint, primer, brushes) — $40-100
- Decorative wall panels or shiplap (optional) — $100-300
- Plants and planters — $50-150
- Curtains or room dividers — $80-200
- Mirrors (large statement pieces) — $100-250
- Bedding and throw pillows — $150-300
- Artwork and prints
- Organizational systems (baskets, shelving units) — $100-250
The The Home Depot has fantastic options for everything from paint to shelving, and you can actually find some really solid modern pieces there that won't break the bank.
Step-by-Step Guide
Step 1: Plan Your Layout and Define Zones
First things first — map out your space. Seriously, grab some paper or use a free app like RoomSketcher and actually visualize where everything goes. The magic happens when you create distinct zones even though you're working with limited square footage. You need a sleeping area, a living area, and a work-from-home zone if possible.
I always recommend using furniture placement and rugs to delineate these spaces. An area rug under your sofa instantly tells the eye "this is the living room." A statement bed frame with a headboard does the same for sleeping quarters. It's all about creating visual boundaries without throwing up actual walls.
Step 2: Choose a Cohesive Color Palette
Here's my golden rule: stick with no more than three colors plus neutrals. Pick a base color (usually a neutral like white, gray, or beige), a secondary color (maybe a soft sage green or warm taupe), and one accent color for pops of personality. This keeps everything feeling intentional and sophisticated rather than chaotic.
Consider painting an accent wall — it's one of the cheapest ways to add visual interest. A deep forest green, moody charcoal, or even a warm terracotta can completely elevate a studio. Better Homes & Gardens & Gardens has some gorgeous color inspiration galleries if you're feeling stuck.
Step 3: Invest in Statement Lighting
Honestly, this is where amateur spaces become designer spaces. Overhead ceiling lights are fine, but they're boring. Add a sculptural pendant light over your dining table, a sleek arc floor lamp next to your reading nook, and a minimal desk lamp at your workspace. Lighting serves double duty — it's functional and decorative.
Choose fixtures that match your overall aesthetic. Mid-century modern? Go for brass and sculptural shapes. Contemporary minimal? Think clean lines and matte black. HGTV does incredible before-and-afters where lighting literally transforms the entire vibe.
Step 4: Select Multifunctional Furniture
This is essential in a studio. Your sofa might need to double as a guest bed. Your coffee table might have hidden storage. Your nightstand might include shelving above it. Look for ottoman beds with compartments, extendable dining tables, and wall-mounted desks that fold up when you need floor space.
The investment here is worth it — spending $600 on a quality sofa bed that looks gorgeous beats buying a cheap sofa and a cheap bed separately. You're saving space and money simultaneously.
Step 5: Maximize Vertical Space with Shelving and Wall Storage
 Budget Apartment Renovation: DIY Hacks That Actually Work
In a studio, you're not going wide — you're going up. Floating shelves are game-changers. Mount them above your desk, beside your bed, or along empty wall space. Style them with books, plants, and decorative objects that match your color palette.
Add a tall, narrow bookcase in a corner, install wall-mounted organizers behind your door, and use the space above your bed for floating shelves. Every inch counts, and using vertical space is how you avoid that cramped feeling.
Step 6: Incorporate Large Mirrors
A strategically placed large mirror creates the illusion of a bigger space while bouncing light around. Position it opposite a window if you have one, or across from your main light source. This is simple, affordable, and genuinely transformative.
Step 7: Layer Your Textiles and Decor
Quality bedding, throw pillows in varying textures, a plush area rug, and soft curtains make a studio feel luxury and livable. Mix materials — combine linen, velvet, wool, and cotton. Add throw blankets draped over your sofa. These details make the difference between "nice apartment" and "designer apartment."
Step 8: Style with Plants and Natural Elements
Living plants instantly elevate any space. Place a tall fiddle leaf fig in a corner, add succulents to your floating shelves, and hang a pothos plant from a macramé hanger. Not only does it look designer, but it also improves air quality and adds life to your space.
Pro Tips
Embrace negative space: Don't fill every square inch. Breathing room actually makes spaces feel larger and more sophisticated. It feels intentional, not cluttered.
Keep your color palette in every room: If your kitchen uses the same neutral tones as your bedroom, the space flows seamlessly. This is what makes professional designs feel cohesive.
Invest in one or two statement pieces: Maybe it's an incredible mid-century modern coffee table or a stunning pendant light. A few really great pieces beat a bunch of mediocre furniture.
Use removable wallpaper or wall decals: If you're renting, peel-and-stick wallpaper is your friend. Add texture and pattern without permanent damage.
Create a focal point: Whether it's your bed with a striking headboard, an accent wall, or a gallery wall of art — give the eye somewhere interesting to land.
Keep it clutter-free: This is non-negotiable for small spaces. Regularly purge, use organizational systems, and maintain a "one in, one out" mentality.
Cost Breakdown
← Scroll to see full table →
| Item | Budget Range | Splurge Range |
|---|---|---|
| Area Rug | $150-200 | $300-400 |
| Multifunctional Furniture | $300-500 | $600-800 |
| Floating Shelves | $60-100 | $120-150 |
| Lighting | $150-300 | $400-500 |
| Paint & Supplies | $40-60 | $70-100 |
| Curtains | $50-100 | $150-200 |
| Mirrors | $80-150 | $200-250 |
| Textiles & Pillows | $100-150 | $200-300 |
| Plants & Planters | $40-80 | $100-150 |
| Artwork | $50-100 | $150-300 |
| TOTAL ESTIMATE | $1,070-1,740 | $2,330-3,650 |
You can absolutely start with the budget-friendly approach and upgrade pieces over time. The foundation is what matters most.
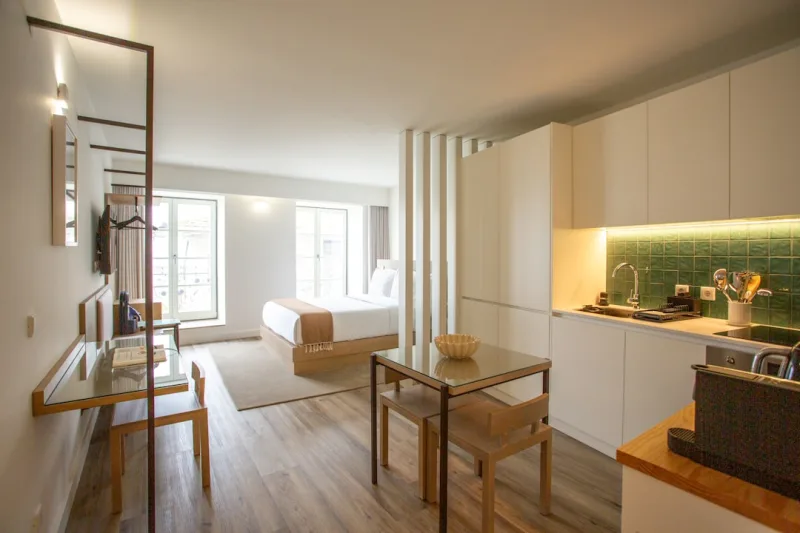
📷 Photo by Aquilion Property on Unsplash


