Look, I'll be honest with you — your fireplace mantel is basically the focal point of your entire living room. It's where everyone's eyes land when they walk in, whether you want them to or not. So if yours is currently looking bare, cluttered, or frankly depressing, we need to talk about fixing that. The good news? You don't need a decorator's salary or even a ton of time to make it look absolutely stunning.
I've been designing mantels for years, and here's what I've learned: the difference between a mantel that looks "nice" and one that stops people mid-conversation usually comes down to intentionality. It's not about spending a fortune on those fancy designer pieces you see on HGTV — it's about understanding a few simple principles and then making smart choices with what you actually have (or what you can grab at a reasonable price).
This guide is going to walk you through everything you need to know to create a fireplace mantel display that feels curated, balanced, and genuinely reflects your style. We're talking real DIY projects, real budgets, and real results. Let's get started.
What You'll Need
Before we dive into the actual decorating, let's talk materials. The beautiful thing about mantel decor is that you don't need much — and honestly, most of what you'll use, you probably already have lying around your house.
- Candles and holders (various sizes) — $15-40 from The The Home Depot or local stores
- Greenery or faux branches (real or artificial) — $10-25
- Picture frames (mix of sizes) — $20-50 if buying new; $5-15 if thrifting
- Decorative books — $0-20 (use books you already own)
- Mirrors or wall art for above the mantel — $30-100
- Vases or vessels (ceramic, glass, or wood) — $10-35
- Garland or rope (seasonal or year-round) — $8-20
- Small sculptures or objects — $5-30 (thrift stores are your friend here)
- Fairy lights or string lights (optional but highly recommended) — $10-25
- Painter's tape and level (for planning) — $5
Pro tip: Before buying anything new, walk through your house and gather pieces you already have. I can't tell you how many beautiful mantels I've created using things people were about to donate. Better Homes & Gardens & Gardens actually did a whole feature on this concept — and it's real.
Step-by-Step Guide
Step 1: Start with a Clean Slate and Plan Your Layout
First things first — clear everything off your mantel. I mean everything. Dust it, wipe it down, and let it breathe for a second. This is your chance to start fresh.
Now, here's where most people mess up. They just start placing things randomly and wonder why it doesn't look "right." Instead, grab some painter's tape and actually map out where things will go. Seriously, do this. It takes five minutes and saves you from rearranging seventeen times.
The general rule? Think in odd numbers and vary your heights. A display with three candles looks intentional. Five objects feels curated. Four feels accidental. Also, you want some pieces standing tall and others sitting low — that visual rhythm is what makes it look professional.
Step 2: Establish Your Anchor Piece
Every good mantel needs an anchor — usually something larger that everything else orbits around. This could be a mirror hung above the mantel, a large piece of art, a tall vase, or even an oversized candle holder. The anchor gives your design somewhere to "land" visually.
If you're hanging something above, make sure it's centered and at eye level (usually about 57 inches from the floor to the center of the piece). Use that level you grabbed — I know it's tempting to just eyeball it, but trust me, when it's crooked, you'll see it every single time you sit down.
Step 3: Layer in Your Greenery or Garland
This is honestly the magic ingredient. Greenery — whether fresh, dried, or faux — instantly makes a mantel feel expensive and intentional. You don't need a ton. A simple garland or a few stems in a vase can completely transform the space.
Run it loosely along the mantel, or cluster it in one or two spots. If you're using real greenery, refresh it every week or two. If you go faux (which, let's be real, is totally acceptable and way more practical), grab something from The Home Depot in a style that matches your home's vibe.
Step 4: Add Candles and Light
Candles aren't just decorative — they literally make your mantel glow. Use different heights and groupings. Three matching candles in a row? Perfect. A tall pillar next to a smaller votives? Also perfect. Mix metal finishes — brass, copper, and black all work together.
If you want to get fancy, tuck some fairy lights behind your greenery or along the back edge. When you turn them on in the evening, it's absolutely magical. Your family will think you hired a professional.
Step 5: Introduce Meaningful Objects and Decor
Now add those personal touches — framed photos, decorative books, small sculptures, or vases. Each item should have some reason for being there. Not every single thing needs to have deep meaning, but nothing should feel random or like you just shoved it there because you had space.
Here's the thing — if you're using books, lay some flat and stand others upright. Stack them at different heights. Books are criminally underrated as decor, especially when you mix in some decorative objects on top of them.
Step 6: Step Back and Edit
This is the most important step and nobody talks about it. Once you've placed everything, step back and look at it from across the room. Does it feel balanced? Does anything stick out (in a bad way)? Does it look cluttered or sparse?
Honestly, the difference between "good" and "amazing" is usually removing one or two items. Less is more. If you're second-guessing something, that's your sign to move it or take it off entirely.
Pro Tips
- Stick to a color palette: Choose 2-3 colors and stick to them. This instantly makes everything look more cohesive. Neutrals with one accent color always works beautifully.
- Mix textures: Combine smooth, rough, shiny, and matte surfaces. A ceramic vase next to a wooden candlestick next to a mirror creates visual interest that's subtle but noticeable.
- Incorporate seasonal changes: Keep the core setup the same but swap out small items seasonally. This keeps things feeling fresh without a total redesign.
- Don't forget about what's below: The mantel is part of a larger fireplace. Make sure the overall composition — mantel plus fireplace surround — feels balanced.
- Use negative space: Empty space is your friend. It's not a void that needs filling. A few well-placed items with breathing room looks infinitely better than a crowded shelf.
- Think about scale: Everything doesn't need to be huge. One larger statement piece paired with several smaller objects creates way more interest than all medium-sized items.
Cost Breakdown
← Scroll to see full table →
| Item Category | Low Budget | Mid Budget | Higher Budget |
|---|---|---|---|
| Candles & Holders | $10-15 | $20-30 | $40-60 |
| Greenery/Garland | $5-10 | $15-20 | $30-50 |
| Frames & Photos | $5-10 | $15-25 | $35-60 |
| Vases & Vessels | $5-10 | $15-25 | $40-70 |
| Decor Objects | $5-10 | $15-25 | $40-80 |
| Mirror/Art (above mantel) | $20-30 | $40-70 | $100-200+ |
| TOTAL | $50-85 | $120-195 | $285-520 |
Real talk: You can create a beautiful mantel for under $100 if you use what you already have and hit up thrift stores. No judgment here — some of my favorite pieces came from estate sales.
- Diy Coffee Table Ideas Cheap
- Master Bedroom Makeover Ideas On A Budget
- cheap diy living room decor ideas
- Boho Home Decor Ideas Diy Budget
🔗 You Might Also Like
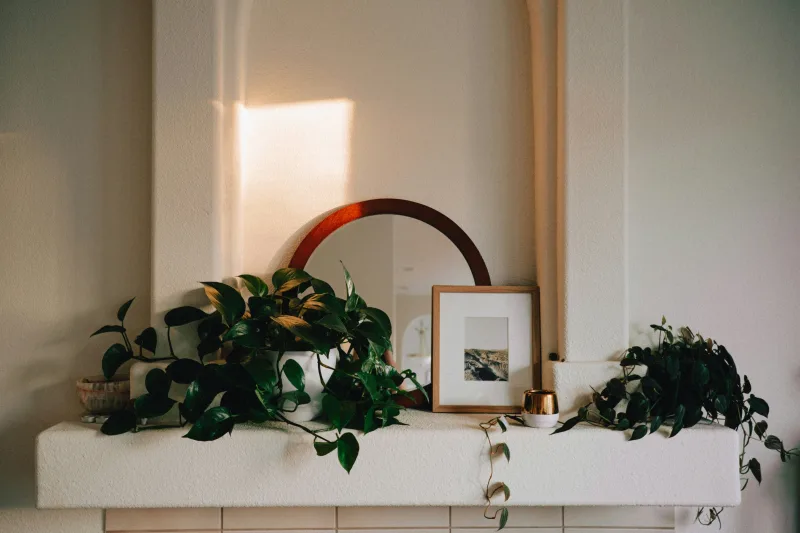
📷 Photo by Ashe Walker on Unsplash


