
Boho Living Room Transformation with DIY Hacks: Create Your Cozy Sanctuary
There's something absolutely magical about walking into a boho living room—that warm, welcoming feeling that wraps around you like your favorite blanket. Maybe you've scrolled through Pinterest countless times, pinning those dreamy spaces with macramé wall hangings, cozy floor cushions, and layered textures that just scream comfort and style. If you're feeling that pull toward a bohemian aesthetic but don't know where to start (or worried about the cost), I have amazing news for you. You don't need a huge budget or professional designer to create this transformation. With the right DIY hacks and a little creativity, you can turn your living room into the cozy boho sanctuary you've been dreaming about. I'm going to walk you through every step, showing you exactly how to nail this look affordably and authentically. This isn't about perfection—it's about creating a space that feels like *you*, a place where you genuinely want to spend time with the people you love.

In this comprehensive guide, you'll discover everything you need to know about transforming your living room into a beautiful bohemian space using budget-friendly DIY hacks. We'll cover the core principles of boho design, walk through a detailed planning checklist, break down costs so you know exactly what to expect, and provide step-by-step instructions for every major transformation element. You'll learn which styles work best together, get specific product recommendations with prices, hear expert tips from experienced decorators, and find answers to common questions that might be holding you back. Whether you're starting from scratch or refreshing an existing space, this guide will give you the confidence and roadmap to create something truly special.
Understanding Boho Living Room Transformation with DIY Hacks
Bohemian, or "boho," style has become more than just a trend—it's a lifestyle choice that celebrates individuality, creativity, and comfort. At its heart, boho design is about creating spaces that feel lived-in, warm, and authentically *you*. The beauty of this style is that it doesn't follow rigid rules; instead, it embraces the freedom to mix and match colors, textures, and patterns in ways that speak to your personal aesthetic.
When we talk about a boho living room transformation with DIY hacks, we're talking about taking the principles of bohemian design—natural materials, layered textures, warm colors, plants, vintage and artisan pieces—and bringing them into your space without breaking the bank. This approach is particularly appealing because boho actually *favors* handmade, repurposed, and DIY elements. There's something inherently bohemian about a macramé wall hanging you created yourself or a tapestry you hand-dyed. This style celebrates the imperfect, the personal, and the intentional.
Why does this matter? Because living in a space that genuinely reflects who you are transforms not just how your room looks, but how you feel when you're in it. Studies show that our environments significantly impact our mental health and well-being. A boho living room, with its emphasis on comfort, natural elements, and personal touches, creates a sanctuary where stress melts away and creativity flourishes.
Common mistakes people make when attempting this transformation include: trying to match everything too perfectly (boho thrives on eclectic mixing), over-investing in high-end pieces (DIY and thrifted items work beautifully), neglecting the importance of plants and natural light, forgetting about functional comfort in favor of aesthetics alone, using too many competing patterns without grounding colors, and trying to complete everything at once instead of building gradually. The best boho transformations happen when you embrace imperfection, shop mindfully, and focus on creating a space that's as comfortable as it is beautiful.
Planning Guide for Boho Living Room Transformation with DIY Hacks
Before you grab your paintbrush or head to IKEA, taking time to plan your transformation is absolutely crucial. This isn't about rigid planning that kills creativity—it's about giving yourself direction so your decisions build cohesively toward the final vision. Start by gathering inspiration. Spend a week (or longer if you want!) collecting images that resonate with you on Pinterest, Instagram, and design blogs. Don't just save random boho rooms; save specific elements that speak to you: a color palette you love, a wall treatment that excites you, a furniture arrangement that feels functional. This collection becomes your visual reference guide.
Next, assess your current space honestly. Measure your room, note where windows and doors are located, identify any structural elements you're working with (like built-in shelves or architectural features), and think about traffic flow. Take photos of your space from different angles—these will be invaluable as you plan. Consider your lifestyle: do you have kids or pets? Do you entertain frequently? Will this be a relaxation space, a creative workspace, or both? Your boho living room should work *for* you, not against you.
Now comes the fun part: defining your boho aesthetic. Boho isn't monolithic—it exists on a spectrum. Are you drawn to earthy, neutral boho with lots of natural materials? Colorful, maximalist boho with bold patterns and rich hues? Minimalist boho with clean lines and carefully curated pieces? Vintage boho with antique and thrifted finds? Your answer here will shape every decision that follows. Finally, set a realistic budget and timeline. Transformation doesn't need to happen overnight, and spreading it across several months actually works better—it gives you time to find great thrifted pieces and spread costs across paychecks.
Pre-Transformation Planning Checklist:
- Gather inspiration: Create a Pinterest board with at least 20-30 images that resonate with you and note common elements
- Measure your space: Record room dimensions, doorway widths, window sizes, and furniture placement options
- Take photos: Photograph your room from multiple angles and in different lighting conditions
- Identify your boho style: Choose whether you're going earthy-neutral, colorful-maximalist, minimalist, or vintage boho
- Set your budget: Determine your total budget and decide if you're investing all at once or spreading costs over time
- List current furniture: Write down what you already own and honestly assess what stays, goes, or needs refreshing
- Plan your timeline: Decide whether this is a weekend project, monthly project, or seasonal transformation
- Assess lifestyle needs: Consider how you actually use this room and what functional elements matter most to you
Budget Breakdown
One of the biggest myths about boho style is that it's expensive. In reality, bohemian design can be incredibly budget-friendly because it celebrates handmade, DIY, and thrifted pieces. Let me break down realistic costs for different investment levels:
 Boho DIY Room Makeover: Full Revamp Under $200
← Scroll to see full table →
| Budget Category | Items & Examples | Typical Price Range |
|---|---|---|
| Under $50 | Throw pillows (Amazon), wall decals, small plants, candles, string lights, DIY macramé projects, thrifted wall art, fabric scraps for tapestry | $10-$45 |
| $50-$200 | Area rugs (IKEA/Amazon), wooden shelving units, larger plants, floor cushions, hanging chair (from Better Homes & Gardens and Gardens), mirror with wood frame, paint supplies, macramé wall hanging kit | $50-$199 |
| $200+ | Quality furniture pieces (sofa, coffee table), large area rugs, statement lighting, professional tapestries, built-in shelving (The The Home Depot), quality upholstered pieces, larger plants and plant stands | $200-$1,500+ |
Here's the beautiful truth about budgeting for a boho transformation: you can create an absolutely stunning space for under $500, and you can do even more with $1,000. The key is prioritizing strategically. I recommend investing in foundational pieces—a good area rug, quality seating, lighting—and going budget-friendly on accessories that are easy to swap out later. Thrift stores, Facebook Marketplace, Craigslist, and yard sales are your secret weapons for finding authentic vintage pieces at amazing prices. IKEA offers fantastic budget-friendly basics that you can elevate with DIY hacks. Amazon has incredible options for soft goods like throws and pillows. The Home Depot is perfect for larger projects like paint, shelving, or flooring options. Better Homes and Gardens carries surprisingly stylish furniture at reasonable prices.
A smart approach is to spend now on pieces you'll keep forever (quality rug, sturdy furniture, good lighting) and save money on trend-prone items like specific color schemes or temporary decorations. Update these seasonally or as your taste evolves. Another money-saving hack: before buying new, look through what you already own. That blanket in the closet? Perfect for a throw. Old picture frames? Strip and paint them. Books you've read? Stack them for visual interest. Some of the most beautiful boho rooms incorporate items with genuine sentimental value, which costs nothing but means everything.
Step-by-Step Guide
Now let's get into the hands-on work. This step-by-step guide breaks the transformation into manageable pieces so you're not overwhelmed. Remember, you don't need to do everything at once—some people spread these steps across several months, and that's absolutely fine. The process is just as important as the result.
Step 1: Choose Your Color Palette
Your color palette is the foundation of your entire transformation. It's what ties everything together and creates cohesion. Common boho palettes include: warm earth tones (terracotta, ochre, warm browns, cream), cool neutrals (soft grays, whites, taupe, sage green), jewel tones (deep emerald, sapphire, burgundy with gold accents), or warm sunset hues (coral, burnt orange, golden yellow, dusty rose). Spend time with your inspiration images and identify which colors appear repeatedly. I recommend choosing 2-3 main colors and 2-3 accent colors. Paint a large swatch on your wall, view it in different lighting, and live with it for a few days before committing. Boho doesn't mean matching perfectly—it means colors working harmoniously.
Step 2: Paint Walls (Optional but Impactful)
Fresh paint is one of the most transformative DIY projects and surprisingly achievable for beginners. You can go bold with a feature wall in a warm color or pattern, keep everything neutral with creamy whites and warm beiges, or use soft accent colors in unexpected ways (like painting the area behind shelves a different shade). Many people are intimidated by painting, but with good preparation and the right tools, it's absolutely doable. Grab painter's tape, drop cloths, and a quality brush from The Home Depot. Watch a YouTube tutorial first, prep your space well, and take your time. The difference between amateur and professional-looking paint jobs is mostly about preparation and patience. If painting feels too overwhelming, consider peel-and-stick wallpaper or fabric wall hangings as alternatives.
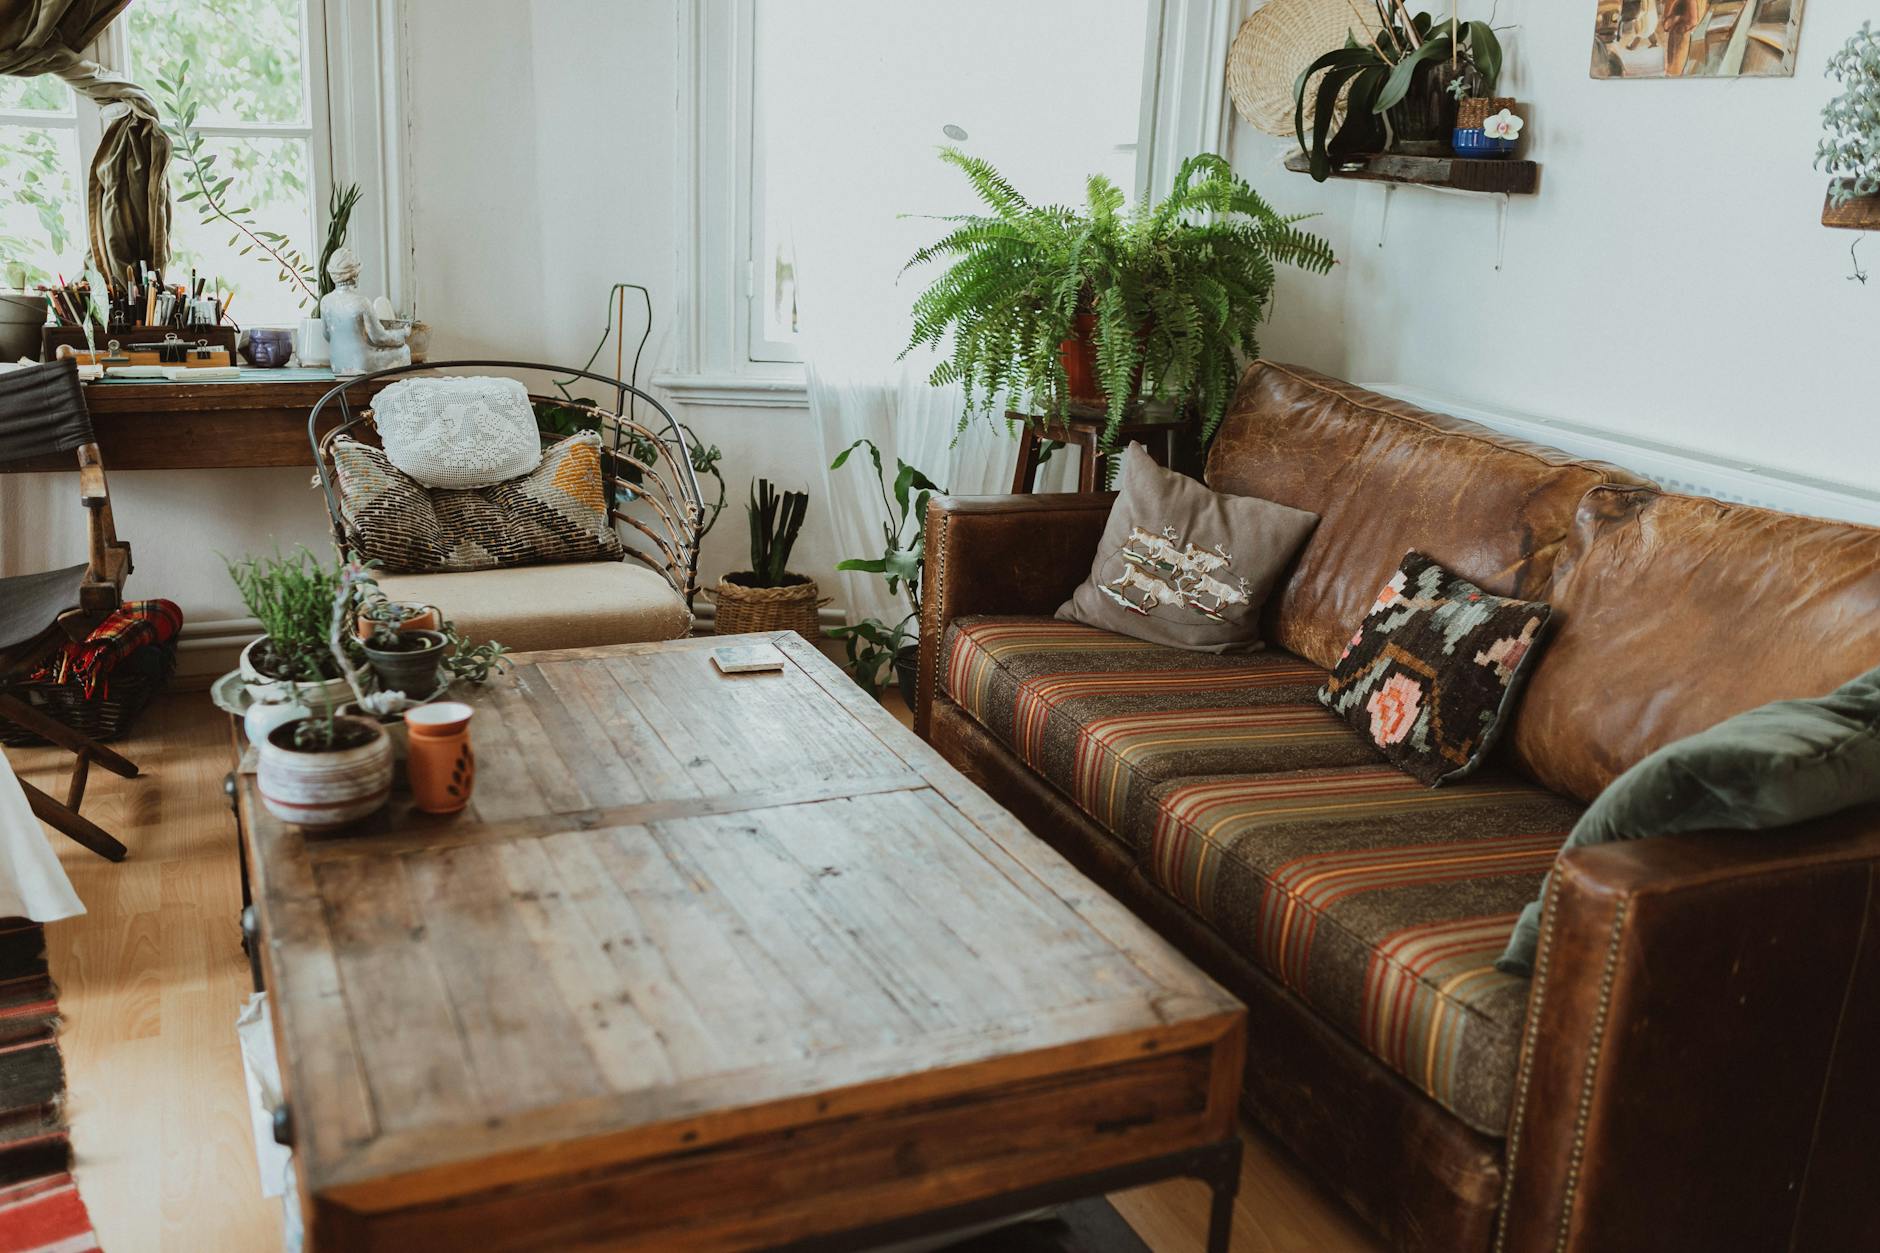
Step 3: Layer in Textiles and Textures
Boho is all about texture—this is where the coziness comes in. Start with a quality area rug that anchors your seating area. Look for natural materials like jute, wool, or cotton with interesting patterns. Layer throw blankets over your sofa or chairs—mix textures like chunky knits, linen, and soft faux fur. Add throw pillows with different fabrics: velvet, macramé, embroidered linen, patterned cotton. The key is mixing patterns and textures but keeping them unified through your color palette. IKEA has incredible affordable options for basic pieces you can then customize. Target and Amazon offer boho-specific textiles at great prices.
Step 4: Create a DIY Macramé Wall Hanging
A statement macramé piece is quintessentially boho and absolutely achievable as a DIY project. You can buy macramé cord at craft stores for just a few dollars and follow YouTube tutorials, or purchase a beginner-friendly kit from Amazon (usually $20-$40). A large macramé wall hanging becomes an instant focal point and is a genuine conversation starter. The beautiful part? Each person's macramé will be slightly different, which is exactly the boho aesthetic. Hang it behind your sofa or as a bedroom accent, and instantly, your space feels intentional and artisan-crafted. If macramé intimidates you, consider hand-painting a canvas, creating a fabric tapestry from inexpensive fabric, or stringing beads on string for a similar effect.
Step 5: Incorporate Plants and Greenery
Plants are non-negotiable in boho design. They bring life, improve air quality, and add natural elements that ground the space. Start with low-maintenance varieties if you're not a plant parent yet: pothos, snake plants, philodendrons, and ZZ plants are nearly impossible to kill. Place larger plants in corners or beside furniture, hang trailing plants from shelves or the ceiling, group smaller plants on tables and windowsills. Mix different pot styles—ceramic, macramé plant hangers, wooden stands, woven baskets. Plants don't need to be expensive; many garden centers sell small plants for $5-$15. As you gain confidence, experiment with more finicky plants like fiddle leaf figs or monstera. The combination of real plants plus botanical prints and pressed flower wall art creates an earthy, natural feeling throughout the space.
Step 6: DIY Wall Decor and Styling
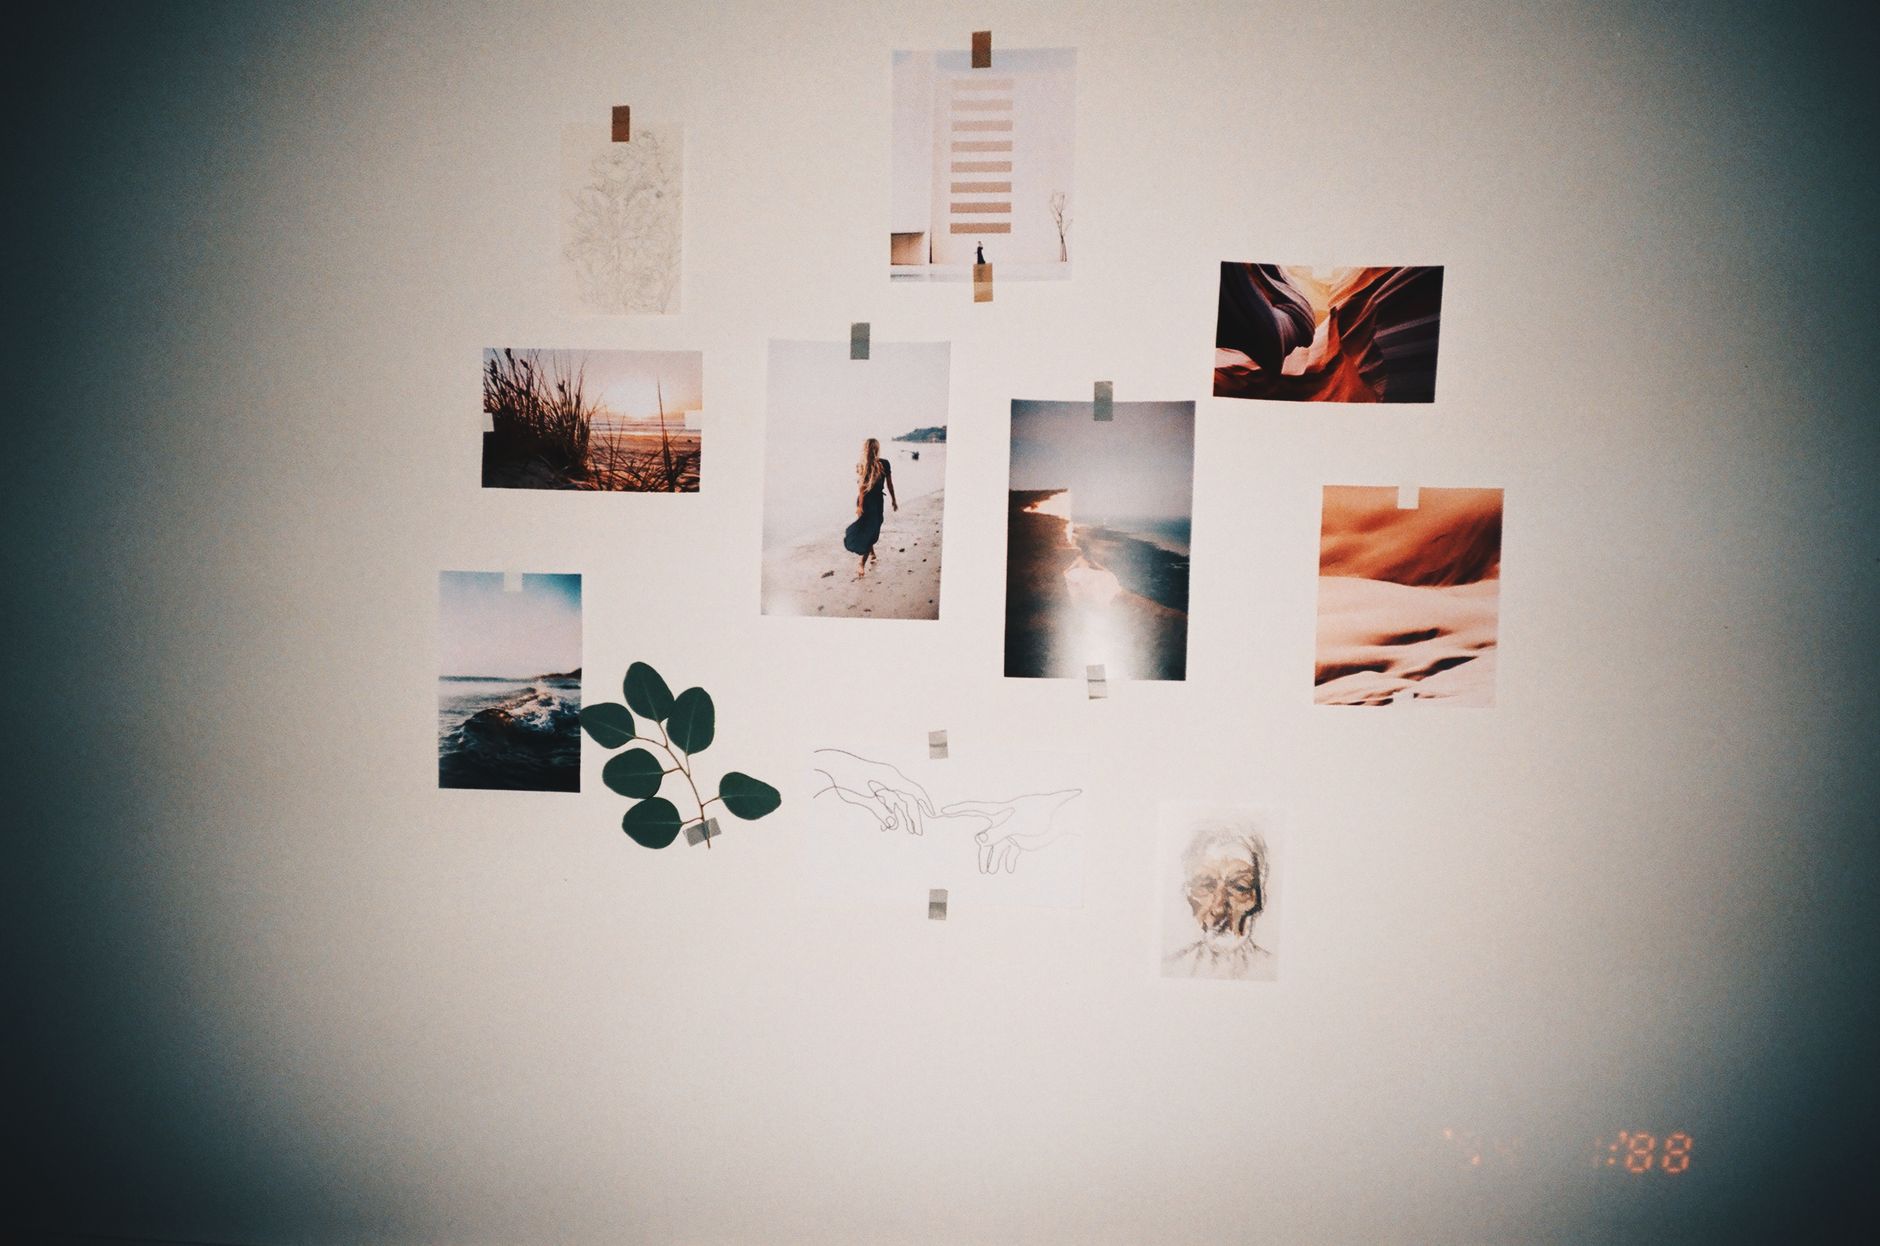
Your walls tell the story of your boho transformation. Mix different types of wall decor: hang a large mirror with a wooden or macramé frame, create a gallery wall with


