Cozy Bathroom Storage 2026: Create Your Dream Organized Oasis
Okay, let's be honest — most bathrooms are chaos zones. You've got toiletries everywhere, towels on the floor, and that mysterious jar of something from three years ago shoved in a dark corner. I get it. But here's the thing: your bathroom doesn't have to be a nightmare of clutter. In 2026, the whole approach to bathroom storage has shifted from purely functional to actually cozy — and I'm here for it.
The trend isn't about cramming everything into industrial shelving anymore. Instead, we're talking warm woods, soft textures, and thoughtful organization that makes you actually want to spend time in your bathroom. Think woven baskets, open shelving with brass accents, and storage solutions that double as decor. It's the sweet spot between Pinterest-perfect and actually livable.
What I love most about this evolution is that you don't need a major renovation to get there. With some smart planning, a weekend or two, and maybe a trip to The The Home Depot, you can transform your bathroom into a serene sanctuary. I've put together everything you need to know to make it happen without losing your mind or your budget.
What You'll Need
Before you start, grab these materials. I've kept the list practical — nothing too fancy or impossible to find.
- Floating shelves (set of 2-3): $40-$80 — Look for solid wood or engineered wood with a warm finish
- Wall anchors and brackets: $15-$25 — Get heavy-duty ones if your bathroom gets steamy
- Woven storage baskets (3-4): $60-$120 — Seagrass, rattan, or woven wire work beautifully
- Wooden storage ladder: $30-$50 — Perfect for towels and adds that rustic touch
- Cabinet organizers/drawer dividers: $20-$40 — Bamboo or wood options look way better than plastic
- Glass jars with wooden lids: $25-$45 — For cotton balls, Q-tips, bath salts — keeps things visible and pretty
- Paint (if refreshing walls): $25-$35 — Soft whites, warm grays, or pale sage
- Over-the-toilet organizer: $35-$60 — Wood frame with woven baskets preferred
- Mirror with shelf: $50-$100 — Doubles storage with style
- Basic tools (drill, level, stud finder): $50-$100 (one-time investment)
Total estimated cost: $350-$655 (depending on how many pieces you tackle at once)
Step-by-Step Guide
Step 1: Assess Your Space and Declutter First
Honestly, this is the most important step and everyone wants to skip it. Don't. Spend an afternoon going through everything in your bathroom. I mean everything — under the sink, medicine cabinet, shower shelves. Pull it all out. Be ruthless. That hotel shampoo from 2023? Toss it. Products you swore you'd use? If you haven't in six months, they're taking up real estate.
Group what's left into categories: daily essentials, occasional-use items, and decorative pieces. This tells you exactly what storage you actually need, not what you think you need.
Step 2: Plan Your Layout and Find the Studs
Look at your bathroom's natural zones. Where's the morning routine happening? Where do guests need space? I usually recommend putting daily-use items at eye level and below, seasonal or backup supplies higher up. Grab a stud finder (trust me on this) and mark where the studs are. Floating shelves need to go into studs or you'll have a disaster on your hands — wet bathrooms are no joke.
Sketch it out on paper first. It sounds overly organized, but it saves you from drilling holes you'll regret.
Step 3: Install Floating Shelves
This is where your tools come in. Use your level obsessively. I've seen people install shelves one-sixteenth of an inch off, and trust me, you notice it every single day. Mark your holes, pre-drill to avoid splitting the wall, then secure those brackets into the studs. The Home Depot has great tutorials if you're nervous, and honestly, there's no shame in watching someone else do it first.
Leave at least 12 inches between shelves so items don't feel cramped. Once they're up, step back and admire your work — it's genuinely satisfying.
Step 4: Add the Basket System
 Budget Apartment Renovation: DIY Hacks That Actually Work
This is where cozy happens. Buy 2-3 matching woven baskets in natural tones. Line them with a soft fabric or kraft paper to hide contents while keeping them accessible. One basket for hair tools, one for under-sink overflow, one for extra bath products. Stack them under shelves or on shelving units. The texture alone makes the whole bathroom feel warmer.
Step 5: Style Your Shelves and Surfaces
Now that you've got the structural stuff done, make it pretty. Use the "rule of three" — group items in odd numbers. A glass jar of bath salts, a small plant, and a framed print reads better than random stuff scattered around. Look at inspiration from Better Homes & Gardens & Gardens for styling ideas. Don't overcrowd; breathing room is part of what makes storage feel cozy instead of cluttered.
Step 6: Tackle Under-Sink and Cabinet Storage
Install drawer dividers inside cabinets. Use rolling bins or stacking containers for things you don't need daily. Label everything — yeah, it's extra, but it actually keeps people (and yourself) from creating chaos. Those wooden or bamboo dividers from HGTV-approved brands are worth the extra few dollars.
Pro Tips
Embrace vertical space: Most people waste the vertical real estate above the toilet and beside the sink. That's where the magic happens. This is where your over-the-toilet shelf or wall-mounted ladder really earns its keep.
Mix open and closed storage: Open shelves look pretty and feel airy, but closed cabinets hide the stuff that isn't Instagram-worthy. The combo of both is honestly the best approach for cozy bathroom vibes.
Lighting matters more than you'd think: Good lighting makes your organized bathroom feel intentional and spa-like instead of sterile. Add a small LED strip under shelves if your bathroom's naturally dark.
Use natural materials: Wood, woven baskets, stone — these materials don't scream "bathroom storage." They whisper "I've got my life together." They also feel less institutional, which is what separates cozy from clinical.
Scent + organization = instant cozy: A subtle candle or essential oil diffuser on a shelf makes the whole space feel intentional. It's psychology, really — when a space smells good and looks organized, your brain reads it as peaceful.
Cost Breakdown
← Scroll to see full table →
| Item | Quantity | Price Range | Total |
|---|---|---|---|
| Floating Shelves | 2-3 | $40-$80 | $40-$80 |
| Wall Anchors & Brackets | 1 set | $15-$25 | $15-$25 |
| Woven Storage Baskets | 3-4 | $60-$120 | $60-$120 |
| Wooden Storage Ladder | 1 | $30-$50 | $30-$50 |
| Cabinet Organizers | 1 set | $20-$40 | $20-$40 |
| Glass Jars with Lids | 3-5 | $25-$45 | $25-$45 |
| Paint (Optional) | 1 can | $25-$35 | $0-$35 |
| Over-Toilet Organizer | 1 | $35-$60 | $35-$60 |
| Mirror with Shelf | 1 | $50-$100 | $50-$100 |
| Tools (if needed) | 1 set | $50-$100 | $0-$100 |
| TOTAL ESTIMATED COST | $350-$655 | ||
Frequently Asked Questions
Q: Can I do this without drilling into walls?
A: Absolutely! Look for adhesive-mounted shelves and over-the-door organizers. They won't hold as much weight, so stick to lighter decorative items. Command makes really solid options that won't damage rental walls — I've used them countless times.
Q: What if my bathroom is really small
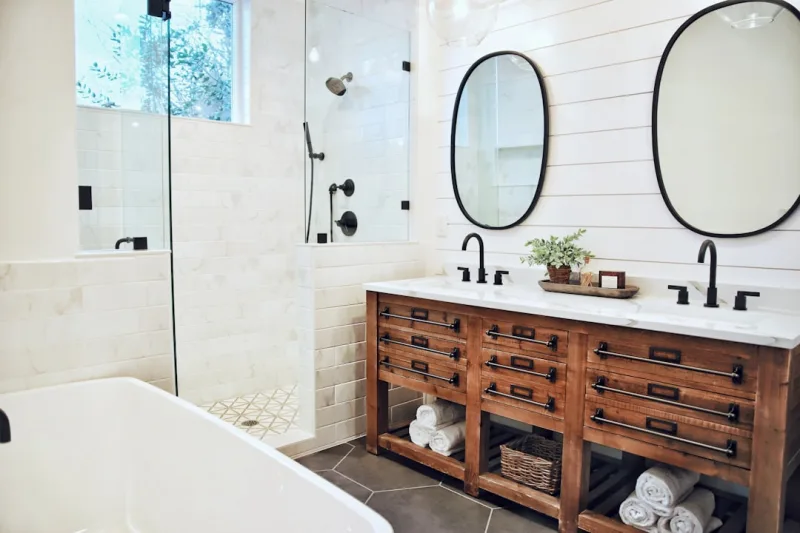
📷 Photo by Taylor Beach on Unsplash


