Scandinavian Bathroom Renovation for Small Spaces: Your Complete Guide
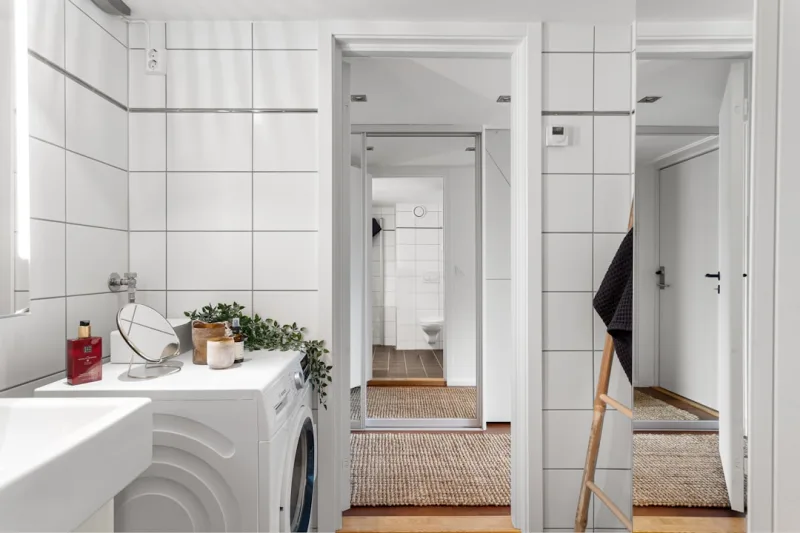
Listen, I've been there. You look at your cramped little bathroom and think, "How am I supposed to make this work?" But here's the thing — Scandinavian design is basically made for spaces like yours. There's something almost magical about the way Nordic minimalism transforms tight quarters into sanctuaries that feel both luxurious and breathable. I'm talking clean lines, smart storage, and a whole lot of white space that somehow makes your bathroom feel twice as big.
I've helped friends renovate bathrooms the size of closets using Scandinavian principles, and honestly, the results blow my mind every single time. The beauty of this design philosophy is that it doesn't scream "expensive" — it whispers sophistication while keeping your wallet reasonably happy. You're looking at functionality meeting aesthetic grace, which means every dollar you spend actually does something for the space.
If you've got a bathroom that's seen better days and you're ready to give it the Scandinavian treatment without maxing out your credit card, you're in the right place. I'm going to walk you through everything — materials, steps, and the insider tricks that'll make your guests wonder if you secretly had a designer on speed dial.
What You'll Need
Before you dive in, let's talk materials. I always recommend making a trip to The The Home Depot or ordering online — their selection for small-space bathroom fixtures is seriously solid these days.
Essential Materials & Fixtures
- White subway tile (per sq ft): $3-$8 — This is your foundation. Trust me on this one.
- Light wood vanity or floating shelves (single/compact): $200-$500 — Birch or light oak is peak Scandinavian.
- Matte black or brushed nickel hardware: $30-$80 — Small touches that matter.
- Minimalist faucet (single-hole): $80-$250 — Go chrome or matte black.
- Small wall-mounted mirror with frame: $50-$200 — Brass or black frames work beautifully.
- Light gray or soft white paint (gallon): $25-$35 — Sherwin-Williams or Benjamin Moore for quality.
- Recessed LED lighting fixtures (per fixture): $20-$60 — Three to four is perfect for small spaces.
- Floating toilet paper holder: $25-$50 — Yes, it makes a difference.
- Small wooden storage baskets (set of 2-3): $40-$100 — For that Nordic touch.
- Grout and adhesive: $15-$30 — Don't cheap out here.
- Caulk and sealant: $8-$15 — Silicone is your friend.
- Basic tools (if not owned): Tile cutter ($30), grout float ($8), mortar pan ($5), level ($20), drill/driver ($50-$100)
Step-by-Step Guide
Step 1: Plan Your Layout and Assess the Space
Start by measuring everything. And I mean everything — height, width, angles. Sketch it out or use a simple app. When you're working with limited square footage, every inch counts. Look at your current setup and identify what's working and what's actively making you miserable. This is your chance to completely reimagine it. Check out design inspiration on Better Homes & Gardens & Gardens to see how other people have tackled similar dimensions.
Step 2: Remove Old Fixtures and Prep the Space
Turn off the water. Seriously, do this first. Then remove your old vanity, toilet if you're replacing it, and any existing tile. Sounds intimidating? It's really not. Use a pry bar, take your time, and be careful not to damage the underlying walls more than necessary. Once everything's out, assess the walls. Any moisture damage? Mold issues? Address these now — they won't go away on their own, and Scandinavian design is all about starting with a clean slate.
Step 3: Handle Wall Prep and Repairs
Patch any holes or damage with drywall compound. Sand it smooth once dry. If you're planning to tile, make sure your walls are even and square — a level is your best friend here. Apply waterproofing primer if you're tiling anywhere near moisture (which, let's be honest, is basically everywhere in a bathroom). This step prevents future headaches.
Step 4: Install New Plumbing (Or Have a Pro Do It)
If you're moving fixtures around, you'll need to adjust your plumbing. Unless you're comfortable with this — and I mean actually comfortable, not "I watched a YouTube video" comfortable — hire a plumber. It's worth the peace of mind and roughly $300-$600. Your future self will thank you when nothing leaks.
Step 5: Prime and Paint the Walls
Choose a soft white or very light gray. Something like Sherwin-Williams "Alabaster" or Benjamin Moore "Cloud White" — these colors are staples for a reason. They reflect light, making small spaces feel larger and airier. Apply primer first, then two coats of quality paint. Don't rush this. Proper coverage now means a flawless finish.
Step 6: Install Recessed Lighting
Three or four recessed LED fixtures will brighten even the smallest bathroom beautifully. Mark their positions, cut your holes, install the housings, and wire them in. If electrical work makes you nervous, call an electrician — this is another area where expertise matters. Budget around $300-$500 total with labor.
Step 7: Tile Installation (The Meditative Part)
For a small bathroom, white subway tile is your MVP. Start from the center of your wall and work outward — this creates a balanced, professional look. Mix your thinset mortar, apply with a notched trowel, and press tiles firmly. Use spacers for consistent grout lines. Take breaks. Seriously. Tiling is a marathon, not a sprint. Once the adhesive sets for 24 hours, grout the joints with a light gray or white grout — it'll look absolutely stunning.
Step 8: Install Your New Vanity or Floating Shelves
Mount your floating vanity at standard height — usually 32-36 inches from the floor. Use heavy-duty brackets and hit the studs. If there are no studs where you need them, use toggle bolts rated for the weight. A floating vanity immediately opens up the floor visually, which is crucial in small spaces. It's basically designer magic at a practical price point.
Step 9: Install Fixtures and Hardware
Mount your faucet, install the sink, and reconnect the plumbing. Hang your mirror with appropriate hardware. Install shelving brackets if you're going the shelf route. Use a level for everything. Crooked fixtures are the enemy of Scandinavian design, which is all about precision.
Step 10: Final Touches and Styling
Install your recessed lighting, add your storage baskets, hang a simple wooden shelf for minimalist accessories. Place a few items — a small plant, a white ceramic soap dispenser, maybe a subtle piece of art. Scandinavian style is about intentionality. Every item should be there for a reason, not just filling space.
Pro Tips
Honestly, the lighting is where people mess up. Get your brightness right, and suddenly everything looks expensive and intentional. Aim for 400-800 lumens total depending on bathroom size. Dimmable LED bulbs are a game-changer.
Go vertical with storage. Floating shelves above the toilet, narrow wall-mounted cabinets next to the mirror — these small moves maximize functionality without overwhelming a tight space. It's smart design, not clutter.
Invest in quality grout and sealing. A 50-dollar sealant now prevents a 500-dollar mold problem later. Your future self will be grateful.
Use a single accent color sparingly. Maybe one matte black fixture or a small wooden element. This is where Scandinavian design breath
- Diy Coffee Table Ideas Cheap
- Boho Home Decor Ideas Diy Budget
- Master Bedroom Makeover Ideas On A Budget
- cheap diy living room decor ideas


