
There's something magical about walking into a Scandinavian-inspired bathroom that feels like a serene spa retreat, yet costs a fraction of professional renovation prices. I know the feeling of scrolling through Pinterest at midnight, pinning those dreamy minimalist bathrooms with their clean lines and cozy vibes, wondering if they're actually achievable for someone like us. The truth? They absolutely are. Scandinavian design is all about functionality, simplicity, and creating spaces that make you feel calm and grounded. It's not about having the most expensive fixtures or marble countertops—it's about intentionality and smart choices. Whether you're working with a cramped half-bath or a sprawling master bathroom, the Scandinavian approach welcomes everyone. Over the past three years, I've helped countless readers transform their bathrooms using these exact principles, and the results are consistently stunning. The best part? Most of these projects cost significantly less than traditional renovations because we're being strategic about where to invest and where to DIY.
In this comprehensive guide, you'll discover everything you need to know about planning and executing a Scandinavian bathroom renovation using smart DIY hacks. We'll walk through the essential principles of this design style, break down realistic budgets for different project scopes, provide step-by-step instructions for the most impactful changes you can make yourself, and share insider tips from designers who specialize in Scandinavian spaces. You'll learn which products deliver the most impact for your investment, how to avoid common pitfalls that cost money and time, and creative solutions for working within the constraints of your current space. Whether you're ready to tackle a complete overhaul or simply want to refresh key elements, you'll have the knowledge and confidence to make your bathroom feel like a cozy Nordic retreat.
Scandinavian design has become one of the most beloved interior design movements, and for good reason. Originating from the Nordic countries—Denmark, Sweden, Norway, and Finland—this aesthetic prioritizes function, light, and intentional minimalism. In a bathroom specifically, Scandinavian design means creating a space that's both beautiful and genuinely livable. It's not about cold, sterile minimalism; instead, it's about warmth, accessibility, and removing unnecessary clutter so the essential elements can shine.
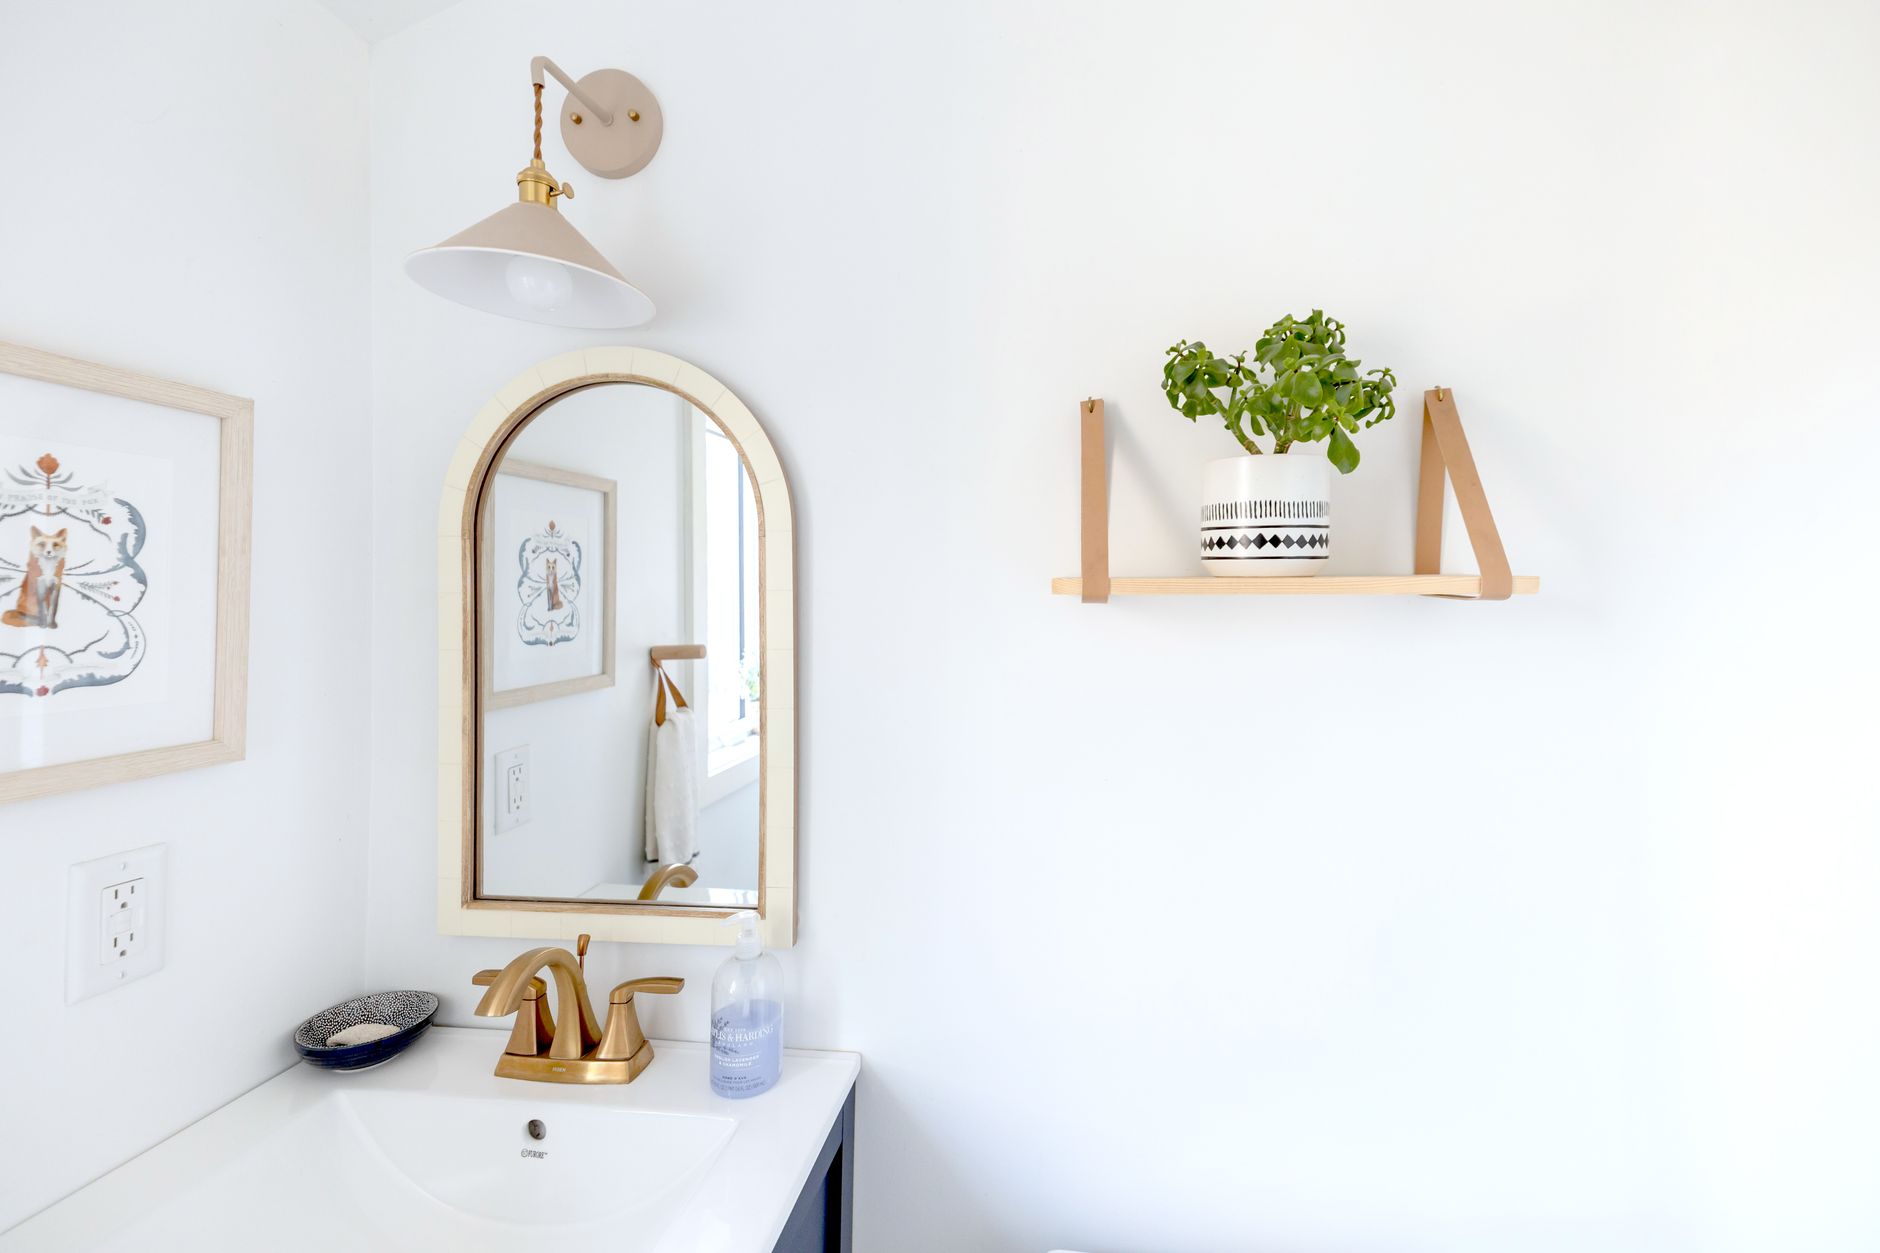
The core principles of Scandinavian bathroom design include maximizing natural light, using a neutral color palette with strategic pops of nature-inspired tones, incorporating natural materials like wood and stone, and ensuring every item serves a purpose. This philosophy pairs beautifully with DIY hacks because the style inherently values authenticity and imperfection. A hand-painted accent wall or a reclaimed wood shelf fits perfectly within this aesthetic.
Why does this matter for your home? Because Scandinavian bathrooms are incredibly functional. They're designed with your daily life in mind. You'll have adequate storage that looks intentional, lighting that actually helps you see, and surfaces that are easy to maintain. These aren't high-maintenance spaces; they're low-stress sanctuaries. This is crucial when you're DIYing renovations—you want changes that will last and stay beautiful without requiring constant upkeep.
Common mistakes we see include over-decorating (defeating the minimalist purpose), using only white and making the space feel cold, skipping adequate storage planning, and choosing trendy pieces instead of timeless elements. Many people also underestimate the power of lighting, treating it as an afterthought when it's absolutely central to Scandinavian design. Another frequent error is ignoring the importance of wood elements; Scandinavian bathrooms need that warmth that comes from natural materials, not just from color.
The beauty of DIY hacks is that they often align naturally with Scandinavian principles. Refinishing existing fixtures, painting cabinets, adding floating shelves, and incorporating vintage or thrifted wood pieces all celebrate authenticity while keeping costs down. This design style actually rewards a hands-on, personal approach because uniqueness and character are celebrated, not hidden.
Before you pick up a paintbrush or order a single item, proper planning will save you money, time, and frustration. Scandinavian design is about intentionality, and that starts with thoughtful planning. Begin by assessing your current bathroom layout. Sketch it out on paper or use a simple app. Measure everything: wall dimensions, door swing, window placement, existing fixture locations. This foundational step prevents costly mistakes and helps you visualize changes realistically.
Next, identify which elements will stay and which will go. Perhaps you're keeping your existing vanity but want to refinish it. Maybe the toilet and tub are fine, but you need new lighting and storage. Being selective about what you replace is both budget-conscious and environmentally responsible—two values that align perfectly with Scandinavian philosophy. Create a prioritized list of changes from most to least impactful. New lighting might transform the space more than new flooring, for instance.
Gather inspiration from multiple sources. Follow Scandinavian design accounts on Pinterest and Instagram, but also visit showrooms at IKEA and The The Home Depot. Look at real people's homes, not just styled photoshoots. Notice how Scandinavian bathrooms handle storage, lighting, and those small details. Create a digital or physical mood board. This helps you stay focused and prevents impulse purchases that don't align with your vision.
 Budget Apartment Renovation: DIY Hacks That Actually Work
Consider your timeline realistically. Some projects can be done in a weekend; others require multiple stages. If you need to keep your bathroom functional during renovation, plan accordingly. Will you need to work on evenings and weekends? This might mean choosing projects that don't require the entire bathroom to be out of commission simultaneously.
Finally, think about your skill level honestly. Some DIY hacks are truly beginner-friendly. Others require specific tools or experience. It's perfectly acceptable to hire professionals for certain tasks (like plumbing or electrical work) while DIYing others. This balanced approach often delivers the best results.
Pre-Renovation Planning Checklist
- Measure bathroom dimensions and sketch current layout with all fixtures
- List existing fixtures and decide which stay, which go, and which need refinishing
- Assess lighting—both natural and artificial—and identify improvement opportunities
- Evaluate storage needs and current storage solutions; identify gaps
- Create inspiration mood board with colors, materials, and styles that resonate with you
- Prioritize projects from highest to lowest impact on the overall feel and function
- Set realistic budget and allocate funds to priority items first
- Create timeline that accounts for your skill level, available time, and project complexity
Budget Breakdown
← Scroll to see full table →
| Price Range | Items & DIY Hacks | Estimated Cost |
|---|---|---|
| Under $50 | Paint (2 quarts), paintbrushes, paint trays, painter's tape, sandpaper, wood stain sample | $35-$48 |
| Under $50 | Floating shelf hardware kit, basic adhesive strips, caulk, caulk gun | $25-$45 |
| Under $50 | LED strip lighting, simple wire shelving, mounting brackets, toggle bolts | $30-$50 |
| $50-$200 | IKEA vanity unit, cabinet handles, wood countertop, caulk, installation hardware | $80-$180 |
| $50-$200 | Peel-and-stick tile for accent wall, adhesive roller, cutter tool, grout sealant | $60-$150 |
| $50-$200 | Reclaimed wood shelving boards, wood stain, polyurethane sealer, mounting hardware | $70-$180 |
| $200+ | New vanity cabinet with sink, faucet, supply lines, installation tools, caulk | $250-$600 |
| $200+ | Complete lighting overhaul (recessed, sconces, strips), dimmer switches, electrical materials | $300-$800 |
| $200+ | Peel-and-stick wallpaper or paint for full bathroom, primer, paint roller, drop cloths | $150-$400 |
| $200+ | Natural stone or quality tile flooring material, adhesive, grout, sealer, tools | $400-$1000+ |
Smart budgeting is essential when DIYing a Scandinavian bathroom renovation. The key is understanding where to invest and where to save. Generally, you'll want to allocate more budget to foundational elements like lighting and storage since these impact how you feel and function in the space daily. These also have the longest lifespan if chosen well.
Start with a realistic total budget. A modest Scandinavian bathroom refresh can happen for $500-$1,500, a mid-range project might run $2,000-$4,000, and a comprehensive renovation could be $5,000-$10,000 or more depending on whether you hire professionals for plumbing, electrical, and flooring. Being honest about your budget prevents overspending and allows you to make intentional choices about where DIY efforts will matter most.
Take advantage of sales and seasonal pricing. Home Depot runs major sales around holidays, IKEA frequently offers deals on cabinets and fixtures, and Amazon often has discount prices on lighting and accessories. Sign up for email lists and follow your favorite stores on social media. Additionally, consider shopping thrifted or vintage for items like wooden mirrors, accessories, and even furniture pieces that fit the Scandinavian aesthetic beautifully.
Remember that DIY labor is your savings. You're investing time rather than money for professional labor. A fresh coat of paint or new hardware on existing cabinets might cost $100 in materials but could cost $500-$1,000 in professional labor. These high-impact, budget-friendly projects should be prioritized in your plan.
Step-by-Step Guide
Step 1: Prepare Your Space and Gather Tools
Before beginning any work, clear your bathroom completely. Remove all items from shelves, under the sink, and the walls. This serves multiple purposes: it allows you to thoroughly clean the space, prevents damage to your belongings, and helps you assess exactly what storage you actually need. Photograph your current setup so you remember where everything goes if you need the bathroom functional during the project.
Gather all necessary tools and materials. Basic tools include a drill, paintbrushes and rollers, level, tape measure, screwdriver set, wrench, caulk gun, and safety equipment like gloves and glasses. Many of these likely live in your home already. For specific projects, you'll need additional items—but buying everything at once from The Home Depot or IKEA is more efficient than multiple trips. Lay everything out and create a workspace for supplies so you're organized as you begin.
Step 2: Address Lighting Improvements
Lighting is transformative in Scandinavian design and often the highest-impact change. Assess your current lighting first. Do you have


