Scandinavian Bathroom Makeover for Modern Homes: Your Complete DIY Guide
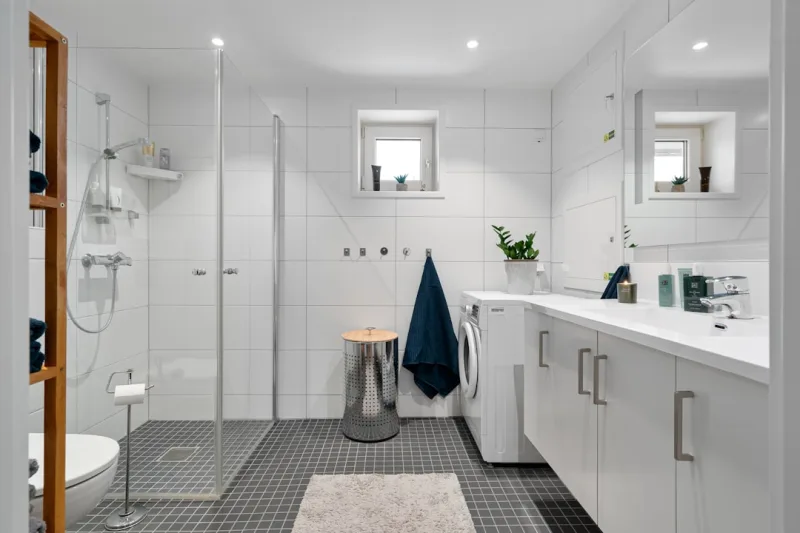
Listen, I've been obsessed with Scandinavian design for years now — and honestly, bathrooms are where this aesthetic really shines. There's something about that clean, minimalist approach that just makes you feel calmer the moment you step inside. No unnecessary clutter, no overstimulation, just thoughtfully curated spaces that function beautifully. If you're tired of your outdated bathroom and want to create a spa-like retreat without breaking the bank, a Scandinavian makeover might be exactly what you need.
Here's the thing about Scandinavian design: it's not as intimidating as it sounds. You don't need to be a professional designer or hire expensive contractors. With some smart planning, readily available materials, and a weekend or two of work, you can completely transform your bathroom into a modern Nordic sanctuary. The best part? You're probably going to come in under $3,000 if you're strategic about your choices.
So let's break down exactly how to make this happen — from materials to installation, plus all my insider tips for nailing that effortless Scandinavian vibe that makes people ask, "Wait, you did this yourself?"
What You'll Need
Before you hit up The The Home Depot or start browsing online, let me walk you through the essentials. Think of this as your shopping list for Scandinavian bathroom success.
- Matte White or Light Gray Paint (2-3 gallons) — $35-$50
- Subway Tile or Wooden Cladding Panels (covers 100-150 sq ft) — $200-$400
- Floating Vanity (white or natural wood) — $300-$600
- Minimalist Faucet Set (chrome or matte black) — $150-$300
- Simple Wooden Mirror with Frame — $80-$150
- Storage Shelving (floating or under-sink) — $100-$200
- Drywall Anchors, Screws, and Hardware — $25-$40
- Grout and Tile Adhesive — $30-$60
- Wood Stain (optional) — $15-$25
- LED Lighting Fixtures (2-3 pieces) — $100-$250
- Linens and Accessories (white towels, minimal decor) — $80-$150
- Caulk and Sealant — $20-$35
Step-by-Step Guide
Step 1: Prep Your Space and Remove Old Fixtures
This is honestly the most tedious part, but it's crucial. Turn off the water supply — seriously, don't skip this. Remove your old vanity, mirror, and any wall-mounted accessories. If you're replacing the toilet or bathtub, now's the time. I recommend shutting off the water for the entire project to avoid any surprises. This typically takes 2-3 hours, depending on how many fixtures you're removing.
Step 2: Paint and Prepare Walls
This is where the magic starts. Clean those walls thoroughly and patch any holes with spackling compound. Once dry, sand them smooth. Then — and this is important — use a primer before painting. I typically go with a soft white or very light gray. Benjamin Moore's "White Dove" or Sherwin-Williams' "Pure White" are my go-to choices. Apply two coats, letting each dry completely. The neutral backdrop is essential for that clean Scandinavian aesthetic.
Step 3: Install Tile or Cladding
Here's where bathrooms get that iconic look. If you're tiling, subway tile is the safe choice — it's timeless and forgiving for DIYers. Measure your walls carefully, mark your starting point at the center, and work outward. Use tile spacers to keep everything even. Mix your thinset mortar according to package directions and spread it with a notched trowel. Press each tile firmly, checking your level constantly. After 24 hours, grout the seams with a damp sponge. Wooden cladding panels are even easier — just follow manufacturer instructions for your specific product. HGTV has some excellent tutorials if you need visual guidance here.
Step 4: Install Your Floating Vanity
A floating vanity is non-negotiable for true Scandinavian design. First, locate your wall studs using a stud finder — this isn't optional, despite what you might think. Mount your vanity brackets securely to the studs, typically at 16 inches apart. Use lag bolts for heavy vanities. Slide your vanity onto the brackets and secure according to manufacturer specs. This is one area where I don't recommend cutting corners. A collapsing vanity is a nightmare nobody wants.
Step 5: Install Plumbing and Faucet
If you're comfortable with basic plumbing, this is doable. Connect your water supply lines and drain according to your vanity's specifications. Install your minimalist faucet — most modern ones come with clear instructions. If plumbing isn't your thing, this is where a plumber friend (or a professional) earns their keep. Better Homes & Gardens & Gardens has some good beginner-friendly guides for basic installations.
Step 6: Mount Your Wooden Mirror
A simple wooden-framed mirror is quintessential Scandinavian. Find the studs or use quality anchors rated for your mirror's weight. Center it above your vanity at eye level. I prefer natural wood finishes — oak or birch look absolutely stunning against white tile.
Step 7: Add Floating Shelves and Storage
 Boho DIY Room Makeover: Full Revamp Under $200
Install open shelving for storing essentials and minimal decor. Keep it organized and clutter-free. This is where quality matters — cheap shelves sag and ruin the whole aesthetic. Splurge a little here. Mount them at varying heights for visual interest, but maintain that sense of calm simplicity.
Step 8: Lighting and Final Touches
Good lighting is everything in a Scandinavian bathroom. Install a simple pendant light or two, plus some LED strips around your mirror for functional task lighting. Keep fixtures minimal and let the natural light do the heavy lifting if you have a window. Add white towels, maybe a small wooden tray, and you're basically done.
Pro Tips
Light is Your Best Friend: Scandinavian design thrives on natural light. If you have a window, don't cover it with heavy curtains. Keep it simple with a lightweight roller shade or nothing at all. Mirrors amplify light beautifully too.
Go Minimal with Decor: Honestly, this is the hardest part for people. Resist the urge to fill every surface with decorative items. One simple plant, a wooden soap dispenser, some folded white towels — that's it. The emptiness is the design.
Natural Materials Matter: Wood, stone, and natural textiles are core to this aesthetic. Mix matte and natural finishes. A raw wood shelf next to white tile next to chrome fixtures creates visual interest without chaos.
Invest in Quality Hardware: This is where you won't regret spending extra money. Good-quality faucets and fixtures last decades and look significantly better than budget options.
Temperature Control: A heated towel rack or underfloor heating (if you're ambitious) really completes the spa vibe. It's not essential, but it's lovely.
Cost Breakdown
← Scroll to see full table →
| Category | Item | Cost |
|---|---|---|
| Paint & Prep | Paint, primer, supplies | $85 |
| Tile & Cladding | Tile, adhesive, grout | $260 |
| Vanity & Plumbing | Floating vanity, faucet, brackets | $900 |
| Mirrors & Shelving | Wooden mirror, floating shelves | $230 |
| Lighting | LED fixtures, bulbs | $200 |
| Hardware & Fasteners | Anchors, screws, caulk | $60 |
| Accessories & Linens | Towels, soap dispensers, decor | $115 |
| TOTAL ESTIMATED COST | $1,850 | |
Note: Costs vary by region and if you choose premium materials or need professional plumbing installation. Budget $2,500-$3,000 if hiring a plumber.
FAQ
Q: Can I do a Scandinavian bathroom makeover without tiling?
Absolutely. Wooden cladding panels, especially in light pine or whitewashed finishes, look just as authentic. Some people even use high-quality waterproof wallpaper. The key is keeping surfaces clean and minimal. Personally, I prefer the durability and aesthetic of tile, but wooden cladding is fantastic


