Cozy Bathroom Organization for Renters: Transform Your Space Without Losing Your Deposit
Look, I get it. You're renting, which means your bathroom probably feels like a cramped afterthought rather than a sanctuary. Towels everywhere, toiletries scattered across the counter, and that one corner where dust bunnies go to party. But here's the thing — just because you don't own the place doesn't mean you can't have a bathroom that actually feels good to spend time in.
I've spent years helping renters navigate the tricky world of bathroom organization without drilling holes, painting walls, or doing anything that'll make their landlord's eye twitch. And honestly? Some of my favorite transformations have happened in rental bathrooms. Why? Because working with limitations forces you to get creative. You learn to maximize every single inch, and that's when the real magic happens.
The best part is that creating a cozy, organized bathroom as a renter doesn't require a huge budget or permanent changes. It's all about smart storage solutions, strategic decluttering, and making thoughtful choices about what stays and what goes. Let me walk you through exactly how to do it.
What You'll Need
Before we jump into organizing, let's talk about the actual tools and materials that'll make this transformation happen. Most of these are damage-free and totally returnable if you change your mind — which is the renter's superpower.
- Over-the-toilet shelving unit ($25-$50) — Available at The The Home Depot, these metal or wood units don't require drilling
- Tension rods ($8-$15) — Perfect for under-sink organization and towel hanging
- Floating shelves with adhesive strips ($20-$40) — Get that extra storage without damaging walls
- Clear acrylic drawer organizers ($15-$25) — Better Homes & Gardens & Gardens makes some gorgeous options
- Over-the-door hooks or racks ($10-$20) — Hang robes, towels, or whatever you need
- Woven baskets ($30-$60 for a set) — Storage that actually looks intentional
- Adhesive shelf liners ($8-$12) — Protect those rental cabinets
- LED strip lighting ($15-$25) — Optional but makes everything feel cozier
- Small rolling cart ($25-$40) — Mobile storage that fits between the toilet and wall
- Command hooks and strips ($10-$20) — The renter's best friend
Step-by-Step Guide
Step 1: Do a Ruthless Declutter First
Before you organize anything, you need to get honest about what's actually in your bathroom. Grab a trash bag and pull everything out — and I mean everything. That expired sunscreen from 2019? Gone. Seventeen half-empty bottles of lotion? Time to choose your favorites. This step alone will make you realize you have way more space than you thought.
Create three piles: keep, donate, and trash. Be ruthless. The goal is to reduce what you're storing so dramatically that organization becomes way easier. Trust me on this one.
Step 2: Maximize Vertical Space with Over-the-Toilet Storage
Your toilet is prime real estate. That empty space above it? Gold. Install an over-the-toilet shelving unit — these literally just sit on top of the tank, no installation required. Use the top shelf for decorative baskets containing less-used items like extra shampoo or first-aid supplies. The middle shelf is perfect for everyday essentials, and the bottom shelf can hold rolled towels or more baskets.
This one addition will instantly make your bathroom feel more organized and intentional.
Step 3: Organize Under the Sink with Tension Rods and Baskets
Under-sink cabinets are usually just empty voids where cleaning supplies go to die. Change that. Pull out everything, wipe down the cabinet (seriously, do this), and then install a tension rod vertically. You can hang spray bottles from it, freeing up so much space. Use small baskets or bins on the shelves to corral items — one for toilet paper rolls, one for cleaning cloths, one for miscellaneous supplies.
Add a shelf liner to protect the cabinet floor, and suddenly you've got a system that actually makes sense.
Step 4: Create a Counter Organization System
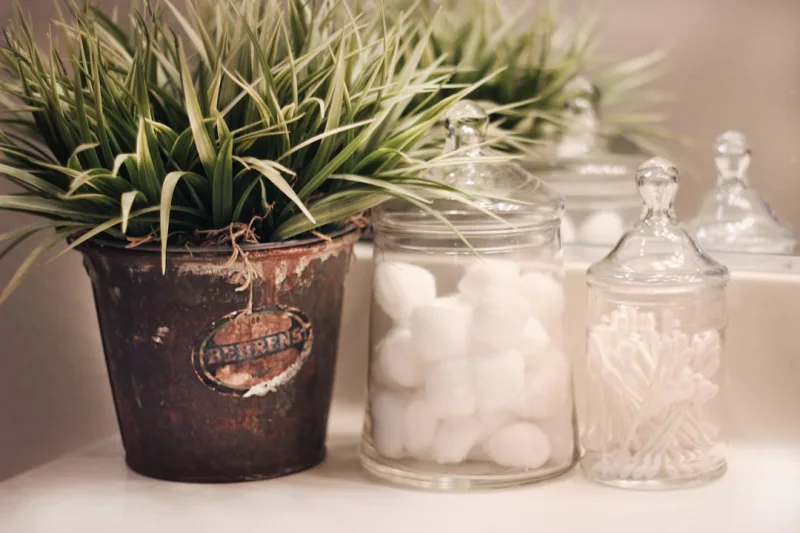
Your bathroom counter should only have items you actually use daily. Everything else goes into storage. For what stays, use clear acrylic organizers to group similar items — toothbrushes together, face products together, that sort of thing. These clear containers let you see what you have at a glance, and they look way more intentional than loose bottles everywhere.
 Budget Apartment Renovation: DIY Hacks That Actually Work
If your counter is really small, consider a rolling cart. Position it next to the sink or between the toilet and wall. It gives you mobile storage that you can move around as needed.
Step 5: Style Your Shelves and Add Ambient Lighting
Organization doesn't have to look boring. Layer your baskets, add some rolled towels for texture, and maybe throw in a small plant or candle. HGTV's philosophy applies here too — function and beauty should live together. If your shelves or cabinets feel dark, pop in some adhesive LED strip lighting. It's not just practical; it makes everything feel more spa-like and intentional.
Step 6: Tackle Door and Wall Space with Command Hooks
The back of your bathroom door? Instant real estate. Use Command hooks to hang a robe, hand towels, or a small organizer pocket. On your walls, use Command adhesive strips to hang floating shelves for additional storage. These strips remove cleanly and won't damage paint.
Pro Tips
Use drawer dividers everywhere. Even small drawers become so much more functional when items have assigned spots. You'll spend less time searching and more time actually enjoying your organized space.
Embrace the "one in, one out" rule. Once your bathroom is organized, keep it that way by removing something every time you add something new. This prevents backsliding into chaos.
Label everything — seriously. Even obvious containers benefit from labels. It helps you stay accountable and looks super intentional. Plus, if you ever move (which is likely as a renter), you'll know exactly what's in each basket.
Keep cleaning supplies in one designated spot. This one habit alone makes cleaning faster and keeps your space from feeling cluttered. A small caddy under the sink or in a cabinet corner works perfectly.
Invest in quality baskets that you actually love. Woven baskets in natural materials make everything feel cozier. Yes, spend a bit more here — you'll look at them every day, so choose ones that make you happy.
Cost Breakdown
← Scroll to see full table →
| Item | Price Range | Where to Buy |
|---|---|---|
| Over-the-toilet shelving unit | $25-$50 | The Home Depot |
| Tension rods (set of 2-3) | $8-$15 | The Home Depot |
| Floating shelves with adhesive strips | $20-$40 | Better Homes & Gardens |
| Clear acrylic drawer organizers | $15-$25 | Better Homes & Gardens |
| Over-the-door hooks/racks | $10-$20 | The Home Depot |
| Woven baskets (set of 3-4) | $30-$60 | Better Homes & Gardens |
| Adhesive shelf liners | $8-$12 | The Home Depot |
| LED strip lighting (optional) | $15-$25 | The Home Depot |
| Small rolling cart | $25-$40 | HGTV Home Collection |
| Command hooks and strips | $10-$20 | The Home Depot |
| Total Estimated Cost | $166-$307 | — |
FAQ
Q: Will Command strips damage my bathroom walls?
A: Not if you use them correctly. Command strips are specifically designed to remove cleanly without damaging paint or drywall. Just make sure you're following the instructions — clean the wall first, press firmly for 30 seconds, and pull straight down when removing. I've used these in rental apartments for years with zero issues.
Q: How do I organize a bathroom with literally no counter space?
A: This is where a rolling cart becomes your best friend. Position it in a corner or next to the toilet, and you've instantly created mobile counter space. You can also use wall-mounted shelves,
📷 Photo by Jen Theodore on Unsplash


