Minimalist Closet Organization for 2026: Your Complete Style Overhaul
Okay, so here's the thing — we're officially over the "junk drawer" approach to closets. If you're anything like me, you've spent way too much time digging through piles of clothes just to find that one sweater you actually love. But 2026 is the year we're changing that. Minimalist closet organization isn't about having fewer clothes (though that helps). It's about being intentional, knowing exactly what you own, and actually getting excited about getting dressed.
I've worked with dozens of homes over the past few years, and I'm genuinely telling you — the transformation from chaotic closet to curated space is life-changing. You'll save time, reduce decision fatigue, and honestly? You'll start wearing everything you own. Not just the five pieces that live on top of your dresser.
The best part? You don't need to completely empty your closet and start from scratch. We're going to walk through this together, step by step, and I'm sharing exactly what materials you'll need, the exact prices I've found, and the tricks that actually work (not the Instagram-perfect ones that fall apart after a week).
What You'll Need
Before you dive in, grab these essentials. You don't need everything at once, but having these on hand makes the process exponentially easier. I've sourced these from The The Home Depot, Container Store, and Amazon — places where you can actually find real prices without the fluff.
- Slim velvet hangers (50-pack) — $25-35 — These genuinely save space. Seriously, swap out those wire hangers immediately.
- Shelf dividers or closet organizers (set of 2) — $18-28 — Keeps folded items from toppling over like a Jenga tower.
- Uniform plastic bins with labels (set of 4) — $30-45 — For seasonal or off-season storage. Get clear ones so you can see what's inside without opening.
- Drawer dividers or organizers (adjustable set) — $12-22 — Game-changer for socks, underwear, and accessories.
- Cascading hangers or S-hooks (pack of 10) — $8-15 — Perfect for pants or multiple tops in the same category.
- Closet hanging organizer (over-the-door with pockets) — $15-25 — Extra storage without taking rod space.
- Label maker — $20-40 — Optional but honestly worth it. No more guessing what's in that bin.
- Adhesive shelf liners — $8-12 — Keeps everything from sliding and makes cleanup easier.
Step-by-Step Guide
Step 1: Empty Everything (Yes, Really)
I know it sounds drastic, but pull every single piece of clothing, shoe, and accessory out of your closet. Lay it on your bed, your couch, wherever you have space. This is the only way to really see what you're working with. You'll find clothes you forgot you owned — and that's exactly the point. You can't organize what you can't see.
Step 2: The Honest Evaluation
This is where it gets real. Pick up each item and ask yourself: Do I actually wear this? Does it fit? Do I feel good in it? Here's my honest take — if you haven't worn it in a year and you're not planning to, let it go. This isn't about being ruthless. It's about respecting your space and your time. According to Better Homes & Gardens & Gardens, the average person wears only 20% of their closet regularly. Why waste space on the other 80%?
Create three piles: keep, donate, and sell. The sell pile is for items in great condition that have real value. The donate pile is everything else. Be honest with yourself — and be generous with others.
Step 3: Categorize by Type and Color
Group your keepers by category: tops, bottoms, dresses, outerwear, and so on. Within each category, arrange by color. It sounds simple, but this visual organization means you'll actually reach for different pieces. You won't just grab the same five outfits every week because you can see all your options.
Step 4: Invest in Good Hangers
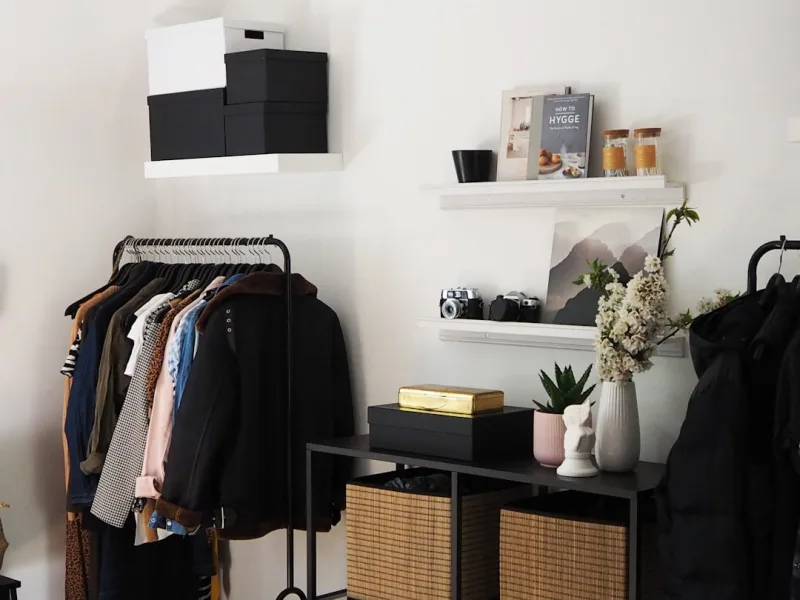
Swap out those mismatched wire and plastic hangers for slim velvet ones. I cannot stress this enough — your closet will look instantly more intentional, and you'll actually save space. Velvet hangers prevent clothes from sliding, which means your carefully arranged outfits stay arranged. It's the smallest change that makes the biggest difference.
Step 5: Create Zones in Your Closet
Designate specific areas for specific items. Hang your workweek tops together, casual tops in another section, and so on. If you have shelf space, fold heavier items like sweaters and jeans using the KonMari method or simple rolling technique — both prevent wrinkles and save space. Add those shelf dividers so nothing avalanches when you grab one item.
Step 6: Handle Shoes, Belts, and Accessories
Shoes should be visible and accessible. If floor space allows, arrange them on a shelf or in a clear shoe rack. For belts, use S-hooks on your rod or hang them on a tie organizer. Small accessories like scarves, hats, and jewelry go in drawer dividers or small clear containers. Everything should be visible — that's the minimalist magic right there.
Step 7: Set Up Seasonal Storage
 Boho DIY Room Makeover: Full Revamp Under $200
Don't jam your closet with out-of-season clothes. Use labeled plastic bins for winter coats in summer, summer dresses in winter, etc. Keep these in a closet shelf, under the bed, or in another storage area. HGTV recommends rotating seasonally to keep your active closet fresh and functional year-round.
Step 8: The Final Touches
Add adhesive shelf liners to protect your shelves, and consider that over-the-door organizer for frequently used items. If you have wall space, wall hooks for bags or everyday jackets work beautifully. Step back and actually look at your closet. Does it feel calm? Can you see everything? That's the goal.
Pro Tips
Hang clothes facing the same direction. This small detail makes your closet look intentional and peaceful. It also helps you spot empty hangers quickly.
Implement a "one in, one out" rule. Once your closet is organized, keep it that way. When you buy something new, let something go. This prevents backsliding into chaos.
Use a capsule wardrobe approach. You don't need hundreds of pieces. A well-curated 40-50 piece wardrobe that all coordinates together means every outfit works. That's the minimalist dream.
Take a photo of your organized closet. Seriously. Refer back to it when you're adding new pieces. You'll naturally gravitate toward items that fit your established color palette and style.
Light matters. If your closet is dark, add a small LED light strip or battery-operated light. You'll actually use your closet better when you can see what you're selecting.
Don't go overboard with pretty containers. I get it — those aesthetic organizers are gorgeous. But they're only useful if you'll actually maintain them. Stick with clear, practical options that will stand the test of time.
Cost Breakdown
← Scroll to see full table →
| Item | Quantity | Unit Price | Total Cost |
|---|---|---|---|
| Slim velvet hangers (50-pack) | 1 | $30 | $30 |
| Shelf dividers/organizers | 2 | $23 | $46 |
| Plastic storage bins (4-pack) | 1 | $38 | $38 |
| Drawer dividers (adjustable) | 2 | $17 | $34 |
| Cascading hangers (10-pack) | 1 | $12 | $12 |
| Over-the-door organizer | 1 | $20 | $20 |
| Label maker | 1 | $30 | $30 |
| Adhesive shelf liners | 1 | $10 | $10 |
| Total Investment: | $220 | ||
Honestly? $220 is a solid investment for a closet organization system that will last years. That's less than most people spend on a single piece of clothing.
FAQ
Q: How long does a complete closet reorganization actually take?
A: If you're starting from absolute chaos, budget a full day — maybe 6-8 hours. That includes pulling everything out, sorting, donating, and setting up your new system. Don't try to rush it. Throw on a podcast, make some coffee, and take breaks. Your future self will
- Diy Coffee Table Ideas Cheap
- Boho Home Decor Ideas Diy Budget
- Master Bedroom Makeover Ideas On A Budget
- cheap diy living room decor ideas
📷 Photo by James Hollingworth on Unsplash


