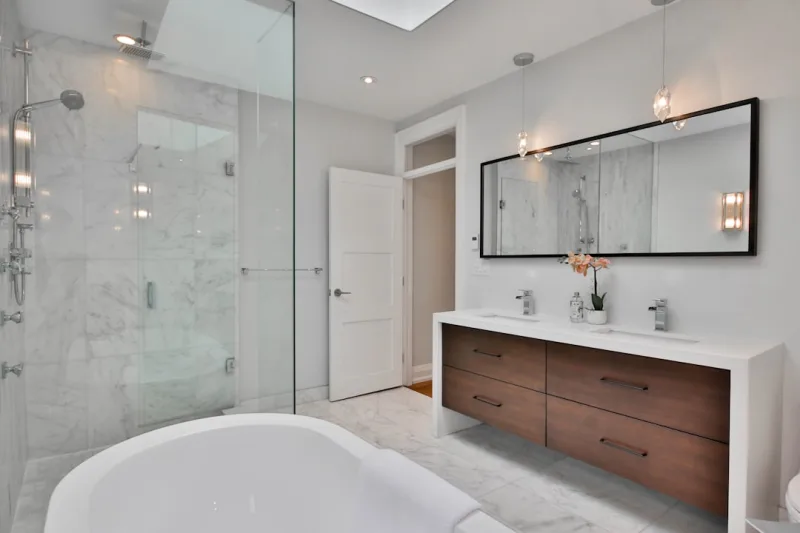
Elegant Bathroom Renovation for Beginners: Transform Your Space Without the Headaches
Listen, I get it. The idea of renovating your bathroom sounds about as appealing as a root canal — especially if you've never done a home improvement project before. But here's the thing: a bathroom refresh doesn't have to be this massive, budget-draining ordeal. You don't need to hire a contractor, max out your credit card, or spend six months living like you're camping in your own home.
I've helped plenty of friends tackle their bathrooms, and honestly? Some of the most elegant transformations I've seen came from beginners who just committed to a solid plan and took it one step at a time. Whether you're looking to update outdated tile, refresh the vanity, or create that spa-like atmosphere you've been craving — this guide will walk you through it all in plain English, without the jargon.
The best part? You can absolutely do this yourself, even if the most complicated thing you've built before is IKEA furniture. So let's dive in and talk about creating a bathroom that actually makes you want to linger in the morning.
What You'll Need
Before you start swinging a hammer (or in your case, probably just watching YouTube videos), let's talk materials. Here's what a beginner-friendly renovation typically requires:
- Paint (1-2 gallons): $25-$60 — High-quality bathroom paint with mildew resistance is non-negotiable
- Peel-and-Stick Tile or Wallpaper: $30-$150 — Perfect for beginners; no installation headaches
- New Vanity or Vanity Makeover Kit: $150-$500 — Or grab one from The The Home Depot if you're replacing entirely
- Lighting Fixture: $40-$200 — Good lighting changes everything
- Hardware (faucet, drawer pulls, towel bars): $50-$300 — Small upgrades, massive impact
- Grout and Caulk: $15-$40 — For sealing and refinishing
- Accessories (mirrors, shelving, soap dispensers): $50-$150 — The finishing touches
- Tools (basic set): $60-$100 — Drill, level, screwdrivers, grout float
Step-by-Step Guide
Step 1: Plan Your Vision and Measure Everything
Before you touch anything, spend some time dreaming. I'm serious — browse Better Homes & Gardens & Gardens or Pinterest and save images of bathrooms that make you genuinely happy. Look for common themes. Do you keep gravitating toward spa vibes with soft neutrals? Industrial chic with concrete and metal? Cozy farmhouse? Once you've identified your style, measure your bathroom down to the inch. Walls, floor, vanity depth, ceiling height — everything matters when you're ordering materials online or at The Home Depot.
Step 2: Clear Out and Deep Clean
Remove everything that isn't nailed down. And I mean everything. Your bathroom should look like a hotel room after checkout. This gives you a blank canvas and honestly — you'll be shocked at how much bigger the space feels. Do a thorough scrub too. You want a clean surface for painting and new fixtures.
Step 3: Update the Paint
This is your biggest bang-for-buck move, hands down. Fresh paint can make a bathroom feel completely different. Choose a high-quality bathroom paint (brands like Benjamin Moore or Sherwin-Williams have moisture-resistant formulas) and pick colors that complement natural light. If your bathroom is small or dark, lighter colors make it feel airier. Tape everything carefully — it takes an extra 30 minutes but saves you from precision touch-ups later. Two coats minimum. Trust me on this.
Step 4: Tackle Flooring and Wall Accents
Unless you're replacing full tile — which is doable but honestly trickier for beginners — consider peel-and-stick options. They're way better than they used to be, and HGTV has featured plenty of stunning bathrooms using them. You can also add peel-and-stick subway tile as a backsplash behind the sink without any grout mess. For walls, think wallpaper or shiplap-effect peel-and-stick panels. These transform a space in an afternoon.
Step 5: Replace or Refresh the Vanity
Here's where you get to inject personality. If your vanity is structurally sound but looking tired, paint it with cabinet-grade paint and swap out the hardware. New drawer pulls and a modern faucet instantly modernize the look. If you're replacing the vanity entirely, measure your plumbing connections carefully. The Home Depot has tons of pre-made vanities with built-in sinks — installation is usually pretty straightforward with basic tools and YouTube guidance.
Step 6: Upgrade Lighting and Hardware
Swapping a light fixture or faucet feels like magic because the impact is immediate. New chrome or brushed nickel hardware sets the whole tone. If you're nervous about electrical work, hire a licensed electrician for the light fixture — it's worth the $100-150 for peace of mind. But replacing cabinet hardware? That's literally just unscrewing and rescrewing. You've got this.
Step 7: Add Finishing Touches
A new mirror, floating shelves, updated towel bars, a nicer soap dispenser — these finishing details are what separates "I painted my bathroom" from "This bathroom is genuinely elegant." Add greenery with humidity-loving plants like pothos or snake plants. Swap out old towels for soft, neutral ones. These small touches matter.
Pro Tips
 Budget Apartment Renovation: DIY Hacks That Actually Work
Invest in Good Paint. Seriously. Cheap paint peels, fades, and won't resist bathroom moisture like quality paint will. Your $50 extra on premium paint lasts five years longer.
Caulk is Your Friend. That line where your wall meets your tub? Caulk it. It's cheap, takes 10 minutes, and prevents water damage. Silicone caulk is worth the extra buck over latex for bathrooms.
Lighting Matters More Than You Think. Overhead lights alone are harsh. Add a wall sconce or soften overhead light with a dimmer switch. Bathroom lighting is often the most underrated element of renovation.
Go Neutral on Big Items, Bold on Small Ones. Paint your walls in calming neutrals, but get that fancy towel rack or statement mirror you love. You can update accessories cheaply; you can't replace a vanity easily.
Don't Cheap Out on the Faucet. A $30 faucet leaks. A $150 faucet runs beautifully for a decade. This is where quality matters.
Cost Breakdown
← Scroll to see full table →
| Item | Budget-Friendly | Mid-Range | Premium |
|---|---|---|---|
| Paint | $25 | $45 | $75 |
| Flooring/Wall Accents | $30 | $100 | $250 |
| Vanity/Cabinet | $150 | $350 | $800 |
| Faucet | $50 | $150 | $400 |
| Lighting | $40 | $120 | $300 |
| Hardware & Accessories | $40 | $100 | $250 |
| Tools | $60 | $100 | $150 |
| TOTAL | $395 | $865 | $2,225 |
FAQ
Q: How long does a beginner bathroom renovation actually take?
A: Most of my friends finish in 3-6 weeks working weekends, though that's spread out work — not continuous. The actual labor time if you did it non-stop? Maybe 40-60 hours. Paint takes longest because of drying time. Expect to live with slight chaos for a few weeks, but you can still use the bathroom the whole time (just maybe not during painting).
Q: Do I really need to hire professionals for anything?
A: Only for electrical work if you're not comfortable (highly recommend you aren't), and plumbing gets tricky if you're moving fixtures. For paint, flooring, hardware, and cosmetic updates? You've absolutely got this. YouTube has better tutorials than most contractors give anyway.
Q: What's the #1 beginner mistake I should avoid?
A: Not measuring twice. Seriously. People order tile, paint, vanities, and fixtures without proper measurements, then have to return everything or make awkward compromises. Spend an hour measuring. That's it. Save yourself weeks of regret.
Final Thoughts
Here's what nobody tells you about home renovation: the actual work is the easy part.
📷 Photo by Lotus Design N Print on Unsplash


