Designer Bathroom Makeover 2026: Your Complete DIY Transformation Guide
Okay, let's be real — bathrooms are one of those spaces that can completely transform how you feel about your home. I've been working on bathroom projects for years, and honestly, there's something magical about walking into a space that looks like it came straight out of a magazine spread. The good news? You don't need to hire a five-figure designer or flip your entire space upside down. A smart, intentional makeover can give you that high-end designer look without breaking the bank.
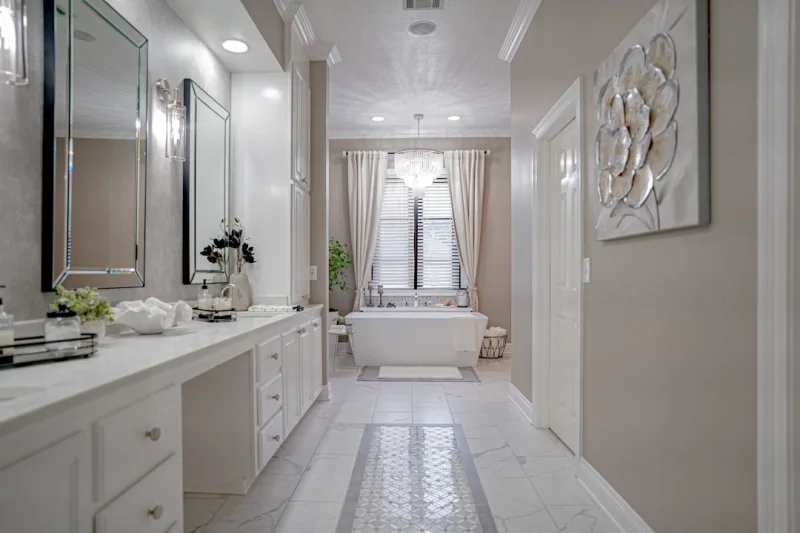
Here's the thing about 2026 bathroom trends — we're seeing a beautiful shift toward sustainable materials, moody color palettes, and functional luxury. Think warm neutrals mixed with dramatic black accents, natural wood elements, and smart storage solutions that actually make sense for real life. It's refreshing because it's moving away from the cold, sterile look we've seen dominate for the last few years.
I'm going to walk you through a complete bathroom makeover that'll have you enjoying a designer-quality space without the designer price tag. Whether you're working with a powder room or a full master bath, these strategies scale beautifully. Let's dig in.
What You'll Need
Before we get our hands dirty, let's talk materials and supplies. I've broken this down by category to make shopping easier — and I've sourced these from places like The The Home Depot and Better Homes & Gardens & Gardens recommendations because, well, they know what they're doing.
Paint & Finishes
- Premium bathroom paint (2 gallons) — $45-60
- Paint primer for bathrooms — $25-35
- Matte black hardware paint or spray (optional) — $8-15
Fixtures & Hardware
- Modern faucet (vanity) — $80-200
- Cabinet hardware knobs/pulls — $30-80
- Lighting fixture (vanity or overhead) — $75-300
- Towel bars and hooks — $40-100
Flooring & Wall Materials
- Peel-and-stick tile or vinyl planks — $100-250
- Grout and adhesive (if needed) — $20-40
- Shiplap or wall paneling (optional accent wall) — $100-200
Storage & Organization
- Floating shelves — $60-150
- Organizational baskets and bins — $40-80
- Over-toilet storage unit — $50-150
Accessories & Decor
- Mirror upgrade or frame — $40-150
- Artwork and wall decor — $30-100
- Plants and greenery — $20-50
- Luxury towels and bath mat — $60-120
Step-by-Step Guide
Step 1: Plan Your Design & Color Palette
This is honestly the most important step, and people rush it all the time. Spend a week — seriously, a full week — collecting inspiration. I use Pinterest, Instagram, and HGTV's website to find bathrooms that speak to me. Look for common threads: Are you drawn to warm tones? Cool tones? Modern minimalism? Spa-like luxury? Pick your main color (I'm loving warm grays and sage greens in 2026) and two accent colors that complement it. Write them down. Pin them. This becomes your north star for every decision you make next.
Step 2: Prep the Space
Clear everything out of your bathroom except what's permanently installed. And I mean everything — toiletries, towels, even the shower curtain. This gives you a blank canvas and honestly, it's kind of therapeutic. Remove cabinet doors if you're planning to refresh them. Take photos of the original layout so you can reference measurements later. Good ventilation is crucial here, so open a window and maybe run a fan.
Step 3: Paint Everything (Walls & Cabinets)
This is where magic happens. Use a quality bathroom-specific paint — it resists moisture better and actually lasts. Prime everything first; don't skip this step even though it feels like extra work. If your vanity is looking tired, painting the cabinet is way more budget-friendly than replacing it. Apply two coats, let each dry completely, and honestly, this one project will transform your entire space. The color you choose here sets the entire mood. I'd suggest testing it on a small wall section first if you're unsure.
Step 4: Upgrade Hardware & Fixtures
Swap out those builder-grade cabinet handles for something with intention. Matte black, brushed gold, or sleek chrome — whatever matches your palette. Don't underestimate how much new hardware elevates a space. Next, replace your faucet and any outdated fixtures. This might require a bit more skill, but if you're comfortable with basic plumbing, The Home Depot has excellent video tutorials. If not, this is the one place I'd call a pro — plumbing mistakes can get messy fast.
Step 5: Address Flooring
Peel-and-stick luxury vinyl or tile is genuinely a game-changer for DIY bathrooms. It looks custom, wears beautifully, and honestly — if you mess up, you just peel and reapply. Lay it out completely before committing (use a dry-lay method first), then apply in sections. Take your time here. Measure twice, stick once. If your existing floor is solid, this goes right over it.
Step 6: Install Lighting
Good lighting changes everything. A modern vanity light above the mirror is ideal for makeup application and actually seeing your face. If you're not comfortable with electrical work, hire this out — it's worth the peace of mind and safety. Install any recessed lighting or replace overhead fixtures. Brightness matters; aim for around 3000K color temperature for a warm, flattering glow.
Step 7: Add Floating Shelves & Storage
 Budget Apartment Renovation: DIY Hacks That Actually Work
These become both functional and decorative. Install floating shelves above the toilet or next to the vanity for towels and plants. Use decorative baskets underneath to corral items you don't want visible. This is where your bathroom stops looking cluttered and starts looking intentional.
Step 8: Style & Decorate
Now for the fun part. New towels, a fresh mirror, some greenery, maybe a small piece of artwork. These finishing touches make it feel designed rather than just renovated. Stick to your color palette, limit yourself to 3-4 key accessories, and let them breathe in the space.
Pro Tips
Ventilation is non-negotiable. Invest in a good exhaust fan or upgrade your existing one. Moisture damage is expensive; prevention is cheap.
Don't cheap out on paint. Bathroom paint needs to handle humidity, and cheap paint will fail within a year. Spend the extra $10-15 per gallon — your future self will thank you.
Measure everything twice. Seriously. Shelves, fixtures, tile — measure again even if you think you're sure. This prevents the frustrating "it's just slightly off" situation.
Save your receipts and take before/after photos. You'll want documentation of what you did, and honestly, the before-and-after comparison is so satisfying. Plus, good content for your own inspiration later.
Go vertical with storage. Most bathrooms feel cramped because they're poorly organized. Use wall space aggressively — shelves, wall-mounted baskets, corner shelving. It changes everything.
Cost Breakdown
← Scroll to see full table →
| Category | Item | Cost Range |
|---|---|---|
| Paint & Prep | Paint, primer, prep materials | $70-110 |
| Flooring | Peel-and-stick tile or vinyl | $100-250 |
| Fixtures | Faucet, hardware, lighting | $225-600 |
| Storage | Shelves, baskets, organizers | $150-380 |
| Accessories | Towels, mirror, decor, plants | $150-420 |
| Total Budget Range | $695-1,760 | |
FAQ
Q: Can I do this makeover without replacing the toilet?
A: Absolutely. A fresh paint job, new flooring, updated lighting, and good styling will make you forget about that toilet. If it's working properly, leave it alone. You can always upgrade it later if you want a more luxe model with soft-close features.
Q: How long does a bathroom makeover like this actually take?
A: Most of the work can be done in 2-3 weeks if you're working on weekends. Painting takes about a week (accounting for drying time). Flooring, another 2-3 days. Fixtures and styling, another
📷 Photo by Ronnie George on Unsplash


