Designer Bathroom Ideas for Cozy Homes: Creating Your Personal Spa Retreat
Here's the thing about bathrooms — they're honestly one of the most underrated rooms in our homes. We spend probably thirty minutes a day in there, and yet so many of us treat it like an afterthought. But when you finally invest time and thought into making your bathroom feel intentional? It changes everything. I'm talking about that luxury hotel vibe, except it's yours, and you don't have to check out.
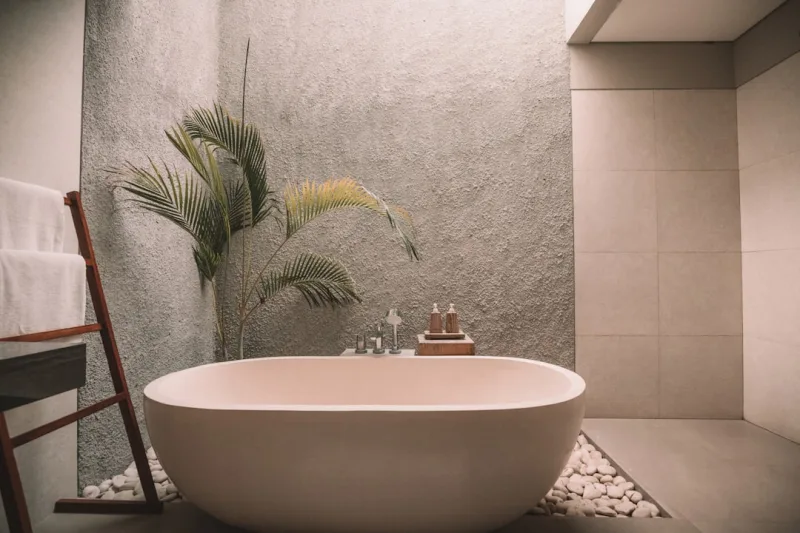
I've been designing bathrooms for cozy homes for years now, and I've learned that you don't need a massive walk-in shower or a soaking tub the size of a small car to make a bathroom feel designer-quality. What you really need is thoughtfulness. You need layers of texture, warm lighting, smart storage solutions, and materials that make you want to linger a little longer. The best part? This is totally achievable on various budgets.
Whether you're working with a tiny ensuite or a modest secondary bathroom, the principles remain the same. We're going to walk through exactly how to transform your space into that cozy, designer bathroom that makes you feel like you're stepping into a wellness retreat every single morning.
What You'll Need
Let me break down the essentials. You don't need everything here to get started — it depends on your space and vision — but these are the materials I consistently reach for when designing cozy bathrooms:
- Warm-toned paint or wallpaper — $30-$80 per gallon or roll. I'm partial to soft creams, warm grays, or muted sage. Check out options at The The Home Depot for quality finishes.
- Quality lighting fixtures (vanity lights, sconces) — $80-$300 each. Good lighting is non-negotiable. Trust me on this.
- Natural wood or rattan storage elements — $100-$400. Floating shelves, ladder racks, or open baskets add warmth instantly.
- Natural stone or patterned tile accents — $5-$15 per square foot. Think pebble tile, marble, or subtle geometric patterns.
- Plush towels and linens — $80-$200 for a quality set. Egyptian cotton or Turkish cotton. The difference is noticeable.
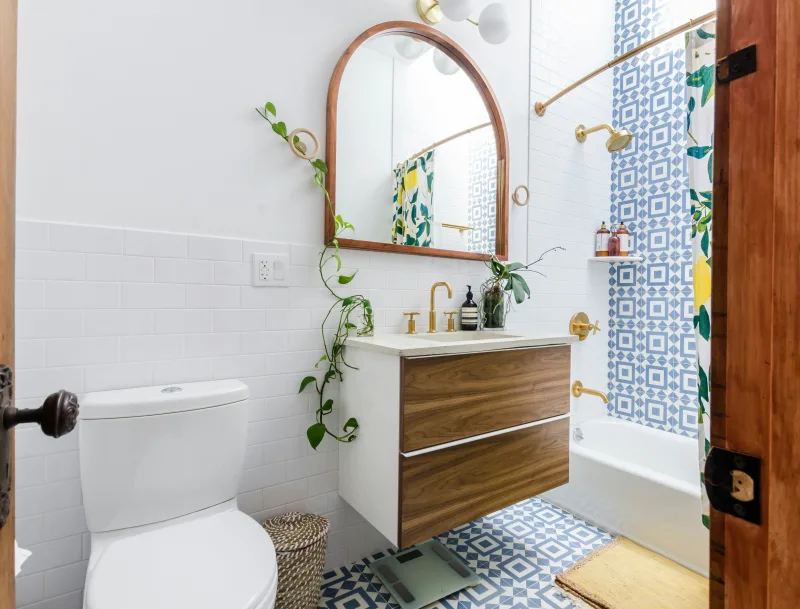
- A statement mirror — $150-$500. Wooden frames, vintage styles, or oversized rounds all work beautifully.
- Plants and natural elements — $20-$100. Pothos, snake plants, or eucalyptus work great in humid bathrooms.
- Caulk, grout, and adhesive supplies — $30-$60. These finishing touches matter more than people realize.
- Drawer organizers and storage baskets — $50-$150. Keep things tidy without looking sterile.
- Paint prep supplies and tools — $40-$80. Drop cloths, rollers, painter's tape, brushes.
Step-by-Step Guide
Step 1: Plan Your Color Palette and Design Direction
Before you buy anything or make any permanent changes, sit with your vision for a week. Honestly, this is the most important step and people skip it constantly. Pull inspiration from HGTV or Better Homes & Gardens & Gardens — create a Pinterest board or just save images to your phone. Look for patterns in what draws you in. Are you gravitating toward earthy tones? Coastal vibes? Scandinavian minimalism with warmth?
Your color palette should consist of a main wall color (usually something soft and warm), accent colors (maybe in your accessories), and your material tones (wood, stone, metal). Stick to a maximum of three main colors. This is what makes spaces feel cohesive and intentional rather than chaotic.
Step 2: Prepare Your Space and Prime
If you're painting, prep work is everything. Remove outlet covers, tape your trim, and lay down drop cloths. Patch any holes with spackling compound — don't skip this step because it shows later. Prime your walls if you're making a dramatic color change. One coat of primer and two coats of paint is my standard approach. Use a paint designed for bathrooms (it resists moisture better). This entire process takes about a weekend for a standard bathroom.
Step 3: Update Your Lighting
This genuinely transforms a space more than anything else. Install sconces on either side of your mirror at eye level (roughly 60-65 inches from the floor) — this provides flattering, shadow-free lighting. Add an overhead fixture if you don't have one, preferably something with a warm color temperature (2700K-3000K). Consider a dimmer switch for flexibility.
If you're not comfortable with electrical work, this is the one place I recommend hiring a professional. It's worth every penny, and it's a safety thing.
Step 4: Incorporate Texture Through Materials
This is where your bathroom starts feeling designer-level. Add texture through your backsplash, floor tile, or accent wall tile. A simple subway tile in a vertical pattern, a pebble-textured tile floor, or even a geometric pattern tile keeps things interesting. Don't feel pressured to do an entire wall or floor — even a small accent area makes a difference. Mix materials: wood, stone, ceramic, and metal all work together when they're in complementary tones.
Step 5: Install Storage Solutions
 Budget Apartment Renovation: DIY Hacks That Actually Work
Wall-mounted floating shelves above the toilet are genius for cozy bathrooms. They're functional and add visual interest. Install a ladder shelf if you have the space — they're perfect for hanging towels and displaying plants. Use open baskets under the sink for extra storage that looks intentional, not cluttered. The key is having dedicated homes for everything so your surfaces stay clear and calm.
Step 6: Add Your Statement Mirror
Replace that basic builder-grade mirror with something with character. A wooden-framed mirror, a vintage-style metal frame, or even an oversized round mirror becomes the focal point. This single element changes the entire vibe. Install it above your vanity and make sure your lighting works with it, not against it.
Step 7: Layer in Soft Goods and Accessories
Now for the fun part. Bring in plush towels, a quality bath mat, and a cozy robe. Add a small tray for your vanity to keep things organized. Introduce plants that thrive in humid environments. Place a few candles (unscented or lightly scented — too much and it's overwhelming). Display your most beautiful products in clear containers or on shelves. This is where personalization happens.
Pro Tips
Ventilation is your secret weapon. Install or upgrade your exhaust fan — moisture is the enemy of cozy bathrooms. It causes mold, peeling paint, and generally makes things feel damp. A good exhaust fan runs during and for 20-30 minutes after showers. This alone extends the life of your design by years.
Go vertical with storage. Cozy doesn't mean cluttered. Wall space is your best friend in smaller bathrooms. Floating shelves, wall-mounted cabinets, and tall narrow organizers keep things organized without eating up floor space.
Invest in one or two really nice pieces. A beautiful mirror, quality hardware, or a stunning light fixture — these anchor your design. It's better to have fewer quality pieces than a bunch of mediocre ones.
Don't underestimate hardware. Changing cabinet handles and drawer pulls is one of the quickest updates and it's noticeable. Brass, matte black, or natural wood finishes all read differently. Pick something that resonates with your overall aesthetic.
Use mirrors strategically. A second mirror or even a small mirrored shelf reflects light and makes your space feel larger. Cozy doesn't mean cramped.
Cost Breakdown
← Scroll to see full table →
| Item | Quantity | Unit Price | Total |
|---|---|---|---|
| Paint & Primer | 2 gallons | $50 | $100 |
| Paint Supplies | 1 set | $60 | $60 |
| Vanity Lighting | 2 sconces | $120 | $240 |
| Statement Mirror | 1 | $200 | $200 |
| Accent Tile | 20 sq ft | $10 | $200 |
| Floating Shelves | 3 | $80 | $240 |
| Storage Baskets | 4 | $35 | $140 |
| Quality Towels & Mat | 1 set | $120 | $120 |
| Plants & Accessories | Various | $60 | $60 |
| Hardware & Fixtures | Various | $80 | $80 |
| Total DIY Project Cost | $1,440 | ||
📷 Photo by Jared Rice on Unsplash