DIY Bedroom Wall Decor Ideas Aesthetic: Complete Guide to Creating Your Dream Space
Introduction: Why Bedroom Wall Decor Matters
Your bedroom is your personal sanctuary—a place where you retreat to rest, recharge, and express your individuality. The walls of your bedroom deserve the same attention and care as any other design element in your home. I truly believe that creating an aesthetic bedroom wall decor setup doesn't require hiring an expensive interior designer or breaking the bank on store-bought artwork. With a little creativity, some basic materials, and a clear vision, you can absolutely transform your bedroom walls into a stunning focal point that reflects who you are.
DIY bedroom wall decor is experiencing a renaissance among American homeowners who want to personalize their spaces without the hefty price tags associated with professional design services. Whether you're drawn to minimalist aesthetics, bohemian vibes, industrial chic, or maximalist color schemes—honestly, the possibilities for creating beautiful bedroom walls are virtually endless. The best part? Most of these projects can be completed over a weekend with materials you can find at local retailers like The The Home Depot or specialty craft stores.
I've put together this comprehensive guide to walk you through everything you need to know about creating aesthetic bedroom wall decor, from selecting materials to executing professional-looking results. You'll discover practical, budget-friendly ideas that transform your bedroom into the sanctuary you've always wanted—I promise it's easier than you think.
What You'll Need: Materials List with Pricing
Before you start your DIY bedroom wall decor project, gather these essential materials. I've included approximate pricing based on current market rates—though honestly, prices vary by location and retailer:
- Peel-and-Stick Wallpaper or Wall Decals: $15-$45 per roll (removable and renter-friendly options available—these are lifesavers, truly)
- Acrylic Paint: $5-$12 per quart (quality varies by brand, and yes, it matters)
- Paintbrushes and Rollers: $8-$25 for a quality set (invest here—cheap brushes are frustrating)
- Drop Cloth or Plastic Sheeting: $3-$8
- Painter's Tape: $4-$7 per roll
- Wall Mounting Hardware (nails, screws, anchors): $5-$15
- Picture Frames (various sizes): $2-$30 each depending on material and design
- String Lights or LED Strips: $10-$35 (game-changer for ambiance)
- Floating Shelves: $15-$50 each
- Tapestry Fabric: $15-$40
- Canvas for Painting: $5-$20 per canvas
- Stencils (optional): $2-$8
- Command Strips (damage-free adhesive): $4-$10 per pack (essential for renters)
- Fabric Scissors and Utility Knife: $8-$15
- Level Tool: $8-$20 (don't skip this—crooked shelves will haunt you)
Step-by-Step Instructions for Creating Aesthetic Bedroom Wall Decor
Project 1: Create an Accent Wall with Paint
 Boho DIY Room Makeover: Full Revamp Under $200
An accent wall instantly transforms any bedroom. It's honestly one of my favorite quick wins—dramatic yet so manageable. Follow these detailed steps:
- Prepare Your Space: Remove furniture from the room or move it to the center and cover everything. Spread out your drop cloth and open those windows—ventilation is your friend.
- Clean the Walls: Wipe down the wall you'll be painting with a damp cloth to remove dust and debris. Let it dry completely. This step makes a huge difference in paint adhesion.
- Apply Painter's Tape: Use painter's tape along the ceiling line, baseboard, and adjoining walls to create clean edges. Press firmly to prevent paint seepage. Trust me, this detail separates amateur from polished.
- Prime if Necessary: If you're using a bold color or painting over dark paint, apply a primer first. This ensures better color coverage and durability—you won't regret it.
- Apply Paint: Start with a 2-3 inch border around edges using a brush, then fill in larger areas with a roller. Use long, smooth strokes. Allow the first coat to dry according to paint instructions (usually 2-4 hours).
- Apply Second Coat: Paint a second coat for full coverage and rich color saturation. This is especially important with lighter or more vibrant shades—one coat simply won't cut it.
- Remove Tape Carefully: While paint is still slightly tacky, carefully remove painter's tape at a 45-degree angle to avoid peeling off fresh paint. This is where patience pays off.
- Touch Up: Use a small brush to touch up any missed spots or uneven edges. Step back and admire your work.
Project 2: Install a Wall Gallery with Framed Artwork
- Gather Your Materials: Collect photos, prints, or artwork you want to display. Frames can be found at Better Homes & Gardens & Gardens retailers and online stores. Mix frame sizes and finishes for visual interest.
- Plan Your Layout: Lay all frames on the floor and arrange them in your desired pattern. Take a photo for reference—seriously, this saves so much guesswork. Consider creating a grid layout, salon-style arrangement, or asymmetrical design depending on your aesthetic.
- Mark Hanging Points: Determine where each frame will hang. Use a level to ensure horizontal alignment. Mark nail holes with a pencil. This is the tedious part, but precision here means everything.
- Find Wall Studs: Use a stud finder to locate studs for heavier frames. For lighter artwork, use appropriate wall anchors—don't just wing it with random nails.
- Install Hanging Hardware: Drive nails or screws at the marked locations. For drywall without studs, use wall anchors to support the weight properly. A fallen frame is nobody's idea of fun.
- Hang Frames: Carefully hang each frame and step back frequently to ensure your arrangement looks balanced and aesthetically pleasing. Your eye is the best tool here.
- Make Final Adjustments: Use your level to ensure frames are straight. Make any necessary adjustments to spacing or alignment. This is where your gallery really comes together.
Project 3: Install Decorative Floating Shelves
- Choose Your Shelf Location: Decide where you want shelves based on your room layout and aesthetic. Floating shelves work beautifully above dressers, beside windows, or as a focal point. Think about what you'll display.
- Measure and Mark: Mark shelf positions with a pencil, ensuring they're level using a level tool. Account for the brackets that will support the shelves. Double-check your measurements—honestly, measure three times if you need to.
- Locate Wall Studs: Use a stud finder to locate studs behind your marks. Studs provide the strongest support for floating shelves, especially if you're planning to load them with books and plants.
- Drill Pilot Holes: Drill small pilot holes at your marked locations to prevent wood splitting and make screw insertion easier. This little step prevents so much frustration.
- Install Brackets: Screw heavy-duty brackets into the studs. Ensure they're level before tightening completely. Take your time here—wobbly shelves are the worst.
- Place Shelves: Carefully set shelves onto the brackets. Adjust until level and secure according to bracket instructions. Give them a little test push to make sure they're solid.
- Decorate Shelves: Arrange plants, books, photos, and decorative objects on your shelves to create visual interest and reflect your personal style. This is the fun part—play around until it feels right.
Project 4: Create a Tapestry Accent Installation
- Select Your Tapestry: Choose a tapestry that matches your bedroom aesthetic. Size should be appropriate for your wall space—typically 60x40 inches to 90x108 inches. This one piece can anchor your entire room.
- Decide on Placement: Determine where your tapestry will be positioned. Center it on your wall or position it above your bed for maximum impact. Trust your gut here.
- Gather Hanging Materials: Acquire a tapestry hanging rod with brackets, Command Strips (for renter-friendly installation), or nails depending on your preference. Command Strips are seriously underrated.
- Install Hardware: If using a rod, install brackets at appropriate height. If using Command Strips, clean the wall thoroughly and apply strips according to package directions. Make sure that wall is pristine.
- Hang the Tapestry: Carefully drape or thread your tapestry onto the rod, or hang it using your chosen method. Ensure it's centered and hangs evenly. Step back and soak in that bohemian vibes moment.
- Adjust and Secure: Make any necessary adjustments to ensure the tapestry is level and secure. A slightly crooked tapestry will bug you forever, so take the extra minute.
Project 5: Install String Lights for Ambient Aesthetic Appeal
- Select Your Lights: Choose string lights that match your aesthetic—fairy lights, Edison bulbs, or LED strips all create different moods. You can find these at The Home Depot for around $15-$35. Honestly, this is where the magic happens in terms of ambiance.
- Plan Your Layout: Decide whether you want lights around the perimeter of your room, in a canopy above your bed, or clustered in a specific area. Sketch it out—I love mapping this on paper first.
- Mark Installation Points: Lightly mark where you'll attach light clips or hooks. Don't be too precise yet—you can adjust as you go.
- Install Clips or Hooks: Screw in small hooks or install adhesive clips at your marked points. Use Command Strips for damage-free options. This is where renter-friendly magic happens.
- String the Lights: Carefully thread lights through clips, ensuring the cord runs inconspicuously along walls or behind headboards. A visible cord can totally kill the vibe.
- Test Your Lights: Turn on lights to verify they're working properly and creating your desired ambiance. There's nothing worse than discovering burnt-out bulbs after everything's installed.
- Hide Cords: Use cord covers or run cords behind furniture to conceal them from view. Your eye will thank you—hidden cords mean a clean, intentional look.
Pro Tips and Expert Advice for Aesthetic Success
Tip 1: Choose a Cohesive Color Palette
The foundation of any aesthetically pleasing bedroom—honestly—is a well-coordinated color scheme. Select 2-3 primary colors and 1-2 accent colors. Stick to these throughout your wall decor choices—from paint colors to artwork frames to tapestry patterns. This creates visual harmony that's both sophisticated and calming, and it prevents that scattered, chaotic feeling. Resources like HGTV.com" target="_blank" rel="noopener">HGTV offer excellent color palettes and design inspiration for various aesthetics if you're feeling stuck.
Tip 2: Use the Rule of Thirds
When arranging wall decor, divide your wall into thirds both horizontally and vertically. Position focal points—like a large piece of artwork or accent wall—along these imaginary lines. This creates a naturally pleasing composition that's far more interesting than centered designs. It's a designer secret that works every single time.
Tip 3: Mix Textures for Visual Interest
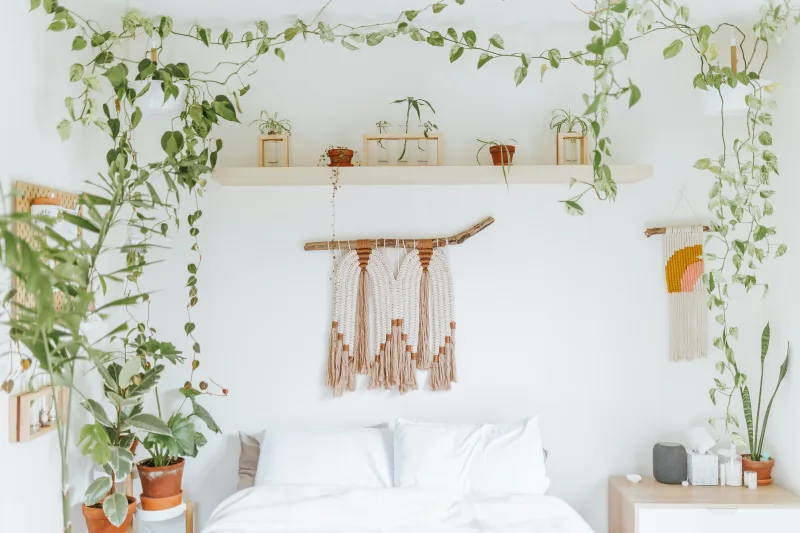
Combine smooth painted walls with textured tapestries, woven baskets, and dimensional wall hangings. Mixing textures prevents your space from feeling flat or boring—trust me, texture is everything. Consider incorporating woven wall hangings, macramé, wood shelves, and fabric elements. Your
📷 Photo by Cole Keister on Unsplash


