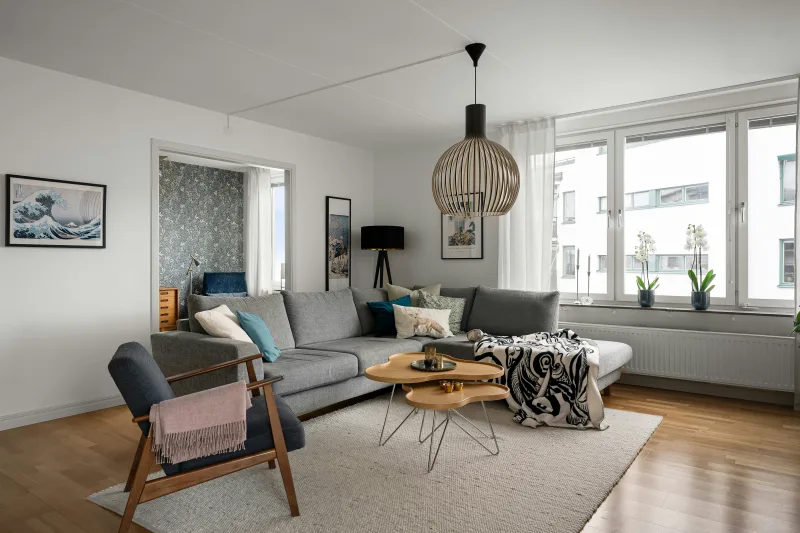
Okay, so here's the thing about Scandinavian design — it's been everywhere for like a decade now, and for good reason. There's something almost magical about how it manages to be both minimalist and deeply cozy at the same time. I've spent years helping friends transform their spaces with Scandinavian touches, and honestly, it's one of the most forgiving design styles to work with as a DIYer. You don't need fancy skills or a massive budget. You just need an eye for clean lines, natural materials, and that perfectly muted color palette.
The beauty of going the DIY route with Scandinavian decor is that you're really just embracing simplicity — which means fewer mistakes, less stress, and way more satisfaction when you step back and see what you've created. Whether you're working with a tiny apartment or a sprawling house, these ideas will help you nail that hygge-filled Scandinavian vibe that makes people actually want to spend time in your home.
Let me walk you through some realistic, doable projects that won't require you to be a carpenter or have a trust fund. These are the things that actually work.
What You'll Need
Before diving into projects, grab these essentials. Most of this stuff you can find at The The Home Depot, HGTV's featured retailers, or honestly just your local craft store:
- Shiplap or Tongue-and-Groove Boards ($50-150 depending on wall size) — The Home Depot has solid options
- White or Off-White Paint ($25-40 per gallon) — Benjamin Moore or Sherwin-Williams work great
- Natural Wood Stain ($15-30) — For that honey-toned look
- Floating Shelf Brackets ($30-80 for a set) — Trust me, quality brackets matter
- Reclaimed Wood or Pallet Wood ($0-50 if you source locally, $60-120 online)
- Linen Fabric ($8-15 per yard) — For cushion covers and throws
- Wood Dowels or Branch Pieces ($10-25) — For plant hangers or wall art
- Concrete or Cement Powder ($12-25) — For DIY planters
- Jute Rope ($5-12) — For storage baskets and hanging elements
- Basic Tools (saw, drill, level, measuring tape) — If you don't have these, The Home Depot rents them affordably
- Stain and Poly Finish ($20-35) — Protects your wood projects
- White or Cream Throw Blankets and Pillows ($30-80) — These aren't DIY, but essential for the vibe
Step-by-Step Guide
Project 1: Create a Shiplap Accent Wall
Honestly, this is the gateway drug into Scandinavian decor. A shiplap wall instantly makes any space feel intentional and, well, expensive — even though you're doing it yourself.
Step 1: Measure and Plan Your Space
Measure your wall height and width carefully. Decide if you're doing a full wall or just behind a bed or sofa. Sketch it out — you don't need anything fancy, just a rough idea of what you're working with.
Step 2: Prep Your Wall
Remove any existing wall decorations, outlet covers, and trim. Fill holes and sand down rough spots. A smooth wall is your foundation for success here.
Step 3: Prime and Paint
Apply a quality primer (one coat), then two coats of your chosen white or off-white paint. This prevents paint from looking flat and unfinished. Let each coat dry properly — don't rush this part.
Step 4: Install Boards
Starting from the bottom, apply construction adhesive to the back of each shiplap board, then use a nail gun or finish nails to secure them. Stagger the boards slightly for that authentic look. Use a level constantly — your eye will catch mistakes faster than you'd think.
Step 5: Fill and Finish
Fill nail holes with wood filler, sand smooth once dry, and paint over. The result? A wall that screams "I have my life together" — even if you're doing this solo on a Saturday.
Project 2: Build Floating Shelves with Natural Wood
These are functional, beautiful, and honestly easier than they look.
Step 1: Source Your Wood
Find reclaimed wood or buy untreated pine boards from The Home Depot. Look for pieces with character — slight imperfections actually add to the Scandinavian aesthetic.
Step 2: Cut and Prepare
Have the wood cut to your desired shelf length (2-4 feet works best visually). Sand the surface smooth, paying attention to edges.
Step 3: Stain or Leave Natural
Apply a light wood stain for warmth, or seal with poly if you love the natural grain. Two coats, light sanding between each. This protects your investment.
Step 4: Install Brackets and Secure
Locate studs in your wall using a stud finder — this is non-negotiable. Install brackets according to the manufacturer's instructions, then rest your shelf on top. Make sure it's level before securing.
Step 5: Style Intentionally
This is where it matters. Stack books horizontally, add one small plant, leave negative space. Scandinavian design is about breathing room — not about filling every inch.
Project 3: DIY Concrete Planters
These look like you spent $60 each at some boutique store. Spoiler: you didn't.
Step 1: Gather Containers
Use plastic cups, yogurt containers, or takeout containers as molds. You'll need two different sizes — one inside one to create the planter walls.


Step 2: Mix Concrete
Follow the concrete powder instructions carefully. It should have the consistency of thick cake batter — not too wet, not too dry.
Step 3: Pour and Set
Pour concrete into your larger mold, insert the smaller mold inside, and let it cure for 24-48 hours. Patience is everything here.
Step 4: Demold and Finish
Carefully remove the molds. Seal the concrete with a concrete sealer if you want it to last longer. Sand any rough edges.
Step 5: Plant and Display
Add drainage holes if needed, fill with soil, and display your minimal green friends. Stack different sized planters for visual interest.
Project 4: Macramé Wall Hanging or Plant Hanger
Yes, macramé is very much still a thing in Scandinavian design, and for good reason.
Step 1: Learn Basic Knots
You only need square knots and half hitches. There are hundreds of YouTube tutorials — pick one and follow along. Seriously, it's not hard.
Step 2: Source Quality Cord
Use natural cotton or jute rope in neutral colors. The thicker the rope, the more forgiving it is for beginners.
Step 3: Create Your Design
Start simple — maybe a small plant hanger or wall hanging. Measure your cord generously; you can always trim excess.
Step 4: Test and Refine
Practice your knots on a small scale first. Once you've got the feel for it, create your actual piece.
Step 5: Mount and Enjoy
Use quality wall anchors to hang your creation. It's functional art, and it's completely handmade by you.
Pro Tips
Embrace Negative Space: The biggest mistake people make with Scandinavian design is over-decorating. Resist the urge. Empty space is intentional, not a problem to solve.
Stick to a Neutral Palette: Whites, creams, soft grays, and warm wood tones are your friends. When you do add color, make it one accent color in small doses — maybe a muted blue or sage green.
Invest in Quality Basics: Your base pieces should be solid. This means good paint, sturdy shelves, and well-made hardware. These aren't places to skimp.
Layer Textures: Linen, wool, wood, concrete, rope — mixing natural materials keeps the space from feeling cold. Scandinavian design might look minimal, but it feels incredibly cozy.
Plants Are Non-Negotiable: They soften the minimalism and bring life to the space. Go for simple green plants in your DIY concrete planters or simple ceramic pots.
Check Out Better Homes & Gardens & Gardens for Inspiration: Their Scandinavian collections often have affordable pieces you can style alongside your DIY projects.
Cost Breakdown
← Scroll to see full table →
| Project | Materials Cost | Time Required | Difficulty Level |
|---|---|---|---|
| Shiplap Accent Wall (8x10 ft) | $200-350 | 6-10 hours | Intermediate |
| Floating Shelves (3 shelves) | $150-250 | 4-6 hours | Intermediate |


