Modern Balcony Inspiration for Renters: Transform Your Outdoor Space Without Losing Your Deposit
Look, I get it. You're renting, which means your balcony probably feels like an afterthought — a concrete slab where you toss forgotten garden tools and that patio chair from 2019. But here's the thing: your balcony doesn't have to be depressing. Even with a strict landlord and zero desire to install permanent fixtures, you can absolutely create a modern outdoor retreat that actually makes you want to spend time outside. I'm talking mood lighting, greenery that doesn't look sad, and furniture that doesn't scream "I gave up on life."
Honestly, some of my favorite outdoor makeovers have been renter-friendly projects. Why? Because they force you to get creative. You can't drill into walls, you can't paint, and you can't install those fancy built-in planters — so instead, you work with what's actually possible. The result? Spaces that feel intentional, flexible, and genuinely stylish. No permanent damage, no lost deposits, just a balcony that actually reflects your personality.
In this guide, I'm breaking down exactly how to create a modern balcony that works for renters. We're talking furniture placement, budget-friendly decor, and plants that'll actually survive your probably-too-busy-to-water schedule. Let's make your balcony a place you love.
What You'll Need
Before you start, grab these items. Most are available at The The Home Depot, and honestly, you probably already have some of them lying around.
- Lightweight furniture — modular sectional or bistro chairs ($200-$600)
- Outdoor rugs — weatherproof, renter-friendly ($40-$150)
- String lights or LED strips — plug-in style ($15-$60)
- Planters in various sizes — ceramic or resin, no drainage required ($10-$80 each)
- Low-maintenance plants — pothos, snake plants, succulents ($5-$25 each)
- Throw pillows and blankets — outdoor fabric ($20-$50 each)
- Storage bench or side table — doubles as seating ($80-$200)
- Privacy screen or climbing vines — removable trellis ($60-$150)
- Outdoor speakers — Bluetooth optional ($30-$100)
- Paint for old furniture — exterior spray paint or brush-on ($8-$25)
Step-by-Step Guide
Step 1: Assess Your Space and Plan Layout
Start by measuring your balcony — seriously, grab a tape measure. Figure out the dimensions, note where the sun hits throughout the day, and identify any dead zones. The size of your space determines everything else. A tiny 6x8 balcony needs different furniture than a sprawling 12x16 one. Sketch it out (or just take photos with notes on your phone). According to HGTV, good layout starts with understanding your flow and function.
Ask yourself: Do I want this to be a lounge space, a dining area, or a little garden nook? Most renters benefit from multi-functional furniture that can adapt as your needs change. You're not stuck with one vision forever — flexibility is your friend here.
Step 2: Choose Your Foundation Furniture
This is where you set the tone for the whole space. Pick one or two key pieces that align with that "modern" aesthetic you're going for — think clean lines, neutral colors, and minimal fuss. A sectional corner piece with gray cushions and straight legs says "I have my life together." A mismatched collection of wicker chairs says "I found these at a garage sale and made them work," which is fine, but maybe not the vibe we're going for here.
Look for furniture that's lightweight (you might need to move it for cleaning) and weather-resistant. Check The Home Depot's outdoor furniture section — they've got solid mid-range options that don't feel cheap. Budget around $300-$500 for a starter setup if you're keeping it simple.
Step 3: Layer in Soft Furnishings
Okay, this is where your balcony stops looking like a showroom and starts feeling like home. Throw an outdoor rug down — it instantly defines the space and makes it feel intentional. Then add pillows and blankets. Choose a color palette: maybe it's neutrals with pops of deep green, or cool grays with warm terracotta accents. Better Homes & Gardens & Gardens has great inspiration galleries for this stuff.
 Boho DIY Room Makeover: Full Revamp Under $200
Don't go crazy with patterns, though. Modern design thrives on restraint. Stick to two or three colors maximum and let texture do the talking — mix smooth fabrics with chunky knits, polished metal with natural wood.
Step 4: Add Greenery Strategically
Plants make everything better. No exceptions. Here's the trick: choose plants that tolerate your actual lifestyle. If you forget to water things, go with succulents and snake plants. They're nearly impossible to kill. If you're more attentive, pothos or small ferns add movement and life without demanding constant attention.
Group plants in odd numbers (three, five, seven) at varying heights. Put tall plants in the corners to create privacy and scale. Use planters that complement your color scheme — all the same style and color looks more intentional and modern than mismatched pots. Skip the plastic if you can; ceramic, concrete, or resin planters feel way more elevated.
Step 5: Create Ambiance with Lighting
This is honestly the secret weapon. String lights draped overhead, a small LED strip along the edge, or even candles in glass holders completely transform your balcony once the sun sets. Plug-in options are your best friend since you can't install anything permanent.
Avoid harsh overhead lights. We're going for cozy and sophisticated, not interrogation room. Warm white or soft amber tones work best. A few solar lanterns scattered around add depth without requiring any electrical work.
Step 6: Address Privacy (If Needed)
If your balcony faces a busy street or neighboring buildings, add a removable privacy screen or trellis on one side. They're affordable, take about 10 minutes to set up, and create instant visual interest. You can even train climbing plants through them — pothos grows fast and looks stunning.
Step 7: Final Touches and Styling
Add a few decorative elements that make the space feel curated. A small side table for drinks and books, a weather-resistant basket for throw blankets, maybe some outdoor artwork. Keep it minimal, though — modern design is about negative space. Every item should earn its spot.
Pro Tips
- Use command hooks and damage-free adhesive strips: These let you hang string lights or small artwork without nails or screws. They peel off cleanly when you move out.
- Go vertical with plants: If floor space is tight, hang planters from the railing or use wall-mounted shelves. It opens up the space and looks intentional.
- Invest in a rug first: More than furniture, a good outdoor rug defines the zone and pulls the whole look together. It's the anchor of your space.
- Keep furniture minimal but intentional: Two really good pieces beat five mediocre ones. Quality over quantity — it's more modern and less cluttered.
- Consider your climate: In hot, sunny areas, add a shade solution like a motorized retractable shade or lightweight umbrella. You'll actually use the space.
- Bring small appliances outside: A compact outdoor speaker, a mini fridge, or even a tiny espresso maker can elevate the whole experience.
- Paint old furniture instead of replacing it: Got beat-up patio chairs? Exterior spray paint is your secret weapon. Transform them for under $20.
Cost Breakdown
← Scroll to see full table →
| Item | Quantity | Price Range | Total |
|---|---|---|---|
| Outdoor Furniture (chairs/sectional) | 1 set | $250-$500 | $375 |
| Outdoor Rug | 1 | $50-$120 | $85 |
| String Lights | 1 | $20-$60 | $40 |
| Planters (set of 4-5) | 1 set | $30-$80 | $55 |
| Plants | 5-7 | $5-$25 each | $75 |
| Throw Pillows | 3-4 | $20-$40 each | $100 |
| Side Table/Storage Bench | 1 | $80-$200 | $140 |
Privacy
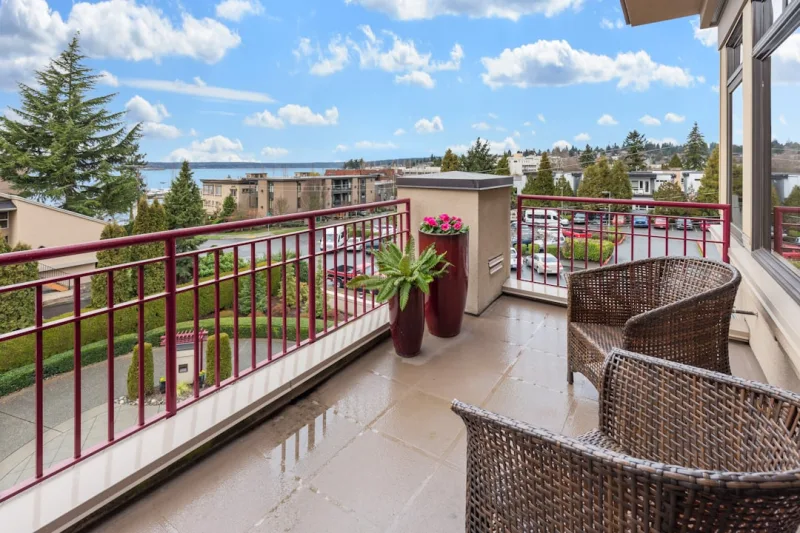
📷 Photo by Francesca Tosolini on Unsplash |


