Quiet Luxury Garage Inspiration for Renters: Transform Your Space Without the Commitment
Look, I get it. You're renting, which means your garage probably feels more like a storage graveyard than the sophisticated space you actually want. But here's the thing — you don't need to own your place to create something genuinely beautiful. Quiet luxury is having a moment right now, and it's honestly the perfect aesthetic for renters because it's all about restraint, quality, and timeless vibes. No flashy maximalism required.
The beauty of quiet luxury design is that it whispers instead of shouts. Think neutral tones, high-quality materials, intentional spacing, and that "I wasn't trying too hard" feeling that somehow took exactly the right amount of effort. Your garage can absolutely be that space — the one where you actually want to park your car, work on projects, or just spend time. And the best part? Everything I'm sharing with you today is renter-friendly, meaning no permanent damage and zero landlord drama.
I've helped plenty of renters completely reimagine their garages without sacrificing their security deposit, and I'm excited to walk you through exactly how to do it. This isn't about dropping a fortune — it's about being intentional with your dollars and creating a space that feels like it belongs in an interior design magazine, not a Pinterest fail compilation.
What You'll Need
Before we dive into the actual transformation, let's talk materials. I'm keeping everything removable and damage-free because, honestly, that's the renter's superpower.
- Neutral Paint (Sample Quarts) — $5-15 each. I recommend Benjamin Moore's "Dove White" or Sherwin-Williams' "Accessible Beige" from The The Home Depot. Yes, you can paint walls with your landlord's permission, but sample quarts let you test first.
- Peel-and-Stick Wallpaper — $25-50 per roll. This is your renter MVP. Brands like Spoonflower have gorgeous neutral options.
- Epoxy Floor Coating (DIY Kit) — $150-300. Rust-Oleum makes solid options at The Home Depot. It's not permanent and looks incredibly polished.
- Floating Shelves (Removable) — $40-120 per shelf. These can be mounted without studs using heavy-duty adhesive strips or command hooks.
- Track Lighting System — $80-200. Plug-in options exist, but hardwired looks more luxe.
- Area Rug (High-Quality Wool) — $150-400. Defines the space and adds warmth instantly. Check out options at Better Homes & Gardens & Gardens.
- Storage Baskets (Natural Materials) — $30-80 each. Rattan, jute, or woven wood adds texture without clutter.
- Minimal Decor (Metal Planters, Artwork) — $50-150. Keep it sparse and intentional.
- Hardware (Hooks, Brackets) — $30-60. Command hooks and adhesive solutions are your friends.
- Paint Supplies (Brushes, Drop Cloth, Primer) — $40-80.
Step-by-Step Guide
Step 1: Declutter and Assess Your Space
I'm going to be real with you — you can't create quiet luxury in a space that's packed with stuff. Go through everything. Everything. You probably don't need half of what's currently taking up square footage. Pull out items, sort into keep-donate-trash piles, and be honest about what's actually serving a purpose.
Once you've cleared things out, stand back and look at the bones of your garage. Natural light? Where are the electrical outlets? What's the condition of the floor? These observations will inform every decision moving forward. Take photos — seriously, before photos are everything.
Step 2: Plan Your Color Palette
Quiet luxury lives in a neutral neighborhood. I'm talking soft grays, warm whites, creams, and maybe one accent tone — think warm black or deep charcoal. Pick three colors maximum. Go grab some paint samples from The Home Depot and paint swatches directly on your garage walls. Watch them in different lighting throughout the day. This matters more than you think.
Once you've settled on your palette, everything else follows. Your rug, your baskets, your accessories — they all should harmonize with these core tones.
Step 3: Address the Floor
The floor is honestly the hero of a quiet luxury garage. If you've got concrete that's seen better days, an epoxy coating transforms everything. These DIY kits from brands like Rust-Oleum (available at The Home Depot) are actually manageable. You're looking at a weekend project, maximum.
Clean thoroughly, follow the kit instructions to the letter, and let it cure properly. The result? A seamless, sophisticated surface that looks intentional and high-end. Bonus: it's actually easier to keep clean, which feeds directly into that luxe aesthetic.
Step 4: Install Removable Shelving
 Budget Apartment Renovation: DIY Hacks That Actually Work
This is where you create actual function without permanent damage. Those floating shelves? Mount them using heavy-duty adhesive strips or command-style solutions. Space them thoughtfully — don't just cram shelves everywhere. Negative space is a quiet luxury essential.
Arrange your shelves in a way that feels intentional. Maybe one wall holds shallow shelves for storage, another wall showcases a few carefully curated pieces. HGTV has fantastic tutorials on this if you need visual guidance during installation.
Step 5: Lighting is Everything
Honestly, this might be the most underrated element of the whole transformation. Garage lighting is typically terrible — those bare bulbs are basically the enemy of sophistication. Upgrade to a track lighting system or install some statement-worthy pendant lights if your landlord allows it.
If hardwiring isn't an option, even strategically placed plug-in lamps completely change the vibe. Look for fixtures with clean lines and warm-toned bulbs. The difference between a garage lit by harsh overhead fluorescents and one with intentional, warm lighting is literally everything.
Step 6: Layer with Textiles and Warmth
A high-quality wool area rug in a neutral tone makes your garage feel like an actual room, not just a parking spot. Add some linen curtains if you have windows — or even just hang them as a design element. Textiles create warmth and prevent the space from feeling cold or sterile.
This is where quiet luxury really shines — it's comfortable and inviting, not precious or untouchable. You should want to spend time here.
Step 7: Curate Your Accessories
Less is genuinely more. Select a few beautiful items that actually reflect your personality or aesthetic. Maybe it's a few ceramic vases in your neutral palette, some gallery-style artwork, a potted plant or two. The key is intention — every item should have a reason for being there.
Styling your shelves? Follow the rule of three. Three books, three objects, some negative space. This creates rhythm and that effortlessly curated feeling that quiet luxury is all about.
Pro Tips
- Command is Your Friend: Those adhesive strips and hooks are renter MVPs. They hold up way more weight than people think, and they come off cleanly. I'm not exaggerating when I say these have changed my renting life.
- Invest in One Statement Piece: Maybe it's an excellent rug, maybe it's a beautiful shelving unit. One quality piece is better than five mediocre ones. This is quiet luxury 101.
- Create Zones: Even if your garage is small, create distinct areas — a parking zone, a work zone, a display zone. This makes the space feel thoughtfully designed rather than haphazard.
- Use Vertical Space: When you can't go wide, go up. Wall-mounted storage, floating shelves, and tall narrow furniture make even compact garages feel spacious and intentional.
- Warm Lighting is Non-Negotiable: Cool, harsh lighting completely kills quiet luxury vibes. Invest in warm bulbs (2700K color temperature). This single change is transformative.
- Keep a Simple Maintenance Routine: Quiet luxury looks effortless because it's clean and organized. A quick 10-minute tidy weekly keeps everything looking curated instead of cluttered.
- Document Everything: Take photos of the original space before you start and after you finish. You'll need these when you move out, and honestly, they're proof of your renting genius.
Cost Breakdown
← Scroll to see full table →
| Item | Estimated Cost | Notes |
|---|---|---|
| Paint & Supplies | $40-80 | Sample quarts + application supplies |
| Epoxy Floor Coating | $150-300 | DIY kit from The Home Depot |
| Floating Shelves (2-3) | $80-360 | $40-120 per shelf |
| Track Lighting | $80-200 | Basic system, can go higher for luxury brands |
| Area Rug | $150-400 | Quality wool, neutral tone |
| Storage Baskets (3-4) | $90-320 | $30-80 per basket |
| Decor & Accessories | $50-150 | Planters, artwork, minimal styling |
| Hardware & Adhesives | $30-60 | Command hooks, brackets, adhesive strips |
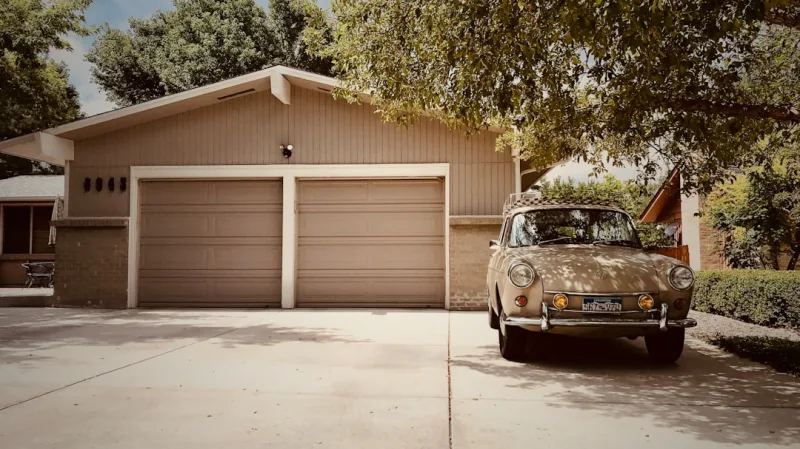
| TOTAL ESTIMATED COST | $670-1,870 | Depending on choices and existing items 📷 Photo by John Paulsen on Unsplash |


