High End Apartment Upgrade with DIY Hacks: Luxury on a Budget
There's something magical about walking into your apartment and feeling like you've stepped into a high-end boutique hotel or a magazine spread from Better Homes & Gardens and Gardens. That feeling of luxury, of coming home to a space that makes your heart happy—it doesn't have to cost a fortune. I remember standing in my own apartment a few years ago, surrounded by builder-grade beige walls and basic fixtures, feeling frustrated that my budget wouldn't stretch to those gorgeous designer apartments I kept pinning on Pinterest. But then I realized something: the most beautiful spaces aren't always the most expensive ones. They're the ones filled with intention, creativity, and a little bit of elbow grease. With the right DIY hacks and strategic upgrades, you can transform your apartment into a high-end sanctuary without breaking the bank. This isn't about cutting corners—it's about being smart, creative, and knowing exactly where to invest your money for maximum impact.
In this guide, you'll discover exactly how to elevate your apartment using DIY upgrades that deliver luxury vibes. We'll walk through the planning process, break down realistic budgets, and show you step-by-step upgrades that make the biggest difference. Whether you're renting and need temporary solutions or own your space outright, these hacks work for everyone. You'll learn which products from IKEA, Amazon, The The Home Depot, and Target will give you that high-end look, plus the expert tips that interior designers actually use to create luxury spaces on modest budgets. By the end, you'll have a complete roadmap to transform your apartment into the cozy, sophisticated haven you've always wanted.
Understanding High End Apartment Upgrade with DIY Hacks
A high-end apartment upgrade with DIY hacks is all about strategic improvements that elevate your space's aesthetic and functionality without the decorator price tag. It means knowing which upgrades deliver the biggest visual impact, which products can look expensive even when they're not, and which projects you can tackle yourself to save money while maintaining quality results.The truth is, luxury doesn't live in price tags—it lives in details. A high-end space feels expensive because of things like lighting, textures, color coordination, and thoughtful organization. Most people think they need custom furniture or designer labels to achieve this look, but that's simply not true. A $30 Target throw pillow styled correctly next to a thrifted brass lamp and a fresh coat of paint can look just as luxurious as something costing five times the price.Why does this matter? Because your apartment is where you spend a significant portion of your life. You deserve to love that space. You deserve to feel like the best version of yourself when you're surrounded by beauty and thoughtfulness. That boost in mood, that sense of calm when you come home—it's not frivolous. It's essential for your wellbeing.Common mistakes people make when trying to achieve this look include spreading their budget too thin across many mediocre upgrades, underestimating the power of paint and lighting, ignoring their rental restrictions, and not having a cohesive style vision before shopping. They'll buy cute things they love individually that don't work together, creating a cluttered, discordant space instead of a curated, intentional one. The secret is being selective, planning ahead, and understanding that sometimes doing one thing beautifully beats doing ten things adequately.
Planning Guide for High End Apartment Upgrade with DIY Hacks
Before you buy a single item, you need a solid plan. This is the difference between scattered, regrettable purchases and a cohesive, gorgeous apartment that looks like you hired a designer. Start by assessing your current space honestly. Walk through each room and identify what's working and what's dragging the whole vibe down. Is it the lighting? The color? The clutter? The worn-out furniture? Take photos of your space in natural light, afternoon light, and evening light—lighting completely changes how a room feels and looks.Next, find your style inspiration. Spend time on Pinterest, Instagram, and design blogs collecting images of spaces that make you feel something. Don't worry if they seem inconsistent at first—patterns will emerge. You might notice you're drawn to warm, cozy spaces with lots of texture, or maybe you prefer clean, modern lines with pops of color. This step is crucial because it ensures your upgrades will reflect your actual taste, not what you think you're supposed to like.Create a mood board, even if it's just a Pinterest board or a folder on your phone. Look for common threads: Are the spaces mostly warm neutrals or bold colors? What kinds of materials show up repeatedly—wood, metal, fabric, glass? What's the lighting situation in the spaces you love? This visual research will inform every purchase you make going forward.Then, audit your budget and timeline. How much can you realistically spend, and over what timeframe? Are you doing this all at once or spreading it out over several months? Both approaches work, but knowing this helps you prioritize. Finally, take measurements of your space and note any limitations (landlord restrictions, awkward layouts, natural light issues, existing fixtures you can't change). Work within these constraints rather than fighting them.
Pre-Upgrade Planning Checklist
- ☐ Take honest before photos of each room in different lighting
- ☐ Create a Pinterest mood board or design inspiration folder
- ☐ Identify your design style (modern, traditional, eclectic, minimalist, etc.)
- ☐ Make a list of what's NOT working in your current space
- ☐ Take measurements of rooms, walls, windows, and doorways
- ☐ Establish your total budget and monthly spending capacity
- ☐ Note any landlord restrictions or permanent fixture limitations
- ☐ Prioritize which rooms or problem areas to tackle first

Budget Breakdown
← Scroll to see full table →
| Under $50 | Price | Where to Buy |
|---|---|---|
| Paint (quart size for accent wall) | $12-$20 | The Home Depot |
| Throw pillows (set of 2) | $20-$35 | Target, IKEA |
| Curtain rods and simple panels | $25-$45 | IKEA, Amazon |
| Wall decor (canvas prints, mirrors) | $15-$40 | Amazon, Target |
| Peel-and-stick wallpaper (single roll) | $20-$30 | Amazon |
| Shelf styling accessories | $25-$45 | Target, IKEA, The Home Depot |
← Scroll to see full table →
| $50-$200 | Price | Where to Buy |
|---|---|---|
| Area rug (5x7 or 6x9) | $75-$150 | Amazon, Target, IKEA |
| Floating shelves with hardware | $60-$120 | The Home Depot, IKEA |
| Statement lighting fixture | $80-$180 | Amazon, Target, IKEA |
| Bookcase or storage unit | $100-$180 | IKEA, Target |
| Paint multiple rooms (full gallon) | $90-$150 | The Home Depot |
| Throw blanket and pillow set | $50-$120 | Target, Amazon |
← Scroll to see full table →
| $200+ | Price Range | Where to Buy |
|---|---|---|
| Quality sofa or sectional | $300-$800 | IKEA, Amazon, Article |
| Dining table set | $250-$600 | IKEA, Wayfair, Target |
| Bedroom bed frame and mattress | $400-$1000 | Amazon, IKEA, Wayfair |
| Complete lighting overhaul (multiple fixtures) | $300-$800 | The Home Depot, Amazon, Target |
| Window treatment set (multiple rooms) | $200-$500 | Target, IKEA, Amazon |
| Kitchen or bathroom upgrade project | $250-$1000+ | The Home Depot, IKEA |
When it comes to budgeting for high-end upgrades, the smartest approach is to invest in items you'll see and use every single day. Your bed, your sofa, your lighting—these are worth spending more on because they directly impact your daily experience and longevity. Meanwhile, decorative items like throw pillows, wall art, and accessories are perfect places to find budget-friendly options that look expensive when styled correctly.Think of your budget as an investment strategy. That $15 pillow from Target will look just as good as a $150 designer pillow when it's part of a well-curated vignette. The difference is in styling, not the price tag. A $30 rug from Amazon paired with quality furniture and intentional decor looks infinitely better than a $300 rug in a cluttered, poorly lit space. Your money should follow your lifestyle. If you work from home and spend hours on your sofa, invest in a quality one. If you entertain often, a beautiful dining table is worth the splurge. If you're in bed eight hours a day, your bed deserves investment. Everything else is flexible.
Step-by-Step Guide
Step 1: Perfect Your Paint
Paint is the single most impactful, budget-friendly upgrade you can make. A fresh coat of paint costs as little as $15-$30 per room but transforms the entire space. Choose a color that matches your mood board and complements your lighting. Warm whites and soft neutrals work in almost any space, but don't be afraid of deeper tones—a moody sage, soft charcoal, or warm taupe creates that high-end, intentional feel. Paint one accent wall if you're nervous, or go full room for maximum impact. The Home Depot has excellent color-matching services, and their staff can help you choose finishes (matte, eggshell, satin) that work for different rooms. Fresh paint alone will make your apartment feel brand new and designer-approved.
Step 2: Upgrade Your Lighting
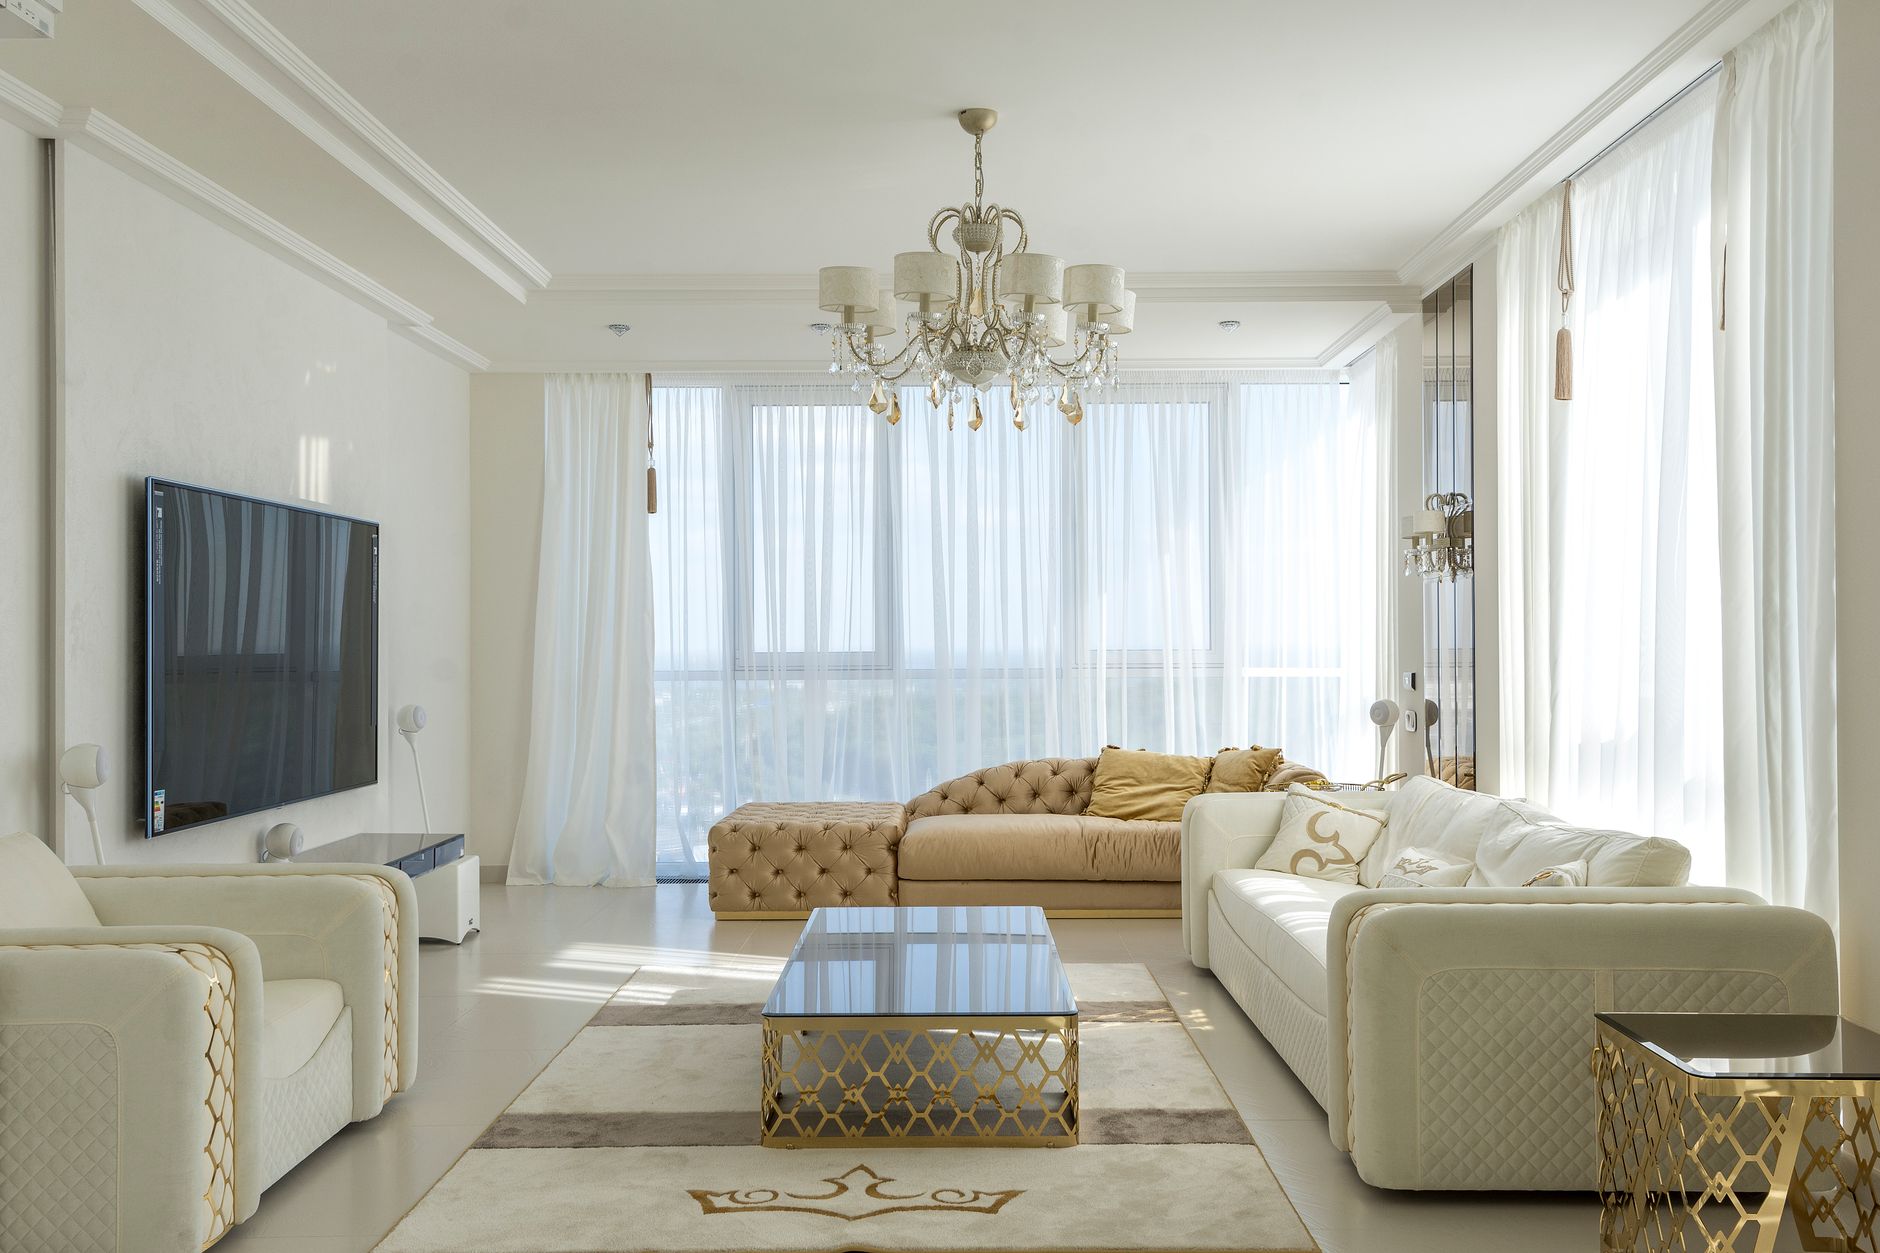
Lighting is the secret weapon of luxury interiors. Harsh, single-source overhead lighting is the enemy of a high-end apartment. Start by adding layers: ambient lighting (overhead or recessed), task lighting (desk lamps, reading lights), and accent lighting (wall sconces, decorative pieces). Swap out basic light fixtures for statement pieces that reflect your style. Amazon has incredible options for elegant chandeliers, modern pendant lights, and sculptural table lamps in every price range. Add dimmer switches to control the mood. Consider string lights or LED candles for cozy evenings. Soft, warm lighting (2700K color temperature) makes everything feel more luxurious and inviting than bright white light.
Step 3: Install Window Treatments
Windows frame your entire room and dramatically affect how a space feels. Bare windows look temporary and unfinished, while dressed windows feel intentional and designed. You don't need expensive custom drapes—IKEA and Target have beautiful, affordable curtain rods and panels. Linen or linen-look fabric in neutral colors looks high-end and expensive. Install floor-to-ceiling panels to make ceilings feel taller and windows larger. Even if you're renting, tension rods that damage nothing work beautifully. Consider layering with sheer panels under heavier drapes for that luxe, spa-like quality. Proper window treatments instantly elevate any room.
Step 4: Add Layers and Texture
High-end spaces never feel flat—they're filled with layers of different textures and materials. Add a quality area rug in a warm, neutral tone or subtle pattern. Layer throw blankets and pillows in complementary colors and textures—velvet, linen, faux fur, chunky knit. Mix metals on shelves and side tables (brass, chrome, rose gold) for visual interest. The goal is depth and sophistication. Every surface should have intentional layering: nightstands need a lamp, a book, and a decorative object; shelves need a mix of books, plants, and pretty boxes. This curated abundance is what separates high-end spaces from empty or cluttered ones.
Step 5: Style Shelves and Surfaces
🔗 You Might Also Like
If you have bookcases, shelves, or nightstands, styling them correctly makes an enormous difference in perceived luxury. Use the rule of three: group items in odd numbers for visual appeal. Alternate vertical books with horizontal stacks. Mix personal items (photos, mementos) with decorative objects (plants, candles, pretty boxes). Add a small


