Designer Kitchen Upgrade That Looks Expensive (Without Breaking the Bank)
Listen, I get it. You scroll through Instagram and see those stunning kitchens with marble countertops, designer backsplashes, and custom cabinetry — and you think, "Yeah, that's not happening on my budget." But here's the thing... you'd be surprised how close you can get to that luxury look without dropping $50,000. I've been renovating kitchens for over a decade, and honestly, the secret isn't spending more money. It's spending smarter.
The best designer kitchens aren't always the most expensive ones. They're the ones where every dollar was thoughtfully placed. A fresh coat of paint on your cabinets, some quality hardware, strategic lighting, and a few knockout design choices can completely transform your space. You'll walk in and feel like you stepped into a magazine spread — and your guests won't know you didn't hire an actual designer.
So let's talk about how to pull this off. I'm going to walk you through the upgrades that give you the most bang for your buck, what materials actually matter, and which ones you can skip. By the end of this, you'll have a realistic roadmap to that kitchen you've been dreaming about.
What You'll Need
Before you hit up The The Home Depot or your local supplier, let's talk specifics. These are the items that'll actually make a difference:
- Cabinet Paint or Stain: $150-$400 (Benjamin Moore or Sherwin-Williams quality)
- Cabinet Hardware (Knobs & Pulls): $200-$600 (quality matters here, trust me)
- Backsplash Tile: $300-$800 (peel-and-stick or traditional installation)
- Countertop Material: $400-$1,500 (depending on material choice)
- Pendant Lights: $250-$600 (3-4 fixtures over island)
- Faucet Upgrade: $200-$500 (functional and beautiful)
- Open Shelving Materials: $100-$300 (wood, brackets, hardware)
- Paint for Walls: $50-$100
- Grout & Adhesive: $30-$80
- Installation Tools (if DIY): $100-$200
Total Estimated Budget: $1,780-$5,180
Step-by-Step Guide
Step 1: Paint Your Cabinets (The Game Changer)
Okay, this is where the magic happens. Your cabinets take up more visual real estate than anything else in your kitchen — so when you refresh them, everything suddenly looks intentional and expensive. I'm talking about either a sophisticated matte black, deep navy, warm white, or even sage green. The key is picking a color that feels timeless, not trendy.
Here's my process: Clean everything thoroughly with TSP (trisodium phosphate), sand lightly with 150-grit sandpaper, and prime with a quality bonding primer. Then apply two coats of cabinet-specific paint. Don't cheap out on the paint — Benjamin Moore's Cabinet Coat or Sherwin-Williams ProClassic will last you 10+ years. Budget two weeks for this project if you're doing it yourself, because you need proper drying time between coats.
Step 2: Upgrade Your Hardware
New hardware is like jewelry for your kitchen. Swap out those builder-grade pulls for something with real character. I'm obsessed with brushed gold, matte black, or polished brass right now — they feel so much more curated than chrome. This single change makes cabinets look like you spent thousands more than you actually did.
Measure your hole spacing first (typically 3 inches for most cabinets), order your hardware, and swap them out. Takes maybe an hour for an entire kitchen. Honestly, the ROI on this is incredible.
Step 3: Install a Statement Backsplash
Your backsplash is your design moment. This is where personality shines through. Options? Endless. Subway tile with a fun grout color, geometric patterned tiles, or even peel-and-stick options (yes, they actually look good now). I've been recommending The Home Depot's selection of peel-and-stick backsplash because they're genuinely impressive, and installation is literally just clean, peel, and stick.
If you're doing traditional tile, here's the process: Measure your wall, find the center point, snap chalk lines, apply thin-set mortar with a notched trowel, press tiles firmly, wait 24 hours, then grout. The grout color matters as much as the tile — dark grout makes patterns pop, light grout feels clean and modern.
Step 4: Add Pendant Lighting Over Your Island
Good lighting isn't just functional — it's transformational. Three pendant lights above an island? That's designer 101. Pick fixtures that complement your aesthetic. Mid-century modern, industrial, farmhouse, glam — whatever vibe you're going for, the right pendants complete the look.
 Budget Apartment Renovation: DIY Hacks That Actually Work
Install them 12-18 inches apart, hung 30-36 inches above your countertop. If you're not comfortable with electrical work, hire an electrician for this one. It's worth the professional touch.
Step 5: Upgrade Your Countertops (Strategic Approach)
Here's where I get real with you — you don't need marble everywhere. But a marble waterfall edge on your island with practical quartz elsewhere? That's the designer move. Or go all-in on a beautiful butcher block with a subtle undermount sink. Pick one hero material and build around it.
Installation depends on your material. Laminate is DIY-friendly and cheap. Quartz and natural stone should be professionally installed. Budget accordingly, but remember — this is visible, so quality matters.
Step 6: Replace Your Faucet
A polished or brushed faucet in a quality finish feels expensive immediately. Swapping out an old builder-grade faucet for something like a Kohler or Moen in a contemporary style takes 30 minutes and costs way less than people think. It's one of those upgrades where the impact far outweighs the effort.
Step 7: Paint Your Walls & Add Open Shelving
Fresh, neutral wall paint (think warm whites, soft greiges, or pale blues) makes everything feel cohesive. And if you have wall space, consider floating shelves with attractive brackets. Style them with cookbooks, greenery, and a few beautiful dishware pieces. It looks intentional and polished.
Pro Tips
The Layering Principle: Designer kitchens don't rely on one expensive element. They layer texture, color, and material. Paint + hardware + backsplash + lighting = expensive-looking kitchen. One marble countertop alone? Looks incomplete.
Don't Ignore Hardware Finish Consistency: Match your faucet, pendant light fixtures, and cabinet hardware finishes. Mixing too many finishes reads chaotic, not designer. Stick to two complementary metals maximum.
Grout Color is a Secret Weapon: Seriously. A contrasting grout color on your backsplash adds visual interest and depth. Don't just default to white.
Lighting is Everything: Under-cabinet lighting, pendant lights, and overhead fixtures create layers. Good lighting makes even modest upgrades look premium.
Source Inspiration, Not Ideas: Spend time on HGTV and Better Homes & Gardens & Gardens identifying what you actually love about expensive kitchens. Is it the color palette? The finishes? The layout? Pin down your aesthetic before shopping.
Cost Breakdown
← Scroll to see full table →
| Upgrade | Budget Range | Impact Level |
|---|---|---|
| Cabinet Paint & Primer | $150-$400 | ⭐⭐⭐⭐⭐ |
| Cabinet Hardware | $200-$600 | ⭐⭐⭐⭐⭐ |
| Backsplash Tile | $300-$800 | ⭐⭐⭐⭐⭐ |
| Countertop Material | $400-$1,500 | ⭐⭐⭐⭐ |
| Pendant Lighting | $250-$600 | ⭐⭐⭐⭐⭐ |
| Faucet Upgrade | $200-$500 | ⭐⭐⭐⭐ |
| Open Shelving | $100-$300 | ⭐⭐⭐ |
| Wall Paint | $50-$100 | ⭐⭐⭐ |
FAQ
Q: Can I really DIY a cabinet paint job without it looking amateur?
A: Absolutely, but patience is everything. The key is proper surface prep (cleaning and sanding), using quality paint, and allowing adequate drying time. Most people rush this. Don't. Give yourself at least two weeks. If you're nervous, test it on one or two cabinet doors first. Honestly, cabinet painting has become so approachable that I recommend most people
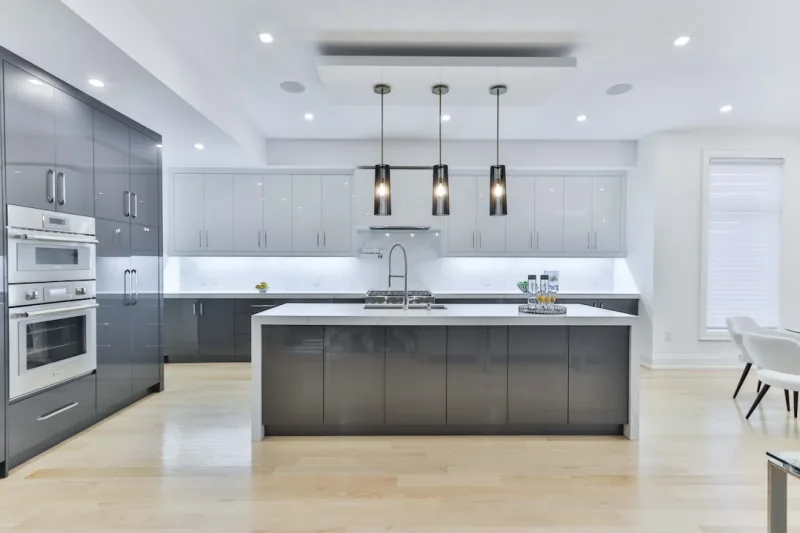
📷 Photo by Lotus Design N Print on Unsplash


