
High End Balcony Inspiration for Renters: Create Luxury Outdoor Living Without Permanent Changes
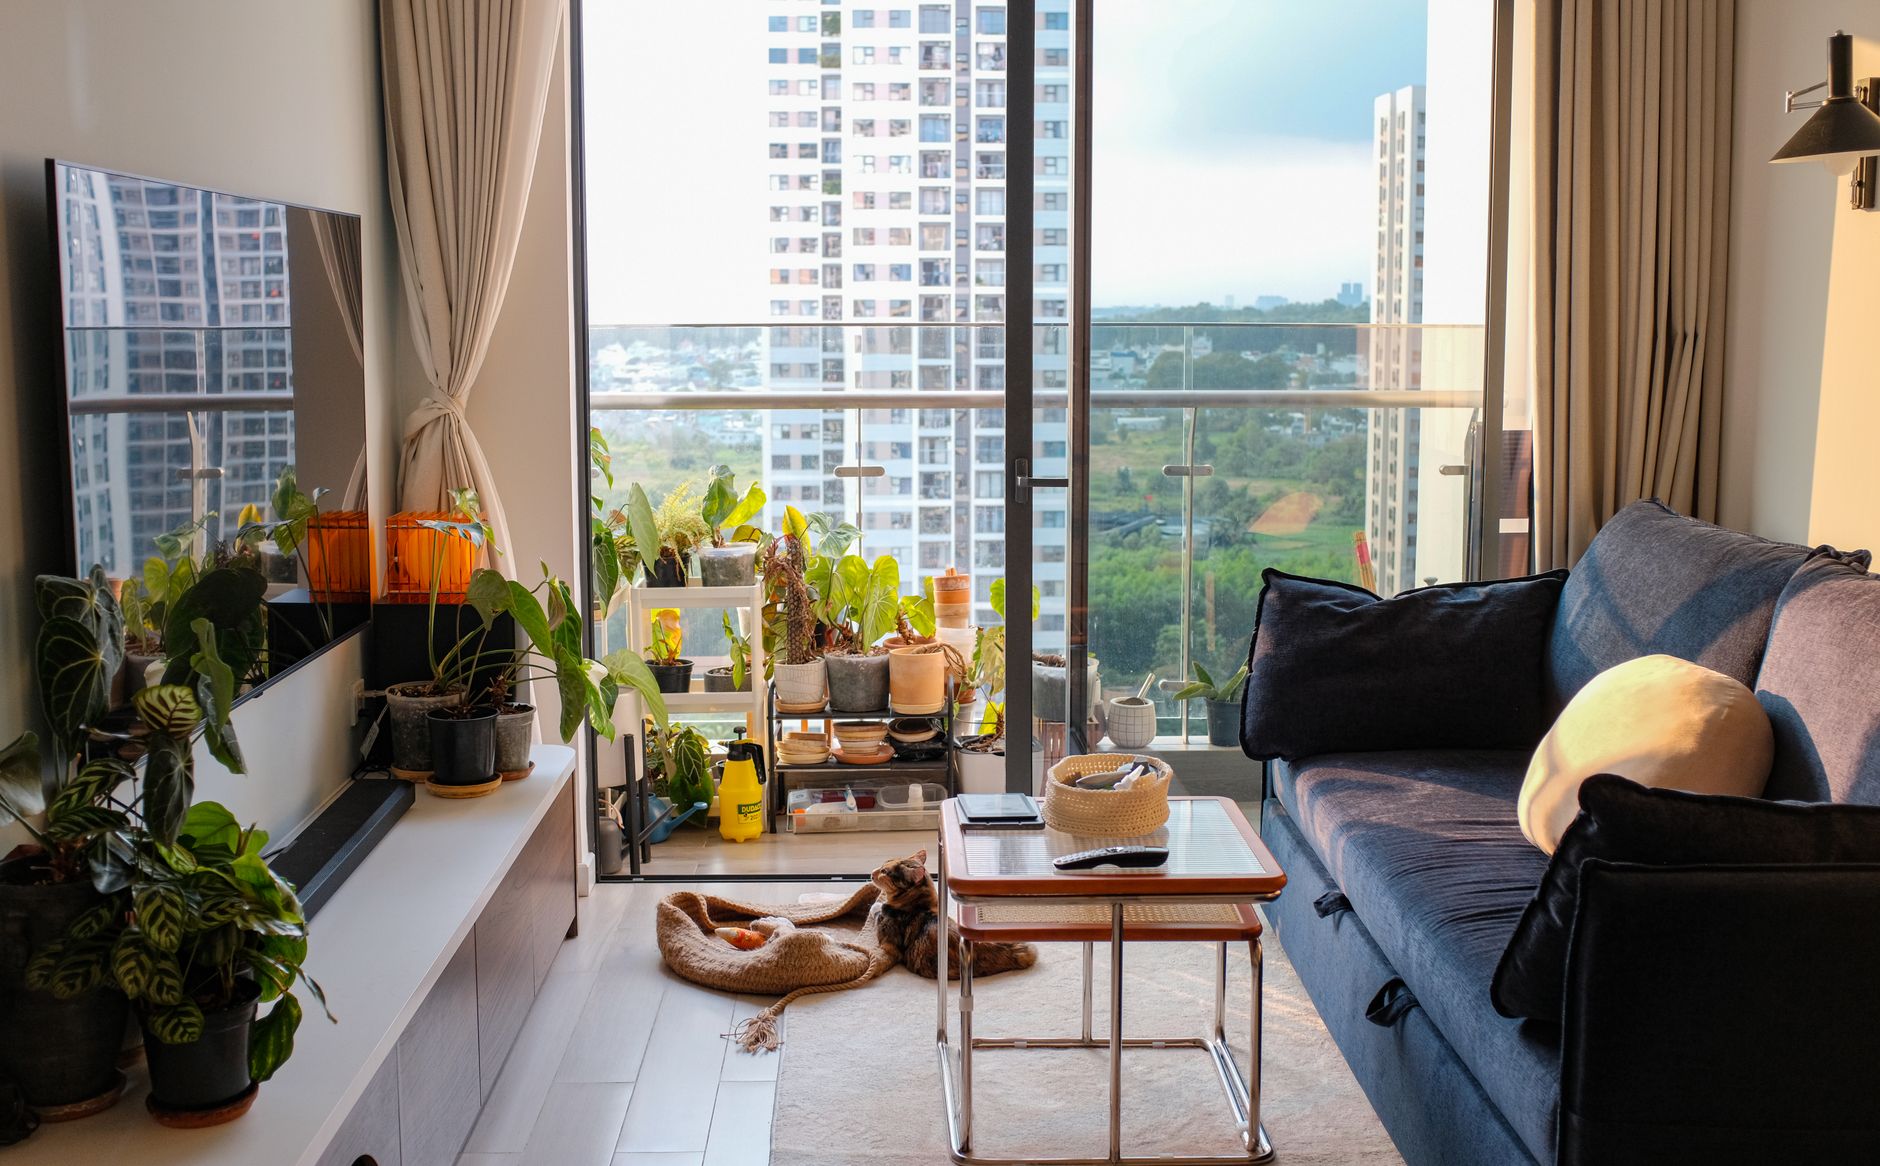
There's something truly magical about stepping onto your own private outdoor space with a perfectly styled balcony. As renters, we often feel stuck between the desire for a beautiful, Instagram-worthy retreat and the reality of not being able to make permanent changes. But here's the secret that's changing the game for renters everywhere: you absolutely can create a high-end, luxurious balcony space that feels like it belongs in a design magazine—without a single nail hole or lease violation. Whether you're dreaming of a cozy Mediterranean escape, a modern minimalist sanctuary, or a lush tropical oasis, your balcony is your blank canvas. The key is knowing which strategic, temporary investments will give you that designer feeling while keeping your security deposit safe. Let's transform that overlooked outdoor space into the sophisticated retreat you've been craving.

In this comprehensive guide, you'll discover everything you need to know about creating a high-end balcony that's perfect for renters. We're talking about renter-friendly solutions that don't compromise on style, luxury touches that are completely removable, and budget strategies that let you achieve expensive-looking results without breaking the bank. You'll learn how to plan your space, choose the right furniture and decor, navigate different design styles, and implement changes step-by-step. By the end, you'll have all the tools and inspiration you need to create an outdoor sanctuary that feels genuinely luxurious and totally your own.
Understanding High End Balcony Inspiration for Renters
So what exactly does "high-end balcony inspiration for renters" mean? It's the beautiful intersection of luxury design aesthetics and practical renting constraints. It's about achieving that elevated, curated look you see on Pinterest and in Better Homes & Gardens and Gardens without installing permanent fixtures or taking on the financial risk of damage deposits. High-end styling for rental balconies focuses on pieces that are statement-making, versatile, and completely removable.
Why does this matter so much right now? More than ever, renters are investing in their living spaces because they're spending more time at home. Your balcony might be the only outdoor space you have access to—and treating it well matters for your mental health, your home's value in terms of livability, and frankly, your Instagram feed. A well-designed balcony becomes an extension of your living room, your morning coffee spot, your reading nook, and your entertainment space all rolled into one.
The most common mistakes renters make? First, they play it too safe, leaving balconies bare and uninviting. Second, they invest in heavy, permanent solutions that make moving complicated. Third, they fail to plan thoughtfully, ending up with a cluttered space that lacks cohesion. Fourth, they ignore the power of layering—using multiple small elements to create impact rather than relying on one big piece. Fifth, they don't consider scale and proportion for their specific space. Sixth, they forget about weather protection and maintenance. And seventh, they shop without a vision, buying beautiful pieces that don't actually work together.
The difference between an ordinary balcony and a high-end one often isn't about spending the most money—it's about strategic choices, intentional curation, and understanding design principles. It's about selecting pieces that feel cohesive, investing in quality where it matters most (like seating and weather-resistant cushions), and knowing how to create layers of interest and comfort. High-end design for renters means being smart about where your money goes and using temporary solutions creatively.
Planning Guide for High End Balcony Inspiration for Renters
Before you buy a single plant or throw pillow, proper planning is essential for creating a high-end rental balcony that actually works. Start by measuring your space carefully—length, width, ceiling height, and sun exposure. Take photos from multiple angles. Note where the sun hits at different times of day and which direction your balcony faces. Understanding your microclimate is crucial because a south-facing balcony with intense afternoon sun needs different solutions than a shaded north-facing space.
Next, decide on your primary purpose. Is this your morning coffee sanctuary? Your evening entertaining space? Your yoga and meditation zone? Your gardening hobby haven? Most high-end balconies serve multiple purposes, but identifying your priority helps shape every decision. Consider your building's rules about weight limits, hanging items, and what the management allows. Some buildings restrict certain types of furniture or require lightweight solutions.
Create a mood board using Pinterest, Instagram, and design websites. Save images that speak to you and identify the common threads. Are you drawn to warm, earthy tones or cool, modern minimalism? Do you love the abundant plant jungle aesthetic or the clean Scandinavian look? Your inspiration board becomes your reference guide, ensuring every piece you purchase supports your overall vision.
Here's your essential planning checklist to ensure you don't miss anything:
- Measure your space: Length, width, ceiling height, and railings
- Assess sun exposure: Note morning, afternoon, and evening light patterns
- Check weight limits: Understand your building's load capacity restrictions
- Review lease restrictions: Know what's allowed regarding installations and damage
- Create a style mood board: Collect 15-20 images representing your vision
- Identify your primary purpose: What will you use this space for most?
- Determine your budget: Realistic allocation across furniture, decor, and plants
- Plan for maintenance: Consider how much upkeep your design choice requires
 Budget Apartment Renovation: DIY Hacks That Actually Work
Finally, think about the five key elements you'll need: seating, shade, greenery, lighting, and accessories. Not every balcony needs all five emphasized equally, but considering each one ensures you create a balanced, livable space. A high-end balcony feels intentional, and that intentionality comes from thoughtful planning before you start shopping.
Budget Breakdown
One of the biggest myths about high-end balcony design is that it requires a huge budget. The truth? Smart shopping across different price points lets you create a luxury look at any budget level. The key is understanding where to invest versus where to economize. Generally, you want to spend more on pieces you'll use daily (like outdoor seating) and can spend less on decorative items that are easier to refresh later.
A realistic budget approach means allocating roughly 40% to your foundation pieces (seating and shade), 30% to greenery and plants, 20% to lighting and functional decor, and 10% to finishing touches. Of course, your specific breakdown depends on your priorities and current situation. Maybe you already own a patio chair, so you can reallocate that money elsewhere. Maybe you're plant-obsessed and want 50% going to greenery. Work with what makes sense for your space and lifestyle.
Shopping strategically means checking IKEA for affordable outdoor furniture, Amazon for shade solutions and lighting, The The Home Depot for weather-resistant accessories and planters, and Target for trendy decor pieces. Better Homes and Gardens often has quality outdoor items at reasonable prices. Mix and match price points—it's perfectly fine to splurge on a beautiful outdoor rug and find affordable accent pillows elsewhere.
Here's a practical budget breakdown across different price ranges:
← Scroll to see full table →
| Under $50 | Price Range | $50-$200 | Price Range | $200+ | Price Range |
|---|---|---|---|---|---|
| Throw pillows (4-pack) | $25-$45 | Outdoor rug 5x7 | $80-$180 | Outdoor loveseat | $300-$600 |
| String lights | $15-$40 | Outdoor sectional (small) | $150-$200 | Premium patio furniture set | $500-$1000+ |
| Potted plants (assorted) | $20-$50 | Retractable shade screen | $100-$200 | High-end outdoor shade sail | $300-$500 |
| Decorative lanterns | $10-$35 | Tall outdoor planter | $75-$150 | Weather-resistant pergola | $400-$800 |
| Outdoor cushions | $20-$45 | Bistro table set | $120-$180 | Premium outdoor sectional | $800-$1500+ |
| Wall art or mirrors | $15-$40 | Quality lounge chair | $150-$250 | Designer outdoor lighting fixtures | $200-$600 |
The beauty of this breakdown is flexibility. You don't need to hit every price range, and you can absolutely create a stunning high-end balcony for $500-$800 total if you prioritize wisely. The items under $50 are where you can add personality and refresh your look seasonally. The $50-$200 range includes your functional foundation pieces, and the $200+ items are investments that elevate the entire space. Consider starting with basics and adding layers over time rather than trying to create the perfect space overnight. This approach also helps you avoid buyer's remorse and gives you time to really understand what you love versus what just looked good on Pinterest.
Step-by-Step Guide
Step 1: Define Your Space and Measure Everything
Before purchasing anything, grab a measuring tape and get exact dimensions of your balcony. Measure the length, width, and ceiling height. Measure your railing height and the distance between railing posts if you're considering shade solutions. Take photos from multiple angles in different lighting conditions. Note any architectural features like pipes, vents, or existing railings that might affect your design. Identify which direction your balcony faces and observe sun patterns throughout the day. This foundational work prevents costly mistakes later and ensures every piece you purchase actually fits.
Step 2: Establish Your Design Vision and Mood Board
Spend time on Pinterest, Instagram, and design websites collecting images that resonate with you. Create a dedicated Pinterest board or screenshot folder. Look at at least 15-20 images and identify common threads in colors, materials, and styles. Notice whether you're drawn to natural materials like wood and stone, modern metal and concrete, or something eclectic. Pay attention to color palettes—are they warm and earthy, cool and neutral, or vibrant and colorful? Write a brief design statement: "I want my balcony to feel like a Moroccan oasis," or "Modern minimalist with a touch of botanical," or whatever resonates. This clarity becomes your filter for every purchasing decision.
Step 3: Assess Your Practical Constraints and Lease
Review your lease carefully and contact your landlord or building management with specific questions about what's allowed. Can you hang shade structures? Are there weight limits for furniture? Can you install wall-mounted items? What about hanging planters? Some buildings allow adhesive command hooks but prohibit drilling. Others restrict weight per square foot. Understand these constraints fully before planning, as they significantly impact your design choices. Better to ask now than deal with issues later or lose your security deposit.
Step 4: Choose Your Seating and Foundation Pieces
Your seating is the anchor of your balcony design and where you should invest quality money. For small balconies, consider a compact bistro set, a single lounge chair with a side table, or a pair of cushioned chairs. For larger spaces, you might go with a loveseat or small sectional. At IKEA, options like the Äpplaryd or


