Quiet Luxury Small Apartment Renovation: DIY Hacks That Actually Work
Look, I get it. You're living in a small apartment, and you've been scrolling through Instagram for months watching people with sprawling lofts get makeovers that look like they cost six figures. But here's the thing — quiet luxury isn't about square footage. It's about intentionality, quality materials, and making smart choices. And the best part? You don't need a contractor or a fat bank account to pull it off.
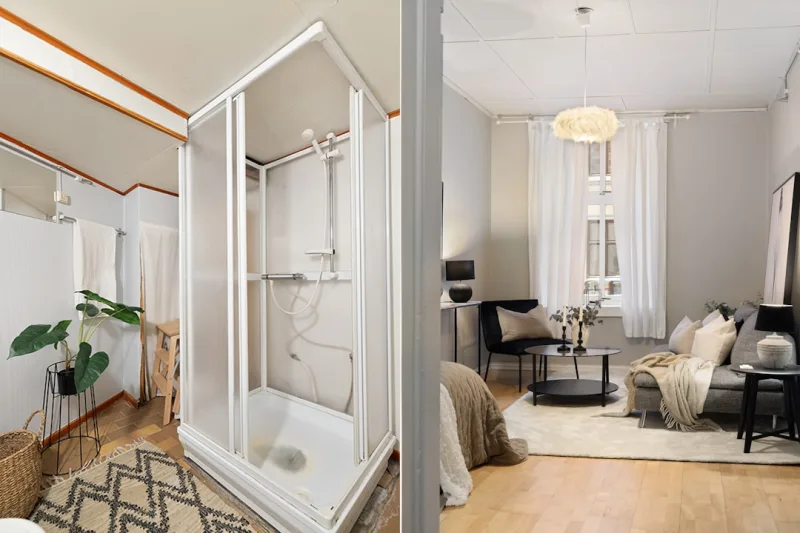
When I talk about quiet luxury, I mean that understated elegance that whispers rather than shouts. Think neutral palettes, quality finishes, and a space that feels curated rather than cluttered. The kind of apartment where people walk in and just... feel something. That calm, put-together vibe that makes you want to stay awhile. And honestly, some of the most impactful renovations I've done in tiny spaces involved nothing more than good planning, elbow grease, and a little creative problem-solving.
Over the next few sections, I'm going to walk you through exactly how to transform your small apartment into a quiet luxury haven without emptying your wallet. We're talking strategic updates, DIY-friendly projects, and those little touches that create major impact. Let's get started.
What You'll Need
Before you grab your tools, let's talk materials. I always recommend starting with quality over quantity — fewer items that are genuinely beautiful will serve you better than a bunch of trendy stuff you'll want to replace in six months.
← Scroll to see full table →
| Material/Item | Quantity | Estimated Cost | Where to Buy |
|---|---|---|---|
| Neutral Paint (premium, low-VOC) | 2-3 gallons | $80-$120 | The The Home Depot |
| Shiplap Wallpaper or Peel-and-Stick Wall Panels | 300-400 sq ft coverage | $150-$250 | The Home Depot, Amazon |
| Wood Stain (for furniture updates) | 1 quart | $12-$20 | The Home Depot |
| Cabinet Hardware (brushed gold or matte black) | 8-12 pieces | $40-$80 | The Home Depot, Wayfair |
| Floating Shelves (wood or metal) | 2-3 shelves | $60-$150 | The Home Depot, IKEA |
| Baskets for Storage (woven, natural fiber) | 4-6 baskets | $80-$150 | West Elm, Target, CB2 |
| Lighting Fixtures (pendant or flush mount) | 1-2 fixtures | $100-$250 | The Home Depot, Schoolhouse Electric |
| Quality Caulk and Sealant | 2-3 tubes | $15-$25 | The Home Depot |
| Paint Brushes and Rollers (quality tools) | 1 set | $30-$50 | The Home Depot |
| Drop Cloth and Painter's Tape | 1 set | $20-$30 | The Home Depot |
Step-by-Step Guide
Step 1: Prime Your Space with Paint
Start with a fresh coat of paint. Seriously — this single step does more for a space than anything else. I'm talking about a soft, sophisticated neutral. Think warm whites, soft grays, or creamy beiges. Skip the bright white unless you're going for a completely minimalist Scandinavian vibe. At The Home Depot, look for premium, low-VOC paints that won't off-gas nasty fumes and will actually last longer. Invest in quality paint brushes too — cheap brushes leave bristles everywhere and make you want to throw things.
Step 2: Add Architectural Interest Without Major Construction
Here's where the magic happens. If you're renting or just don't want to open walls, peel-and-stick shiplap or wall panels are your best friend. Install them as an accent wall behind your bed or as wainscoting in a bathroom or entryway. The texture adds dimension and that high-end, thoughtfully designed feel. Takes maybe an afternoon, and it's absolutely transformative.
Step 3: Update Hardware for an Instant Refresh
Walk into your kitchen or bathroom. See those old cabinet pulls? Swap them out for brushed gold or matte black hardware from The Home Depot. This is genuinely one of the easiest upgrades and the payoff is insane. New hardware costs maybe forty to eighty bucks but makes everything feel intentionally designed rather than generic.
Step 4: Install Floating Shelves Strategically
Floating shelves create vertical interest and give you storage without eating up precious floor space — absolute game-changer in a small apartment. Install them above a desk, beside your bed, or in an awkward corner. Style them with books, plants, and a few curated objects. Keep the styling simple though — quiet luxury means restraint, not everything crammed onto a shelf.
Step 5: Upgrade Your Lighting
 Budget Apartment Renovation: DIY Hacks That Actually Work
Honestly, this is where people mess up. That builder-grade flush mount light? It's gotta go. Swap it for something with character — a simple pendant, a brass sconce, or even a statement ceiling fixture. Better lighting doesn't just illuminate your space; it completely changes the mood and makes everything feel more expensive and intentional.
Step 6: Add Smart Storage with Beautiful Baskets
Small apartments mean clutter can take over fast. Invest in quality natural fiber baskets — woven rattan, seagrass, whatever speaks to you. Hide the stuff you don't want visible but still need nearby. This is quiet luxury in action — everything has a place, and it actually looks good.
Step 7: Finish with Finishing Touches
Paint trim, caulk gaps where walls meet baseboards, and seal anything that needs sealing. These finishing details are what separate a DIY project from something that looks professionally done. Spend time on caulking and sealant — it's not glamorous, but trust me, it matters.
Pro Tips
Lighting is Everything: You can have the most beautiful paint color and finishes, but bad lighting will kill the vibe. Layer your lighting with overhead fixtures, task lighting, and ambient elements like candles or string lights. Better Homes & Gardens & Gardens nails this concept consistently.
Stick to a Color Palette: Quiet luxury thrives on restraint. Choose three colors maximum — typically a neutral base, a secondary neutral, and one accent color. Everything else follows that palette. This creates cohesion and that expensive, curated feeling.
Invest in One Statement Piece: You don't need everything to be luxury brands. Pick one special piece — maybe a beautiful mirror, a quality light fixture, or heirloom-quality furniture — and build around it. That anchors the whole aesthetic.
Use HGTV and Design Blogs for Inspiration: Before starting, spend time on HGTV.com looking at small space renovations. Clip photos, create a mood board, and identify what actually speaks to you versus what's just trendy. Your taste matters more than what's popular.
Don't Overlook Hardware and Finishing Details: The unsexy stuff like caulk, baseboards, and trim makes or breaks a project. Those edges where things meet? Perfect them. That's what separates amateur from intentional.
Cost Breakdown
← Scroll to see full table →
| Category | Cost Range | Notes |
|---|---|---|
| Paint and Painting Supplies | $110-$170 | Include quality brushes and rollers |
| Wall Treatments (Shiplap/Panels) | $150-$250 | Depends on room size and coverage |
| Hardware Updates | $40-$80 | Cabinet and door hardware |
| Shelving and Storage | $140-$230 | Floating shelves plus baskets |
| Lighting | $100-$250 | New fixtures (1-2 pieces) |
| Finishing Materials | $30-$50 | Caulk, sealant, trim work |
| TOTAL ESTIMATED COST | $570-$1,030 |


