Okay, let's be real — I fell in love with open shelving the moment I saw it on HGTV, but I thought there was no way I could pull it off in my own kitchen without hiring a contractor and emptying my bank account. Here's the thing: installing open shelving is genuinely one of the most doable DIY projects you can tackle, and the payoff is absolutely worth it. Your kitchen doesn't just look more spacious and modern — it actually feels different.
Whether you're renting (yes, there are temporary solutions!) or you own your home, open shelving gives you that Instagram-worthy aesthetic that somehow makes even your everyday coffee mugs look intentional. I'm going to walk you through everything I've learned — from picking the right shelves to styling them so they don't look like a disaster waiting to happen.
The best part? You don't need fancy tools or years of experience. Just some basic materials, a little patience, and the willingness to accept that your first attempt might look slightly wonky (totally normal, by the way). Let's dive in.
What You'll Need
Before you head to The The Home Depot or order online, let me break down exactly what you'll need. I've included realistic pricing because I know you want to know if this fits your budget.
- Floating Shelves or Wood Boards — $25–$150 each depending on size and material. Pine is budget-friendly; walnut costs more but looks stunning.
- Shelf Brackets — $10–$40 per bracket. Heavy-duty steel holds heavier loads; decorative options run pricier.
- Wall Anchors or Studs — $5–$15 for a pack. Essential if you're not hitting studs.
- Drill with Bits — $30–$100. Most people already own one, so this might be skippable.
- Level — $10–$25. Seriously, don't cheap out here. Crooked shelves haunt you forever.
- Stud Finder — $15–$40. Game changer. Worth every penny.
- Screws and Fasteners — $8–$15 per pack.
- Drywall Patch Kit (optional) — $10–$20 for touch-ups.
- Wood Stain or Paint (optional) — $8–$25 depending on brand.
Total Budget Range: $150–$500 for a small kitchen setup
Step-by-Step Guide
Step 1: Plan Your Layout and Measure Twice
This is where most people get excited and skip ahead — don't. Seriously. Take your time here. Measure your wall space, decide how many shelves you want, and at what heights. I usually space mine about 12–15 inches apart, which gives enough room for a coffee mug and a small plant without looking cramped.
Sketch it out on paper or snap a photo of your wall. Mark where you want each shelf with a pencil lightly — you can erase this later. Think about your daily workflow too. Where's your coffee station? Do you reach for glasses or plates constantly? Design around your actual life, not what looks good in pictures.
Step 2: Locate Your Wall Studs
Here's where a stud finder becomes your best friend. Run it horizontally across your wall and mark where the studs are — you'll feel a satisfying click. Mark these spots with a light pencil line or painter's tape. Studs are your foundation. If you hit them, your shelf can support way more weight without worrying about catastrophic failure.
If your desired shelf location doesn't line up perfectly with studs, don't panic. Heavy-duty drywall anchors work beautifully — just don't overload them with fifty cookbooks.
Step 3: Install Your Brackets
This is the actual installation moment. Mark your drill holes using a level — seriously, use the level. I made the rookie mistake of eyeballing it once. Never again. Drill pilot holes first (smaller holes that guide your actual screws), then screw in your brackets securely.
Tighten everything until it's snug, but don't hulk out on it. You're looking for secure, not "I'm trying to destroy this bracket." If you're using drywall anchors, follow the manufacturer's instructions — they usually require a specific type of screw.
Step 4: Place Your Shelf and Check for Level
Carefully lift your shelf onto the brackets and place your level on top. Adjust the brackets slightly if needed — and yes, even a tiny adjustment makes a difference. A shelf that's off by a quarter inch will drive you absolutely crazy every single day. Trust me on this.
Once everything is perfectly level, secure your shelf to the brackets according to your bracket style — some require additional screws underneath, others just rest on top.
Step 5: Repeat and Step Back
 Budget Apartment Renovation: DIY Hacks That Actually Work
Install your remaining shelves using the same process. Stagger your measurements if you're going for that trendy, artistic look — though honestly, evenly spaced shelves are easier to work with and look more intentional.
Once all shelves are up, step back and admire. Seriously. You just did that.
Pro Tips
Consider Weight Distribution — Open shelves look beautiful, but they're not magical. Heavy items like canned goods or cookbooks should sit closer to the brackets where the support is strongest. Lighter decorative items can go toward the center.
Style with Purpose — Books standing upright, a few small plants, a couple of aesthetic canisters — this is the magic formula. The trick is negative space. Don't fill every inch. Your eyes need somewhere to rest. Better Homes & Gardens & Gardens has some killer styling inspiration if you're stuck.
Go for Cohesion — Your displayed items don't need to match perfectly, but they should feel intentional. Stick to a color palette — maybe whites, natural wood, and one accent color. It feels curated rather than chaotic.
Dust is Real — Open shelving means regular dusting. I'm not going to sugarcoat it. Use a microfiber cloth weekly to keep things looking fresh.
Embrace Temporary Solutions — If you're renting, tension rods with floating shelves or adhesive-backed brackets exist. They're not as stable as permanent installations, but they work for lighter loads and leave no damage.
Cost Breakdown
← Scroll to see full table →
| Item | Quantity | Price Per Unit | Total |
|---|---|---|---|
| Floating Shelves (Wood Boards) | 3 | $50 | $150 |
| Shelf Brackets | 6 | $20 | $120 |
| Wall Anchors (Pack) | 1 | $12 | $12 |
| Stud Finder | 1 | $25 | $25 |
| Level | 1 | $18 | $18 |
| Drill with Bits | 1 | $60 | $60 |
| Screws & Fasteners (Pack) | 1 | $10 | $10 |
| Wood Stain/Paint | 1 | $15 | $15 |
| TOTAL PROJECT COST | $410 | ||
Note: If you already own a drill and level, you'll save approximately $85. Prices reflect mid-range options from The Home Depot and similar retailers.
FAQ
How Much Weight Can Open Shelves Actually Hold?
Honestly, it depends on your bracket quality and whether you hit studs. Heavy-duty brackets mounted to studs? You're looking at 25–50 pounds per shelf easily. Drywall anchors? Maybe 15–25 pounds maximum. Don't test this by loading them to capacity — that's how accidents happen. If you're displaying heavy cookbooks, consider a sturdy closed cabinet instead.
Can I Install Open Shelving in a Rental?
Yes, absolutely. Look into damage-free options like adhesive-backed shelves, tension rods, or command strips rated for heavier items. They won't last as long as permanently installed shelves, but they work beautifully for a few years and won't upset your landlord. Just photograph your walls before and after for your deposit's sake.
What's the Best Wood for Kitchen Shelves?
Pine is budget-friendly and takes stain well. Oak is durable and classic. Walnut looks premium but costs more. Reclaimed wood adds character but requires careful inspection for stability. Personally? I go with solid pine and stain it to match my kitchen aesthetic. It's forgiving, affordable, and looks way more expensive than it actually is.
Conclusion
Open shelving isn't just a design trend — it's genuinely functional and makes your kitchen feel intentional and curated. The installation process is straightforward, the cost is reasonable, and honestly, the satisfaction of stepping back and saying "I built that
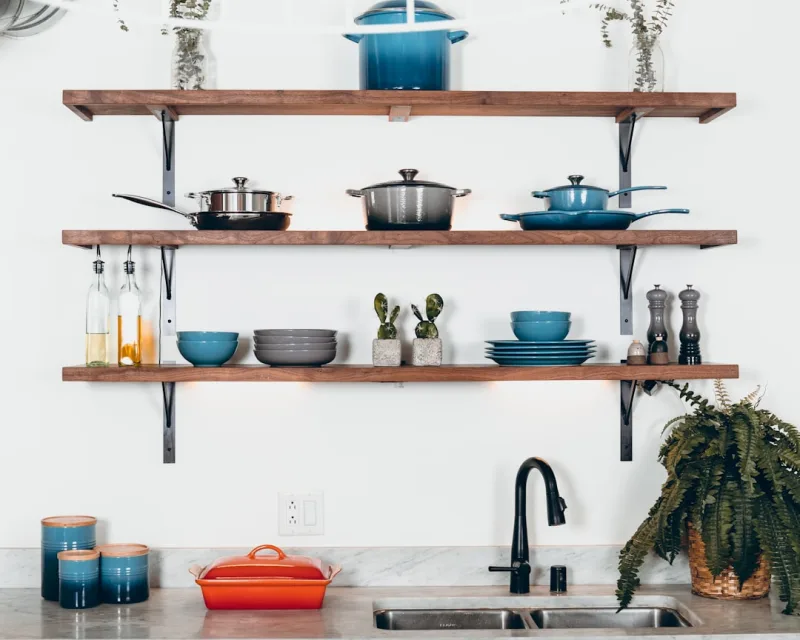
📷 Photo by Dane Deaner on Unsplash


