High End Closet Upgrade with DIY Hacks: Transform Your Space Without Breaking the Bank
Listen, I've been there — standing in front of a closet that screams "I'm totally disorganized" and feeling that gut punch of regret. You scroll through Instagram, see those gorgeous, perfectly curated closets with custom shelving and designer lighting, and think, "Yeah, that's definitely not happening on my budget." But here's the thing: you don't need to drop five figures at a fancy closet company to get that high-end look. I've helped transform closets from "yikes" to "yes, please" using strategic DIY upgrades that actually don't require a construction degree.
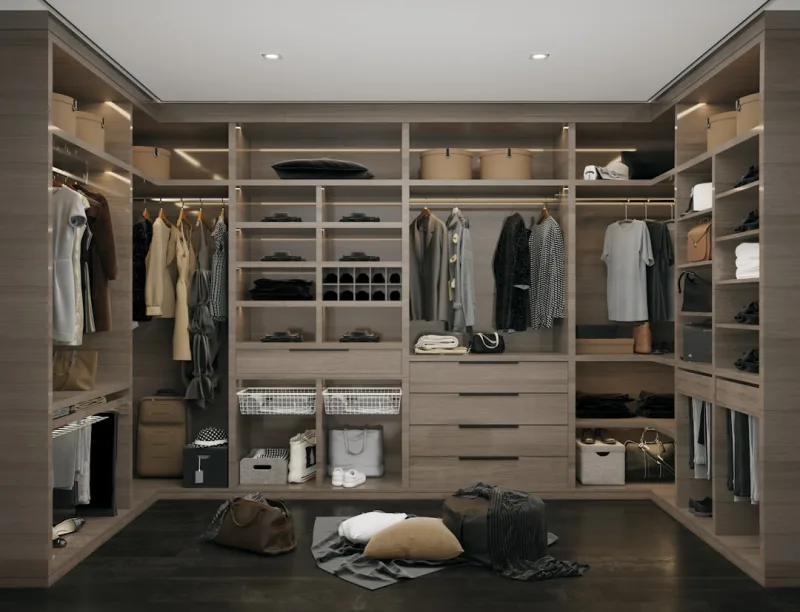
The secret? It's all about layering smart investments with clever hacks. We're talking about combining affordable organizational systems with statement lighting, a fresh coat of paint, and some seriously good styling tricks. Your closet doesn't have to look like it came straight from a design magazine — but it absolutely can feel that way when you step inside. And honestly, that's what really matters.
I'm going to walk you through exactly how I'd approach this project. We'll cover everything from the must-have materials to the actual installation process, plus some insider tips that'll make your closet feel genuinely luxe. Let's get started.
What You'll Need
Before you hit up The The Home Depot or start adding things to your online cart, let's get real about what actually moves the needle here. These are the game-changers — not every single thing, but the items that'll genuinely elevate your space:
- Premium Paint (matte or velvet finish) — $25-$45 per gallon. I'm talking Sherwin-Williams or Benjamin Moore. Yes, it costs more, but the finish is unmatched.
- LED Strip Lighting — $35-$80. This is non-negotiable. It changes everything about how your closet feels and functions.
- Quality Closet Rods and Brackets — $50-$150. Goodbye wobbly rod that sounds like it's about to collapse.
- Floating Shelves (3-4 shelves, quality wood) — $80-$200. These are your statement pieces.
- Open Shelving Supports — $40-$80. The invisible heroes that make your shelves actually stay put.
- Drawer Organizers and Dividers — $30-$60. Smaller investment, massive impact.
- Wood Stain or Filler (if needed) — $15-$25. For finishing touches and repairs.
- Hardware (handles, hooks, specialty items) — $40-$100. The jewelry of your closet.
- Paint Primer and Supplies (brushes, drop cloth, painter's tape) — $20-$40.
- Adhesive, Anchors, and Fasteners — $15-$25. The stuff you'll definitely forget and have to go back for.
Total Estimated Budget: $350-$815 (depending on your choices and closet size)
Step-by-Step Guide
Step 1: Plan Your Layout and Take Measurements
Seriously, don't skip this. I've seen too many people measure once and regret it forever. Measure your closet width, depth, and height. Write everything down. Then measure again. Check HGTV's closet design guides for inspiration on layouts that actually work for your lifestyle — because a closet designed for someone who lives in athleisure looks different than one for someone in business casual.
Think about traffic flow. Where does your door swing? Is there a awkward corner? Map out where you want your rods, shelves, and lighting. Sketch it out if you're visual — I'm not judging, I drew mine on the back of an old receipt.
Step 2: Prep the Space
Empty everything. I mean everything. If you haven't worn it in a year, it goes. This is your moment to actually curate. Remove old rods, shelves, and hardware. Fill any holes with spackling paste and sand it smooth once it dries. This step feels tedious, but it's what separates DIY closets that look DIY from ones that look professionally done.
Vacuum and wipe down all surfaces. You'd be shocked how much dust accumulates in closets.
Step 3: Paint Your Walls and Interior
This is where the magic happens. Paint transforms everything. I typically recommend soft, neutral tones — think Benjamin Moore's "Chantilly Lace" or Sherwin-Williams' "Alabaster" — but honestly, if you want a deeper shade like sage or soft charcoal, go for it. Your closet, your rules.
Use a matte or velvet finish paint. It's more forgiving than gloss and feels more luxe. Prime first, especially if you're covering existing color. Two coats of paint is non-negotiable. The investment here pays off every single time you open that door.
Step 4: Install Lighting
LED strip lighting is your secret weapon. Install it along the top of your closet or directly on floating shelves for ambient lighting that actually lets you see your clothes. Battery-operated options exist if you're not comfortable with wiring, but hardwired fixtures look cleaner. This is worth watching a YouTube tutorial for — seriously, it's easier than it sounds.
 Boho DIY Room Makeover: Full Revamp Under $200
Pro tip: Use warm white lighting (2700K-3000K). It's more forgiving and makes everything look better. Your skin tone, your clothes, everything.
Step 5: Install Your Rod System
Replace that flimsy builder-grade rod with something that actually supports weight. Heavy-duty rods with solid brackets cost more but they won't sag. Install at standard height (about 60-65 inches from the floor for single rod, adjust for double hanging). Use a level — this matters more than you think.
Step 6: Add Floating Shelves
Floating shelves are the signature piece of a high-end closet. Measure and mark where you want them. Find studs in your walls — use a stud finder, don't guess. Install heavy-duty brackets into studs for maximum support. These shelves will hold folded sweaters, bags, and accessories, so they need to actually hold weight.
Space them about 12-14 inches apart. Better Homes & Gardens & Gardens has excellent guidelines on shelf spacing if you want to reference something authoritative.
Step 7: Organize and Style
Now comes the fun part. Use matching hangers — I know it seems small, but having uniform hangers (wood or velvet) instantly makes everything look more cohesive. Organize by color or category, whatever feels right for your brain.
Fold heavier items neatly on shelves. Use matching storage boxes for smaller items — they don't all have to match, but there should be a visual theme. Think of your closet like a retail display. Everything visible should feel intentional.
Pro Tips
Lighting is everything. Honestly, this is the number one thing that separates mediocre closets from ones that feel legitimately high-end. Invest in good lighting. It changes how your clothes look, how your space feels, and how functional the whole situation becomes.
Use mirrors strategically. A large mirror on the back of your closet door or on the side wall makes the space feel bigger and helps you see outfits in context. Plus, there's something luxe about being able to dress in your closet.
Go vertical. Don't waste floor space. Use the walls. Upper shelving, hooks, and vertical storage are what transform small closets into functional ones. The Home Depot has endless vertical storage solutions if you need to expand beyond basic shelving.
Invest in quality hangers. Seriously. Cheap plastic hangers make even expensive clothes look cheap. Wood or velvet hangers cost more but they look better and actually grip your clothes so nothing slides off.
Create a jewelry or accessory station. Hanging organizers, wall-mounted hooks, or a dedicated shelf completely changes how you access and think about smaller items.
Don't over-stuff. High-end closets feel spacious even when full. Leave breathing room between hangers. If everything is crammed, it defeats the purpose. Pare down your clothes if needed. Quality over quantity always wins.
Cost Breakdown
← Scroll to see full table →
| Item | Low Estimate | High Estimate |
|---|---|---|
| Premium Paint & Supplies | $35 | $70 |
| LED Strip Lighting | $35 | $80 |
| Closet Rod & Brackets | $50 | $150 |
| Floating Shelves | $80 | $200 |
| Shelving Supports | $40 | $80 |
| Drawer Organizers | $30 | $60 |
| Hardware & Hooks | $40 | $100 |
| Fasteners & Anchors | $15 | $25 |
| Total | $325 | $765 |


