Look, I get it. You're sitting in your backyard looking at that sad, empty patch of dirt thinking, "I'd love to have a beautiful patio, but I don't have $10,000 lying around." And honestly? You don't need it. I've watched so many people completely transform their outdoor spaces for under $500, and the best part is they did it themselves. There's something genuinely satisfying about creating your own patio — you get exactly what you want, you save a fortune, and you'll actually tell people you built it yourself (and mean it).
The secret isn't some fancy designer trick. It's knowing where to shop, what materials work best, and having a solid game plan before you start. Whether you're dreaming of a cozy seating area, a dining spot for summer gatherings, or just somewhere to enjoy your morning coffee, I'm going to walk you through every step. We'll keep costs low but the vibe high — because your backyard deserves to be Instagram-worthy without the Instagram-sized budget.
I've personally done this a few times, and I've helped friends tackle their own projects. Trust me, the confidence boost you'll get from finishing your own patio is worth way more than the money you'll save.
What You'll Need
Before you head out to The The Home Depot or your local hardware store, let's talk about what actually goes into a budget-friendly patio. The materials you choose make all the difference between a project that looks cheap and one that looks intentional and stylish.
Base Materials:
- Gravel or pea gravel (50-lb bag, $5-8) — Budget for 10-15 bags depending on size
- Landscape fabric ($15-25 for a roll)
- Pavers or concrete stepping stones ($2-5 each)
- Wood edging boards — 2x6 or 2x8 lumber ($3-6 per 8-foot board)
Optional Decorative Elements:
- Outdoor paint or stain ($20-35 per can)
- Sealer for pavers ($25-40)
- Mulch or decorative rock ($6-12 per bag)
- String lights or solar lanterns ($15-50)
Tools (you might already have these):
- Shovel and spade ($20-40 if needed)
- Level ($15-30)
- Wheelbarrow ($40-60 if you don't own one)
- Work gloves, measuring tape, hammer ($20 total)
Step-by-Step Guide
Step 1: Plan Your Space and Mark the Area
This is where most people want to skip ahead, but honestly, spend a weekend on this. Measure your desired patio area — I usually recommend starting with something like 12x12 or 10x16 feet for a budget build. Use spray paint or chalk to mark out your boundaries. Live with it for a day or two. Walk around, check the sun patterns, see how it flows with your yard. The last thing you want is to finish a patio and realize it blocks your garden or sits in full afternoon sun.
Better Homes & Gardens & Gardens has some great resources on patio sizing — definitely worth a quick read before you commit.
Step 2: Clear and Level the Ground
Remove any grass, weeds, or debris from your marked area. This is the grunt work, but it's crucial. You want a relatively level surface. Use your shovel to dig out high spots and fill in low spots. It doesn't have to be perfect — we're working with nature here, not a marble floor.
Pro tip: save the soil you remove in a pile. You might want it for edging or garden work later.
Step 3: Lay Down Landscape Fabric
This step prevents weeds from coming up through your patio (trust me, you'll thank me later). Roll out your landscape fabric across the entire area and secure it with landscape pins or even old nails. Overlap the edges by about 6 inches so you don't get sneaky weeds creeping in from the sides.
Step 4: Create Your Border With Wood Edging
Install 2x6 or 2x8 wood boards around the perimeter of your space. This frames everything beautifully and contains your gravel. Use a level to ensure they're even, and secure corners with landscape spikes or galvanized screws. If budget is really tight, even stacked stones work for this purpose.
Step 5: Add Your Base Layer
 2026 DIY Apartment Upgrades That Look Designer
Start with a 2-3 inch layer of gravel. Spread it evenly across the fabric and level it out. This creates excellent drainage and gives you a solid, stable base. I like pea gravel because it looks a little more refined than basic gravel, and the price difference is honestly negligible.
Step 6: Arrange Your Pavers or Stepping Stones
Now comes the fun part — laying out your pattern. You can go traditional in straight lines, diagonal, or even a random pattern. Gently push each paver into the gravel base. Use your level to check as you go. I usually work from one corner and methodically move across.
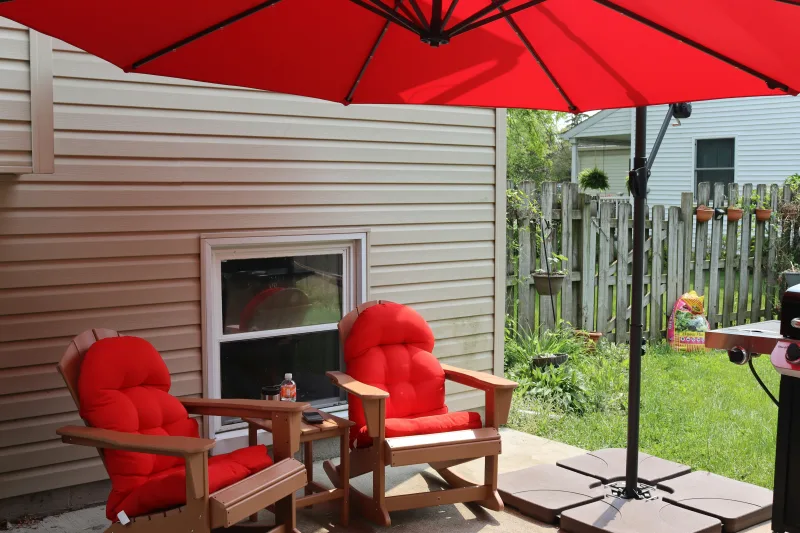
Step 7: Add Finishing Touches
Once your pavers are set, you can fill gaps with more fine gravel or polymeric sand (if you want something more permanent). Add decorative mulch around the edges, string up some lights, and suddenly you've got an actual destination in your backyard. Check out HGTV's patio lighting ideas for inspiration — they've got tons of budget-friendly options.
Pro Tips
Shop End-of-Season Sales: Late August and September are goldmines for outdoor materials. Stores need to clear inventory, and you'll find deals that are actually worth talking about.
Consider Recycled or Reclaimed Materials: Hit up your local Buy Nothing Facebook groups, Craigslist, or Habitat for Humanity ReStore. I've found gorgeous pavers and stones at 25-50% of retail prices. Sure, they might have some character (aka scratches), but that's actually the vibe right now.
Don't Underestimate Paint: A fresh coat of outdoor paint on pavers or existing concrete can completely change the look. It's like getting a whole new patio for the cost of two cans of paint.
Invest in Quality Sealer: Spending an extra $30-40 on paver sealer now saves you hundreds in repairs later. Seriously — it's worth it.
Start Small: You can always expand next year. Starting with a 10x10 area means less material waste and faster completion, which keeps momentum going.
Cost Breakdown
← Scroll to see full table →
| Material/Item | Quantity | Unit Price | Total Cost |
|---|---|---|---|
| Gravel (50-lb bags) | 12 | $6.50 | $78.00 |
| Landscape Fabric | 1 roll | $20.00 | $20.00 |
| Concrete Pavers | 80 pieces | $2.75 | $220.00 |
| Wood Edging (8-ft boards) | 6 | $4.50 | $27.00 |
| Landscape Spikes | 1 box (50 ct) | $12.00 | $12.00 |
| Decorative Mulch (2 cu ft bags) | 8 | $8.00 | $64.00 |
| Paver Sealer | 1 gallon | $35.00 | $35.00 |
| Tools (if needed) | As needed | — | $0-100 |
| Estimated Total (12x12 patio) | $456.00 | ||
Note: Prices based on The Home Depot averages and vary by location and current sales. Budget 10-15% extra for unexpected needs or upgrades.
FAQ
Q: Do I really need landscape fabric, or is that just overkill?
A: I used to think it was unnecessary until I skipped it once. Weeds came through within three weeks, and I spent the whole summer fighting them. Now I'm a believer. It's cheap insurance that saves you serious time and frustration. Trust me on this one.
Q: Can I do this alone, or do I need help?
A: A 12x12 patio is totally doable solo, though it'll take a weekend or two depending on your fitness level. Bigger projects benefit from a helper


