The Ultimate Warm Kitchen Makeover for 2026: Transform Your Space Into a Cozy Gathering Hub
You know that feeling when you walk into a kitchen and it just feels... cold? Like you're in a sterile showroom instead of the heart of your home? Yeah, I've been there. For years, I had this beautiful but utterly impersonal kitchen—all stainless steel and harsh white walls. Then something clicked: kitchens should feel warm. They should invite you in. They should make you want to linger over coffee with a friend.
Here's the thing about 2026 kitchen trends — everyone's finally ditching the minimalist approach in favor of warmth. We're talking golden tones, natural textures, and designs that actually feel lived-in. And honestly? You don't need a $50,000 renovation to pull this off. I've created a makeover plan that'll transform your kitchen into this year's hottest design without breaking the bank.
Whether you're working with a tiny galley kitchen or a sprawling open concept space, this guide walks you through exactly what to do. We're focusing on high-impact changes that make a massive visual difference — paint, lighting, hardware, and strategic decor. Ready to make your kitchen the warmest room in your house?
What You'll Need
Let me be upfront: this makeover doesn't require professional contractors or specialized tools (unless you want to get fancy). Most of this you can find at The The Home Depot or your local paint supplier.
- Warm-Tone Paint (2-3 gallons) — $45-75 per gallon
- Paintbrushes & Rollers Kit — $25-35
- Painter's Tape & Drop Cloths — $20-30
- Warm-Toned Cabinet Hardware (handles & knobs, 12-15 pieces) — $60-150
- Pendant Lights or Under-Cabinet Lighting (2-3 fixtures) — $80-250
- Natural Wood Open Shelving or Floating Shelves (2-3 shelves) — $100-200
- Decorative Items (wood cutting boards, ceramic bowls, woven baskets) — $75-150
- Backsplash Peel-and-Stick Tiles (optional upgrade) — $40-120
- Cabinet Paint or Stain (if painting cabinets) — $30-80
- Primer — $25-40
- Ladder or Step Stool (if you don't have one) — $40-80
- Caulk & Caulking Gun — $15-25
Step-by-Step Guide
Step 1: Choose Your Warm Color Palette
This is literally the foundation of your entire makeover, so don't skip it. I'm talking warm terracotta, soft cream, honey gold, or muted sage — colors that make you feel like you're wrapping yourself in a hug. Look at color swatches from brands like Benjamin Moore or Sherwin-Williams. Pro move? Get sample pints and paint large swatches on your walls. Live with them for a few days under different lighting conditions.
For 2026, the trend is moving toward earthy, almost Mediterranean-inspired palettes. Think sun-baked walls paired with natural wood elements. Check out HGTV's latest kitchen trends to see what's resonating with designers right now.
Step 2: Prep Your Space Thoroughly
I know, I know — prep work isn't glamorous. But this step determines whether your paint job looks amateur or professional. Remove cabinet hardware, cover your countertops and appliances with plastic sheeting, and tape off areas you don't want painted. Use painter's tape along the ceiling line and around windows and doors. Don't cheap out here — quality tape prevents bleeding.
Step 3: Paint Your Walls
Start with a quality primer — seriously, it makes all the difference. Once it's dry, apply two coats of your chosen warm-tone paint. Use a roller for large flat surfaces and a brush for edges and corners. Work in sections and maintain a wet edge to avoid lap marks. This usually takes a full weekend, but the transformation is immediate.
Step 4: Update Cabinet Hardware
 Budget Apartment Renovation: DIY Hacks That Actually Work
Here's where you get big visual impact for minimal effort. Swap out those old brushed nickel knobs and handles for warmer finishes — brass, warm bronze, or natural wood-and-metal combos. It's literally just unscrewing and screwing new hardware on. Takes maybe an hour. Game changer.
Step 5: Install Warm Lighting
Lighting is honestly the secret weapon that nobody talks about. Harsh overhead fluorescents? Out. Replace them with warm LED pendant lights or under-cabinet lighting that creates ambiance. If you're not comfortable with electrical work, hire a pro — safety first. But honestly, many under-cabinet light kits are plug-and-play these days.
Step 6: Add Open Shelving and Natural Materials
Install one or two floating shelves above your counter or in a corner. Fill them with warm-toned cookbooks, wooden cutting boards, ceramic bowls, and potted herbs. This adds texture and makes the space feel curated and intentional. Browse Better Homes & Gardens & Gardens for styling inspiration on how to arrange these elements naturally.
Step 7: Optional — Add Peel-and-Stick Backsplash
If you want to go the extra mile without demolition, peel-and-stick backsplash tiles in warm terracotta or subtle geometric patterns work beautifully. Just ensure your wall is clean and smooth before applying. This adds visual interest and ties the whole look together.
Pro Tips
- Go for Warm LED Bulbs: When shopping for light fixtures, specifically choose warm-toned LEDs (2700K color temperature). This transforms your entire kitchen's vibe instantly.
- Layer Your Textures: Warmth comes from mixing materials — pair smooth painted walls with rough wood shelves, smooth ceramics with woven baskets. Don't be afraid to blend.
- Invest in Quality Paint: Cheaper paint looks cheaper. Spend the extra $15-20 per gallon on quality brands. It covers better and lasts longer.
- Paint Your Cabinets If They're Dated: If your cabinets are solid wood underneath the paint or stain, a fresh coat in a warm tone can be transformative. Honestly, painting cabinets is intimidating but doable with patience.
- Don't Forget Hardware Finish Coordination: Keep your hardware finishes cohesive. Mixing too many metals looks chaotic. Pick two complementary finishes max — like brass and wood, or warm bronze and natural stone.
- Natural Daylight Matters: If possible, enhance natural light with clean windows or light, sheer curtains. Daylight makes warm colors sing.
Cost Breakdown
← Scroll to see full table →
| Item | Estimated Cost | Priority Level |
|---|---|---|
| Wall Paint (Warm Tones) | $120-150 | High |
| Painting Supplies | $45-75 | High |
| Cabinet Hardware | $60-150 | Medium |
| Lighting Fixtures | $80-250 | High |
| Floating Shelves & Installation | $100-200 | Medium |
| Decorative Elements | $75-150 | Low |
| Backsplash Tiles (Optional) | $40-120 | Low |
| Cabinet Paint (If Needed) | $30-80 | Medium |
| Total Estimated Budget | $550-1,175 | — |
Frequently Asked Questions
Q: Can I really do this makeover myself, or should I hire a professional?
A: Honestly, about 90% of this you can absolutely DIY. Painting walls? Total beginner move. Hardware swaps? Easy. Installing floating shelves? Straightforward if you have a stud finder. The only part where a professional makes sense is electrical work — installing new light fixtures safely. Everything else is genuinely doable with YouTube tutorials and patience. I've watched first-time DIYers nail this makeover.
Q: What if I rent and can't make permanent changes?
A: Great question because you can still do SO much! Paint the walls (with landlord permission, obviously) since you'll touch it up when you leave. Skip the backsplash or go full peel-and-stick. Choose battery-operated under-cabinet lights instead of hardwired. Swap hardware temporarily. Focus on styling your open shelves and adding warm decor. Renters can absolutely have warm, inviting
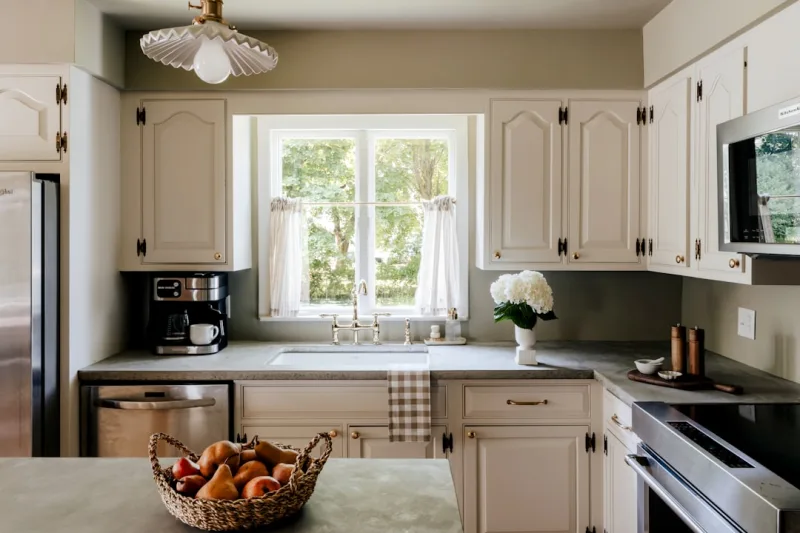
📷 Photo by Clay Banks on Unsplash


