Designer Closet Storage 2026: Transform Your Space Without Breaking the Bank
Look, I get it. Your closet is basically a black hole where clothes go to disappear. You open the door, stare blankly at what's supposed to be your curated wardrobe, and somehow still can't find anything to wear. Sound familiar? Well, 2026 is bringing some seriously game-changing storage solutions that don't require you to hire a professional organizer or remortgage your house.
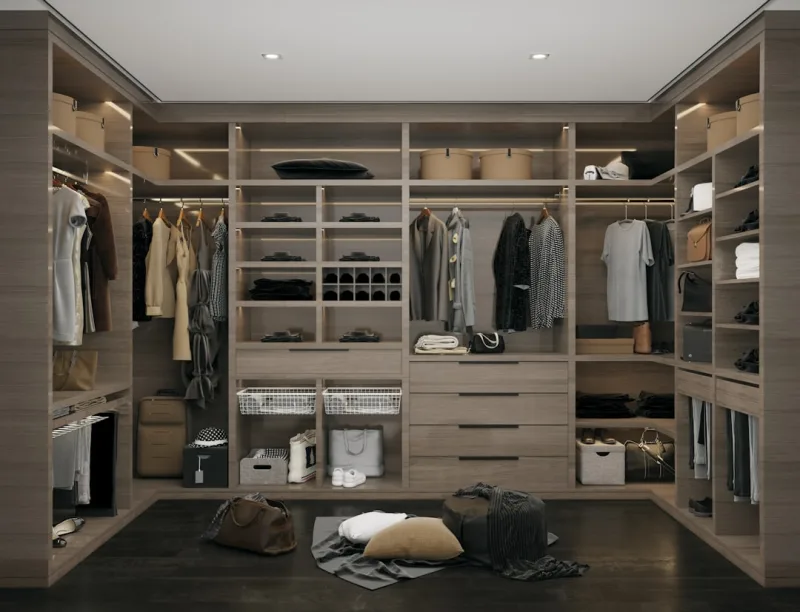
The beautiful thing about designer closet storage right now is that it's become accessible. I'm talking about those magazine-worthy, Instagram-friendly setups that actually function in real life — not just for photo ops. Whether you've got a walk-in closet the size of a master bedroom or you're working with a modest reach-in situation, we're going to walk through how to create something that's both stunning and practical.
Here's the thing: the best closet storage is the kind you'll actually use. It combines aesthetics with accessibility, organization with ease of maintenance. And that's exactly what we're tackling today. I've spent way too many hours researching 2026 trends, testing systems, and consulting resources like The The Home Depot and HGTV to bring you this comprehensive guide. Let's get your closet designer-ready.
What You'll Need
Before you break out the drill, let's talk materials. The 2026 closet storage aesthetic leans into mixed materials — think natural wood, metal accents, and soft textiles. Here's what you're looking at budget-wise:
- Wooden closet shelving system: $150-$400 (depending on quality and customization)
- Metal hanging rods and brackets: $40-$120
- Storage bins and containers (set of 6-10): $50-$150
- Drawer dividers and organizers: $30-$75
- Soft-close drawers/hardware: $60-$200
- LED lighting strips: $25-$80
- Hooks, brackets, and fasteners: $20-$50
- Natural wood hangers (12-20 pack): $40-$100
- Fabric storage baskets: $50-$150
- Paint or stain for shelving: $15-$40
Step-by-Step Guide
Step 1: Assess Your Space and Declutter
Honestly, this is where most people want to skip ahead. Don't. Measure your closet dimensions — height, width, depth. Take photos from different angles. And then — this is crucial — actually go through your clothes. I mean really go through them. Pull out anything you haven't worn in over a year, anything that doesn't fit, anything that doesn't spark joy (yes, I went there). You'd be amazed how much space you suddenly have when you're not storing three pairs of jeans from 2019. This step alone can eliminate 30-40% of your clutter without spending a dime.
Step 2: Plan Your Layout and Design
Sketch out a simple floor plan. Where do you want hanging space? Which items need shelving versus drawers? The 2026 trend is all about creating zones — a section for everyday wear, a section for professional clothes, a section for workout gear, and so on. Group similar items. This isn't just pretty; it's functional. When you can see everything at a glance, you actually wear what you own. Sketch it out on paper or use your phone to mark measurements directly on photos. Resources like Better Homes & Gardens & Gardens have fantastic closet layout templates that can help here.
Step 3: Install Your Support System
This is where the drill comes in. Start with the heavy-duty stuff — your hanging rods and shelving brackets. Use a stud finder if you're going into walls; otherwise, use heavy-duty anchors rated for your closet's weight capacity. Install hanging rods at standard height (about 65 inches for full-length hanging) and your top shelf about 12 inches below the ceiling. This is the structural foundation. Don't rush it. Take your time, use a level, and double-check measurements twice. I typically measure three times and drill once, if that tells you anything.
Step 4: Add Your Shelving and Storage Layers
Once your brackets are secure, install wooden shelves at varying heights based on what you're storing. Here's my typical formula: 12-15 inches between shelves for folded items, 18-20 inches if you're storing sweaters or boxes. If you're feeling fancy — and really, why not? — add LED lighting strips under the shelves. It's probably the single best upgrade you can make. The lighting is subtle, warm, and absolutely transforms how the closet feels.
Step 5: Organize with Intention
Now for the fun part. Arrange your hanging clothes by color, then by type. So all your black blouses together, then black pants, then black blazers, and so on. Fold bulkier items and place them on shelves. Use matching storage bins — the uniformity is what makes this feel "designer." Label everything clearly. Top shelves typically work best for off-season storage and items you don't use daily. Keep your everyday items at eye level and within easy reach. Your most-used items should be the most accessible.
Step 6: Final Touches and Styling
 Boho DIY Room Makeover: Full Revamp Under $200
Switch to wooden hangers (they're more supportive and look way better than plastic), add small decorative touches like woven baskets or a decorative jewelry tray, and step back to admire your work. Consider adding a small mirror or full-length mirror if space allows. The final reveal should make you actually want to open your closet.
Pro Tips
Invest in quality hangers. Seriously. Those flimsy plastic hangers are costing you more than they save. Wooden or velvet hangers preserve your clothes better, prevent shoulder marks, and look exponentially more elevated. You can often find solid options at The Home Depot for reasonable prices.
Use vertical space aggressively. Most people waste the upper third of their closet. Stack shelves, use hanging organizers, install hooks on the inside of doors. The goal is to make every square inch work for you.
Keep a "maybe" box. When decluttering, don't throw out that one dress you're unsure about — put it in a box, date it, and revisit in three months. If you didn't wear it, donate it guilt-free.
Label everything. I cannot stress this enough. When storage containers are labeled clearly, you maintain the system. When they're mystery boxes? Chaos ensues. Use a label maker and embrace it.
Don't match the overall aesthetic to trends. Choose neutral tones for your structural elements and let fashion trends live in your actual clothes. Your storage should be timeless.
Cost Breakdown
← Scroll to see full table →
| Item | Budget Option | Mid-Range | Premium |
|---|---|---|---|
| Shelving System | $150 | $280 | $400 |
| Hardware & Brackets | $40 | $80 | $120 |
| Storage Containers | $50 | $100 | $150 |
| Lighting | $25 | $50 | $80 |
| Hangers & Organizers | $50 | $100 | $200 |
| TOTAL ESTIMATED COST | $315 | $610 | $950 |
FAQ
Q: Can I do this without hiring a contractor?
A: Absolutely. This is a completely DIY-friendly project. If you're comfortable with a drill and comfortable reading instructions, you've got this. The most intimidating part is usually just getting started. I'd recommend watching a few YouTube tutorials specific to your closet type before you begin, but you don't need professional help.
Q: What if my closet is tiny?
A: Small closets actually benefit most from this kind of system. Focus on vertical storage, use slim wooden hangers, and incorporate hanging organizers on the back of doors. Mirrors can make the space feel larger. Every inch counts, so planning becomes even more critical. Really
- Diy Coffee Table Ideas Cheap
- Boho Home Decor Ideas Diy Budget
- Master Bedroom Makeover Ideas On A Budget
- cheap diy living room decor ideas
📷 Photo by Ali Moradi on Unsplash


