Elegant Closet Renovation on a Budget: Transform Your Space for Under $500
Here's the thing about closets — they don't get nearly enough love. We shove our stuff in there, close the door, and pretend the chaos doesn't exist. But what if I told you that you could completely transform your closet into something that actually makes you feel good when you open those doors? And honestly, you don't need to drop thousands of dollars to make it happen.
I've been renovating closets for years, and I've learned that elegance isn't about expensive custom builds or designer organizers. It's about smart planning, thoughtful choices, and a little elbow grease. You'd be shocked at what you can accomplish with under $500 — and I mean genuinely shocked.
Whether you're working with a tiny apartment closet or a sprawling walk-in, this guide will walk you through every step. We're talking better lighting, functional storage, fresh paint, and that polished look you've been dreaming about. Ready? Let's get started.
What You'll Need
Before you dive in, let's gather your materials. The beauty of this project is that you're probably not buying anything exotic — it's all stuff you can find at The The Home Depot, Target, or even IKEA.
- Paint & Primer (1 gallon) — $25-35. Go with a soft white, warm beige, or pale gray.
- Paint Roller & Brush Set — $12-18
- LED Strip Lighting (adhesive-backed) — $20-40. Game changer for visibility.
- Floating Shelves (set of 2-3) — $40-80. Budget-friendly alternatives to built-ins.
- Shelf Brackets & Hardware — $15-25
- Wooden Dowels or Tension Rods (for additional hanging) — $20-30
- Matching Hangers (set of 20-30) — $25-35. Seriously underrated for visual cohesion.
- Storage Bins & Baskets (3-4 units) — $40-60
- Caulk & Sealant — $5-8
- Sandpaper & Cleaning Supplies — $10-15
- Miscellaneous Hardware & Wall Anchors — $20-30
Total estimated budget: $252-376 — leaving you wiggle room within the $500 limit for splurges on higher-end bins or extra shelving.
Step-by-Step Guide
Step 1: Clear It Out Completely
I know, I know. This sounds like a pain. But trust me — you need a blank canvas. Pull everything out, and I mean everything. Hangers, shelving, the random box you forgot about five years ago. Now's the time to purge. If you haven't worn it, don't use it, or genuinely love it — it goes.
Step 2: Deep Clean & Prep the Space
Once everything's out, really clean. Vacuum, dust, wipe down the walls. If there's old paint, carpet stains, or buildup, address it now. Sand any rough spots. This step takes patience, but the results are worth it. A clean canvas sets the tone for everything that follows.
Step 3: Paint the Walls & Ceiling
Fresh paint is honestly the MVP of budget renovations. I typically recommend soft, neutral tones — think warm whites, pale greiges, or soft sage. These colors make spaces feel larger and more elegant. Prime your walls first, then apply two coats of paint. Don't skip the ceiling. Paint it white or just slightly lighter than the walls. You'd be amazed how much brighter this makes the space.
Step 4: Install Lighting
Bad lighting ruins an elegant closet. Period. LED strip lights are affordable and super effective. Mount them along the top shelf or on the soffit — anywhere that casts light downward onto your items. The investment here pays dividends every single day.
Step 5: Add Floating Shelves
Floating shelves are elegant, functional, and way cheaper than custom cabinetry. Install them at varying heights along one or two walls. This creates visual interest and gives you premium storage for folded items, boxes, and décor. Use sturdy brackets and don't skimp on installation — you want these solid.
Step 6: Install Additional Hanging Space
 Budget Apartment Renovation: DIY Hacks That Actually Work
Standard closet rods are often too limited. Add a second rod below the existing one for shorter items, or install tension rods along the side walls. Wooden dowels work beautifully too and cost next to nothing. This doubles your hanging capacity.
Step 7: Invest in Quality Hangers
Swap out all your mismatched hangers for matching wooden or slim velvet ones. Yes, this is a detail. But details matter. When everything is uniform, your closet looks intentional and organized — which is exactly what "elegant" means.
Step 8: Add Storage Solutions
Use matching baskets or bins for off-season items, accessories, and anything that doesn't hang. Group by category. This keeps visual clutter down while maximizing space. Label everything if you're into that sort of thing — honestly, it looks pretty too.
Step 9: Final Touches & Styling
Add a small mirror on the wall if space allows. Keep a small area clear for getting dressed. If you're feeling fancy, add a single decorative item — a nice plant, a framed print, or even just a decorative box. The goal is a space that feels curated, not cluttered.
Pro Tips
Use Vertical Space Aggressively — Most closets have way more potential above eye level. Don't just use your hanging rod and one shelf. Go higher. Use that space.
Color-Code Your Hangers — Okay, this might sound extra, but organizing by hanger color (rose gold for dresses, silver for tops, black for pants) creates an aesthetic that's genuinely satisfying and functional.
Add a Scent — A small sachet or fragrance diffuser makes your closet feel like a luxury boutique. Seriously. Cedar blocks are budget-friendly and actually help with moisture.
Layer Your Lighting — Don't rely on a single light source. Strip lights plus a small battery-operated puck light in a dark corner creates depth and eliminates shadows.
Before You Drill — Locate studs with a stud finder (you can rent one or use HGTV's guidance). Mounting shelves into studs is non-negotiable for safety and stability.
Don't Underestimate Paint Finish — Choose a satin or soft-sheen finish rather than flat. It's more washable and has a subtle elegance that flat paint lacks. The price difference is negligible.
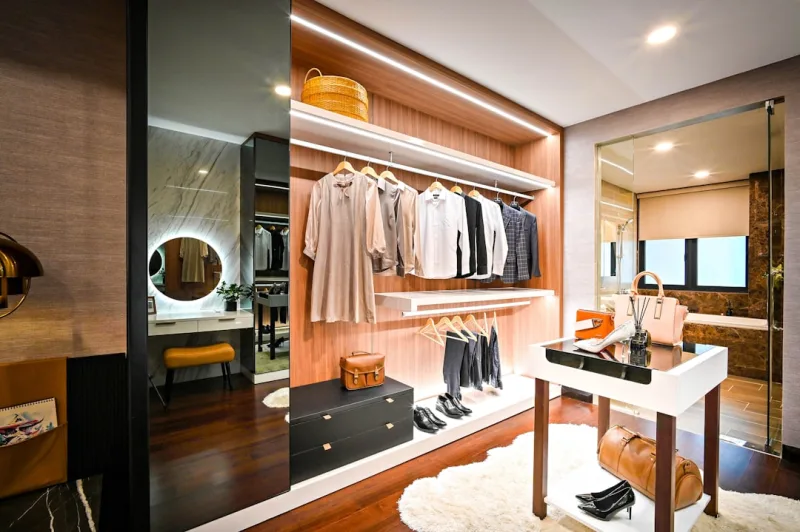
📷 Photo by Huy Nguyen on Unsplash


