Look, I get it — we're all tired of cookie-cutter holiday decorations that cost a fortune and look like everyone else's. This year, I'm genuinely excited about the shift toward personalized, handmade Christmas decor. There's something magical about walking into a home where someone actually put thought and effort into the decorations instead of just buying the same pre-made garland from The The Home Depot that half the neighborhood has. And here's the thing: making your own Christmas decor isn't just cheaper — it's actually way more fun and way less stressful than you'd think.
Whether you're dealing with a tiny apartment, a sprawling farmhouse, or anything in between, DIY Christmas decorating in 2026 is all about mixing sustainable choices with creative flair. I've been playing around with natural materials, upcycled elements, and some surprisingly trendy color palettes that aren't your typical red and green situation. We're talking warm metallics, moody jewel tones, and even some unexpected pastels that somehow totally work when the lights hit them just right.
The best part? You don't need to be a crafting expert or have a Pinterest-perfect setup. Honestly, some of my favorite decorations came from "oops, that didn't go as planned, but I kind of like it" moments. So let's walk through some genuinely doable DIY ideas that'll have your home looking magazine-worthy by December.
What You'll Need
Before you dive into any project, here's what I typically keep on hand for holiday decorating. You might not use everything for every project, but having these basics means you're prepared for whatever creative mood strikes.
- Hot glue gun and glue sticks — $12-18 (get a quality one, seriously)
- Floral wire and green wire — $6-10 per pack
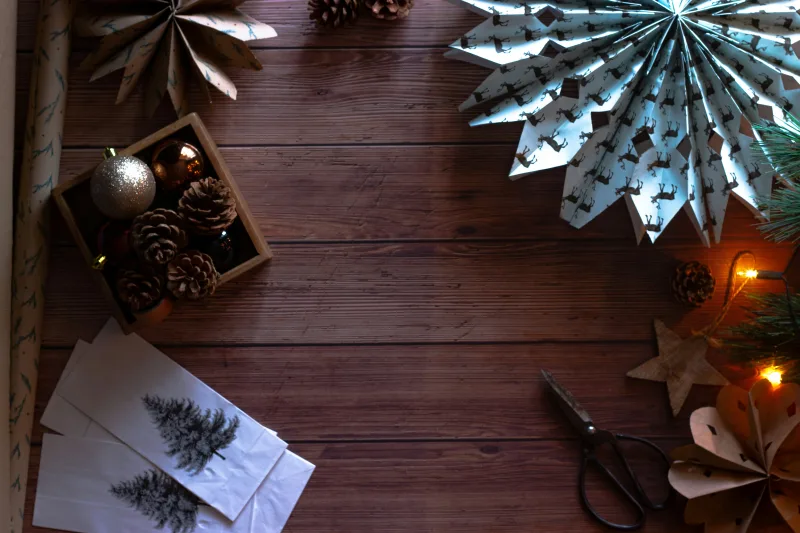
- Artificial greenery bundle (eucalyptus, fern, pine) — $15-25
- LED string lights (warm white, 100+ count) — $15-30
- Kraft paper and cardstock — $8-12 per pack
- Scissors and craft knife — $10-15 total
- Acrylic paint set — $8-15
- Paintbrushes (assorted sizes) — $5-10
- Wooden ornaments or shapes — $10-20 per pack
- Twine, ribbon, and burlap — $8-15 combined
- Mason jars or glass containers — $5-12 per dozen (or use ones you already have)
- Dried citrus slices and cinnamon sticks — $6-12
- Mod Podge or clear sealant spray — $5-8
- Ornament filling supplies (beads, faux snow, small decorations) — $10-20
Step-by-Step Guide
Project 1: Custom Hand-Painted Wood Ornaments
This is honestly my favorite starter project because you can't really mess it up. I usually grab a pack of unfinished wooden ornaments — Better Homes & Gardens & Gardens has some solid options — and just go wild with paint.
Start by prepping your workspace. Lay down newspaper or a craft mat because acrylic paint is forgiving but you don't want it on your nice table. Prime your ornaments with a base coat if you want — I usually skip this step unless I'm doing something really dark over white.
Now comes the fun part. You can do geometric patterns, hand-lettered names, minimalist designs, or even little scenes. The key is working in thin layers. Don't glob the paint on — you'll just end up with weird drips. Use a smaller brush for details and let each layer dry a bit before adding the next. I like doing coordinating sets of three — maybe one metallic gold, one emerald green with gold accents, and one in a matte cream with a simple hand-drawn snowflake.
Once you're happy with your design, seal everything with a matte or glossy spray finish depending on your vibe. Attach a small hook or loop at the top, and boom — you've got ornaments that actually mean something.
Project 2: Upcycled Jar Candle Holders with Dried Botanicals
Okay, this one requires basically zero artistic skill and looks incredibly sophisticated. Clean out some mason jars or any glass containers you have lying around. Seriously, raid your pantry.
Grab some dried citrus slices, cinnamon sticks, bay leaves, and dried orange peel (you can dry these yourself in the oven at 200°F for a couple hours or buy them pre-dried). Layer these inside your jar — don't just dump them in randomly. Think about how it'll look from the outside as people walk past. Alternate colors and textures.
Pour in some LED string lights — I use the battery-operated ones because they're safer and easier to manage. You can also add some Epsom salt or faux snow on top to make it look wintery. The dried botanicals smell amazing when warmed, and the lights filtering through just hit different at night. Tie a piece of twine or ribbon around the neck of the jar, and you've got a piece that actually looks like it came from a high-end home goods store. Seriously, I've had people ask where I bought these.
Project 3: DIY Garland from Natural Materials
This is where things get really personal because you're literally creating your own statement piece. Measure where you want your garland to go — above a fireplace, along a staircase, across a doorway.
Start with a base. I use floral wire or even sturdy twine if I'm going casual. Attach your greenery first — this creates your foundation. Eucalyptus, faux pine branches, or even real greenery from your yard works. Layer as you go to make it look full and organic.
 DIY Apartment Makeover: Paint, Shelves & Lighting Hacks
Now add your embellishments. String in some warm white LED lights and secure them gently with floral wire. Add your painted ornaments, dried citrus slices (wire these on), small wrapped boxes in coordinating colors, and any other elements that fit your aesthetic. Maybe some metallic picks or feather accents. The HGTV design team always says to work in odd numbers and vary the heights, which honestly is solid advice that actually makes things look better.
Step back frequently to see how it's looking as a whole. You want it to feel collected and intentional, not like you just threw everything at it. Though sometimes the thrown-together look is exactly what works, so trust your gut.
Pro Tips
Invest in quality LED lights. I'm serious about this. Cheap lights flicker, burn out, and drive you absolutely nuts. Spend the extra five bucks per strand. You'll use them for years, and they make everything look infinitely better.
Use unexpected color combinations. Everyone does red and green, right? Try navy and gold, emerald and cream, or even dusty rose with copper accents. Your home will stand out, and honestly, these colors feel more modern and sophisticated.
Work with what you have. Before buying anything, raid your closet, your kitchen, your entire house. Old fabric scraps can become bow accents, wooden spoons can be decorated and used as picks, empty bottles can become candle holders. Upcycling is in, and it's also just practical.
Embrace imperfection. Hand-painted ornaments are supposed to look hand-painted. Slightly wonky garlands have charm. Your DIY stuff shouldn't look factory-made — that defeats the entire purpose.
Plan your lighting early. Honestly, the lights can make or break your whole setup. Decide on your lighting scheme before you start decorating. Warm white feels cozy and traditional. Cool white feels modern and crisp. Multicolor can work if you're going playful, but honestly, I rarely recommend it unless you're specifically going for that aesthetic.
Document as you go. Take photos of your work in progress. You'll actually appreciate seeing how it comes together, and you'll have a reference for next year if you forget what you did.
Cost Breakdown
← Scroll to see full table →
| Project | Materials Cost | Time Required | Difficulty Level |
|---|---|---|---|
| Hand-Painted Wood Ornaments | $35-50 | 2-3 hours | Easy |
| Jar Candle Holders with Botanicals | $20-35 | 30 minutes | Very Easy |
| DIY Natural Garland (6-foot) | $40-75 | 1-2 hours | Medium |
| Upcycled Ornament Filler Ideas | $15-30 | 1 hour | Easy |
| Complete Starter Kit (all supplies) | $120-180 | Varies | Beginner-Friendly |
Note: Prices are approximate as of 2026 and can vary by location and retailer. Many supplies can be found at The Home Depot, craft stores, or ordered online.
FAQ
Can I make DIY Christmas decorations last for multiple years?
Absolutely, and honestly, they often look better the second year because you know what worked and what didn't. For painted ornaments, store them carefully in divided boxes so they don't crack. Garlands can be wrapped around a pool noodle and stored in a flat bin. The key is protecting everything from moisture and crushing. Keep them in a cool, dry place — not the attic if your attic gets humid. I've had the same ornaments and garland pieces going strong for four or five years with proper storage.
What's the best way to secure DIY garlands to avoid damaging walls?
I'm obsessed with removable adhesive hooks — they hold way more than people think and don't leave marks. For fireplace mantels, you
📷 Photo by micheile henderson on Unsplash


