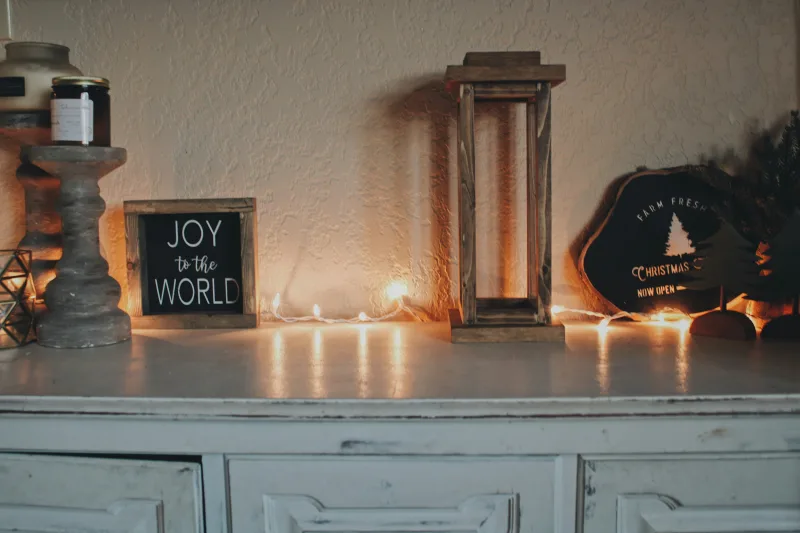
DIY Farmhouse Signs Ideas That Won't Break the Bank
Look, I get it. You're scrolling through Pinterest, seeing those gorgeous farmhouse signs with perfect weathered finishes and hand-lettered fonts, and your first thought is probably, "There's no way I can afford that." Here's the thing — you absolutely can make stunning farmhouse signs yourself for practically nothing. I'm talking five to fifteen bucks per sign, tops. The farmhouse aesthetic has completely taken over home decor (and honestly, I'm not mad about it), but those Etsy prices? Yeah, we can do better.
I've been making DIY signs for my own home for years now, and I've learned that cheap doesn't mean cheap-looking. With some basic materials you probably already have lying around and a little creativity, you can create pieces that look like they cost a hundred dollars. Whether you're decorating your kitchen, entryway, or porch, these ideas are totally doable — no fancy equipment required. Most of these projects take maybe an afternoon, and the best part? You'll have personalized decor that actually means something because you made it yourself.
So grab your coffee, let's talk about turning dollar store finds and scrap wood into farmhouse magic. Trust me, once you make your first sign, you won't be able to stop.
What You'll Need
Before we dive into the fun part, let's talk supplies. The beauty of this project is that most of this stuff is ridiculously affordable, and honestly, you might have some of it already.
- Wood pieces (pallet wood, scrap lumber, or plywood from The The Home Depot) — $3-8
- Acrylic paint (any craft brand, seriously) — $1-2 per color
- Paintbrushes (dollar store quality is fine) — $1-3
- Stencils or vinyl lettering (optional but helpful) — $2-5
- Sandpaper (120 and 220 grit) — $2-4
- Wood stain or whitewash (optional for aged effect) — $3-6
- Polyurethane sealer (keeps it looking fresh longer) — $4-8
- Drill and basic tools (you probably have these) — Free if you own them
- Pencil and ruler — Free (or $1 if you need to grab one)
- Hanging hardware (nails, hooks, or wire) — $1-3
Honestly, your biggest expense here will be the wood itself, and even that's negotiable. Check Better Homes & Gardens & Gardens project ideas for sourcing tips — they often feature budget-friendly wood alternatives that I swear by.
Step-by-Step Guide
Step 1: Select and Prep Your Wood
Start by choosing your wood base. Pallet wood is free if you know where to look — check behind stores, on Craigslist, or ask neighbors who've had deliveries. If you'd rather skip the scavenging mission (totally fair), grab some scrap wood from The Home Depot. They sometimes sell cut pieces super cheap, or you can ask the lumber section to cut larger pieces for you. I usually go for pieces that are roughly 10 to 24 inches long, depending on the sign size I'm envisioning.
Once you've got your wood, sand it down. This step is crucial because it removes splinters and rough spots while creating a nice surface for paint. Start with 120-grit sandpaper for rough surfaces, then finish with 220-grit for a smooth final texture. Work with the grain, and don't worry about making it perfect — slight imperfections actually add to the farmhouse charm.
Step 2: Paint the Base
Here's where the magic starts. Paint your wood with acrylic paint in your chosen color. For classic farmhouse vibes, I usually go with white, cream, or soft gray. Apply two coats — the first coat will look thin and streaky, but trust the process. Let each coat dry completely (usually 30 minutes to an hour, depending on the paint). Don't invest in expensive paint here. Dollar store acrylic works just fine, and honestly, the cheaper brands sometimes have that slightly chalky finish that's perfect for farmhouse aesthetics.
Pro move: If you want an intentionally aged look, skip the second coat and let the wood peek through in spots. Or paint a base color, let it dry, then dry-brush a lighter or darker shade over the top for that weathered effect.
Step 3: Create Your Design
This is where your vision comes to life. You have several options here, and none of them require fancy lettering skills. Option one is using stencils — grab them at any craft store for a couple bucks, then use a paintbrush to fill in the letters. Option two is vinyl lettering, which you can purchase pre-made or cut yourself if you have access to a cutting machine. Option three is just drawing it out with pencil first and painting freehand. Honestly? Even if your lettering isn't perfect, it adds character. Real farmhouse signs aren't always perfectly symmetrical — that's the charm.
Start by lightly sketching your text in pencil. Measure twice (actually, measure three times). I use a simple ruler and find the center of my piece before I start. HGTV has some amazing tutorials on lettering techniques that've saved me more than once when I'm stuck on spacing.
Step 4: Paint Your Letters


Using your stencil, vinyl, or pencil outline, paint your letters in a contrasting color. White letters on a dark base looks crisp and modern, while darker letters on white gives classic farmhouse. I usually do two to three coats depending on opacity. Let each coat dry completely before adding the next one.
Step 5: Add Details and Aging
Once your main lettering is dry, this is the fun part — adding those little details that make it look professionally made. Light dry-brush some darker paint in the corners or along the edges for depth. You can add small decorative elements like arrows, flourishes, or simple designs with a thin paintbrush. This step is totally optional but makes a huge difference in the final look.
Step 6: Seal It
To protect your work and make it last, apply a polyurethane sealer. This is especially important if your sign will live in a bathroom or kitchen where humidity happens. Just one coat does the trick — thin, even strokes, and you're done. Let it cure for the time recommended on the can (usually 24 hours) before hanging.
Step 7: Hang and Display
Attach your hanging hardware — simple nails, eye hooks, or even wire if you're feeling fancy. Hang it somewhere it'll make you smile every time you walk past. Your entryway, kitchen, bedroom, or porch are all excellent choices.
Pro Tips
Mix and match wood types: Don't feel like you need matching pieces. Combining different wood tones actually looks more authentic and farmhouse-y. I often mix natural wood with painted wood on the same wall.
Use what you have: Old picture frames, broken cutting boards, or even cabinet doors can become stunning signs. The less "new" it looks, the better for farmhouse aesthetic.
Layer your letters: Instead of painting letters directly on the sign, paint words on separate pieces of wood and arrange them like a collage. It adds visual interest and dimension.
Whitewash for instant aged vibes: Mix white paint with water (roughly 1:3 ratio) and brush it on over a darker base color. Let some of the base color show through for that perfectly weathered look without actually waiting years.
Keep it simple: The best farmhouse signs usually have just one or two words. "Home," "Gather," "Blessed," "Farmhouse" — these classics work because they're timeless and let the sign itself be the statement piece.
Batch your projects: Make multiple signs at once. It's way more efficient, and you'll get better at the process with each one. Plus, you can experiment with different techniques on the same day.
Cost Breakdown
← Scroll to see full table →
| Item | Quantity | Price | Total |
|---|---|---|---|
| Wood (pallet or scrap) | 1 piece | $0-8 | $0-8 |
| Acrylic paint | 2-3 colors | $1-2 each | $2-6 |
| Paintbrushes | 2-3 | $1 each | $1-3 |
| Stencils (optional) | 1 | $2-5 | $2-5 |
| Sandpaper | 1 pack | $2-4 | $2-4 |
| Polyurethane sealer | 1 can | $4-8 | $4-8 |
| Hanging hardware | 1 set | $1-3 | $1-3 |
| Total Cost Per Sign (using all items): | $12-37 | ||
| Total Cost Per Sign (if you have tools/supplies): | $5-15 | ||


