How to Create an Elegant Closet Layout on a Budget
Look, I've been there — standing in front of a chaotic closet, clothes piled everywhere, thinking "I need a designer to fix this." But here's the thing: you absolutely don't. I've helped countless friends transform their closets from disaster zones into gorgeous, functional spaces without dropping thousands of dollars. And honestly? It's not even that hard once you know the right approach.
An elegant closet isn't about having expensive built-ins or custom shelving (though those are nice if you have the budget). It's about smart organization, intentional spacing, and making what you have work harder. Whether you're dealing with a tiny reach-in closet or a sprawling walk-in, the principles remain the same — maximize your vertical space, invest in a few key organizational pieces, and create a layout that actually makes sense for how you live.
The best part? You can pull this off for somewhere between $150 and $400, depending on what you already own. I'm going to walk you through exactly how I'd do it, step by step, so you can have the kind of closet that makes you actually want to open the doors.
What You'll Need
Before we dive into the layout itself, let's talk materials. You don't need to buy everything at once — honestly, I'd recommend starting with the structural stuff and adding accessories as you go. Here's my realistic shopping list:
- Closet rod dividers (set of 5-7) — $18-25
- Wooden or metal shelves (2-3 shelves, 24-36" wide) — $60-90
- Slim velvet hangers (pack of 50) — $25-35
- Drawer organizer dividers (fabric or plastic) — $12-18
- Floating shelf brackets (if not included) — $15-25
- Shelf risers (to double your hanging space) — $20-30
- Clear storage boxes (medium, set of 3) — $20-30
- Baskets for bottom storage (2-3 woven baskets) — $30-50
- Hooks and hardware (command hooks, nails, anchors) — $10-15
Pro tip: Check The The Home Depot first — they often have better prices than specialty stores, and their return policy is solid if something doesn't work out. Better Homes & Gardens & Gardens also has an excellent online selection if you want to browse options before hitting the store.
Step-by-Step Guide
Step 1: Empty Everything and Measure
I know it sounds obvious, but seriously — take everything out. Pull every single item. Once your closet is completely empty, you can actually see what you're working with. Measure your space: width, depth, height, and the location of any existing rods or shelves. Note where your outlets are (if you have any). Take photos too — you'll want to reference them as you redesign.
Step 2: Declutter Ruthlessly
This is where the magic happens. Go through everything you pulled out and be honest about what you actually wear. I use the "would I buy this again?" test — if the answer is no, it goes. Donate, sell, or recycle. You're not creating an elegant closet if you're keeping things out of guilt. Aim to keep maybe 60-70% of what you originally had.
Step 3: Create Your Zones
Now here's the thing about elegant closets — they look intentional. Divide your closet into zones. I typically create four main areas: tops, bottoms, dresses/jackets, and accessories. If you have a walk-in, you can be more elaborate. If you have a reach-in, keep it simple. Use your rod dividers to create visual sections, and when someone opens your door, they should immediately understand where things go.
Step 4: Install Your Storage Infrastructure
This is where shelf risers and additional shelving come in. If you only have one rod, install a shelf riser above it to create a double hanging space — instant capacity without renovation. For shelves, I typically put one above the hanging area for folded items, and one or two on the bottom third for bulkier items. Use your floating shelf brackets if you're adding new shelves, or install risers on existing shelving.
Step 5: Organize Strategically
Here's my organization order, and honestly, it works: hang all your tops first (organized by color within each zone), then bottoms, then anything longer. Fold heavier pieces like jeans and sweaters and place them on shelves — they actually take up less space that way. Put your everyday accessories in the easiest-to-reach spot. Seasonal items go in those clear storage boxes on higher shelves. Your daily-use shoes go front and center; special occasion ones go in the back.
Step 6: Add the Pretty Touches
Use those velvet hangers throughout — they're thin, they're elegant, and they prevent clothes from sliding. Add a small basket or decorative box for smaller accessories like scarves and belts. Install a few hooks on the side walls for bags or frequently-worn jackets. If you have room, add a small mirror or one decorative element. The goal is functional, but it should look intentional and beautiful.
Pro Tips
 Budget Apartment Renovation: DIY Hacks That Actually Work
Hang by color: It sounds simple, but organizing your hanging clothes by color (white, neutrals, pastels, brights, darks) makes everything look more elegant and makes it way easier to actually get dressed. You'll see your options at a glance.
Use vertical space aggressively: Most people waste the space above their hanging rods and below their shelves. Install hooks, use shelf risers, add risers under shelves to create more storage. Small adjustments add up.
Embrace the fold: Heavy knits, jeans, and basics actually look better folded on shelves than crammed on hangers. Plus, you'll see more items. HGTV has some great tutorials on clothing folding methods that genuinely work.
Keep it minimal-ish: Elegant closets aren't overstuffed. Try the 80/20 rule — fill about 80% of your space, leave 20% breathing room. It looks better, and you can actually grab things without disturbing everything else.
Label everything: If you're using baskets or boxes, label them. It keeps things organized and maintains that "designed" look rather than a chaotic "I shoved stuff in there" vibe.
Cost Breakdown
← Scroll to see full table →
| Item | Estimated Cost | Where to Buy |
|---|---|---|
| Rod dividers | $18-25 | The Home Depot, Amazon |
| Shelving | $60-90 | The Home Depot, IKEA |
| Velvet hangers | $25-35 | Target, Amazon |
| Drawer dividers | $12-18 | Container Store, The Home Depot |
| Shelf risers | $20-30 | The Home Depot, Amazon |
| Storage boxes | $20-30 | Target, Walmart |
| Baskets | $30-50 | HomeGoods, Bed Bath & Beyond |
| Hardware and hooks | $10-15 | The Home Depot |
| Total Estimated Cost | $195-293 | — |
FAQ
Q: Can I do this in a tiny reach-in closet?
A: Absolutely — actually, small spaces are where this approach shines. Focus on vertical storage, use shelf risers to create double hanging space, and resist the urge to stuff things in. It's better to have a beautifully organized small closet than a chaotic medium one. Less is genuinely more here.
Q: What if I rent and can't install shelves?
A: Use command hooks, tension rods, and freestanding shelving units instead. You can create a gorgeous layout with zero permanent installation. Wire shelving units are cheap and surprisingly elegant when styled right.
Q: How often do I need to reorganize?
A: Once you have the system in place, a quick refresh every season (maybe 30 minutes) keeps things elegant. If you're decluttering and reorganizing quarterly or twice a year, you're doing it right. It shouldn't feel like a massive project.
Final Thoughts
Creating an elegant closet on a budget is totally doable — and honestly, it's one of those projects that pays dividends every single day. Every time you open your closet, you'll feel that little spark of "yeah, I did this." Plus, when you can actually see and access your clothes, you get way more use out of what you already own. That's a win financially and aesthetically.
Start with the decluttering and measuring, invest in a few key organizational pieces, and take your time with the setup. You don't have to do it all in one weekend. The beauty of this approach is that it grows with you — add baskets next month, upgrade your hangers the month after. You've got this, and your future self will be so grateful.
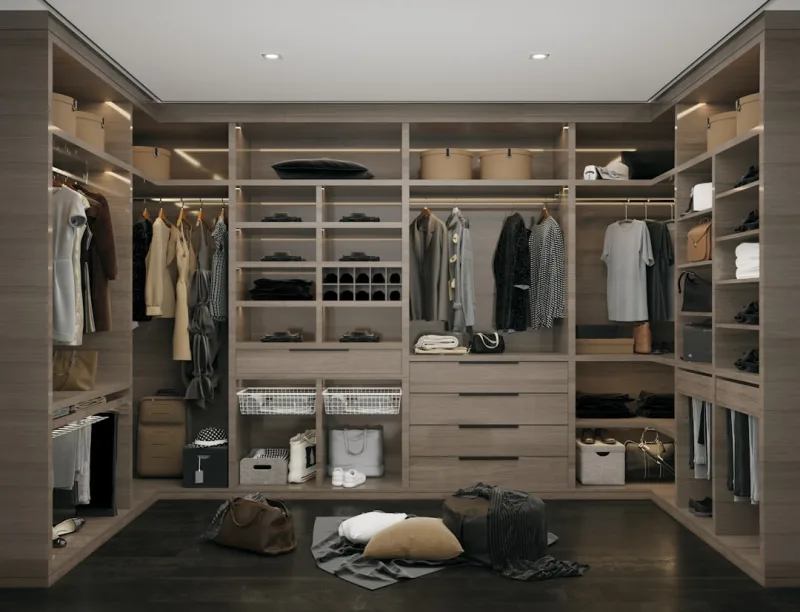
📷 Photo by Ali Moradi on Unsplash


