How to Create Your Dream Boho Kitchen in 2026: A Complete DIY Upgrade Guide
Look, I've been obsessed with boho kitchens for years now — and honestly, 2026 feels like the perfect moment to finally make the leap. The boho aesthetic has evolved beyond just macramé and throw pillows. We're talking warm-toned cabinetry, open shelving that actually looks intentional, and those gorgeous textured tiles that make your heart skip a beat every time you walk in.
Here's the thing about boho kitchens: they're not as intimidating to upgrade as you might think. You don't need to gut your entire kitchen or hire a professional contractor. With some strategic swaps, DIY installations, and a solid plan, you can transform your cooking space into something that feels authentically you — something that makes morning coffee actually feel luxurious.
I'm talking about incorporating natural materials, earthy color palettes, and those handcrafted touches that make boho so irresistible. Whether you're starting from scratch or working with an existing kitchen layout, this guide will walk you through everything you need to know to nail that 2026 boho aesthetic.
What You'll Need
Before you dive into any project, let's talk materials and costs. Most of these items are readily available through The The Home Depot, local tile shops, or specialty retailers — and yes, you can absolutely find budget-friendly options.
- Terracotta or Cement Tiles (for backsplash or flooring) — $200-$600
- Open Shelving Brackets (wrought iron or wooden) — $50-$150
- Reclaimed Wood Planks (for shelves) — $100-$300
- Warm Brass or Copper Hardware (cabinet knobs/pulls) — $80-$200
- Natural Fiber Baskets (for storage) — $60-$150
- Macramé Wall Hanging or Woven Art — $40-$120
- Pendant Lights (rattan or woven design) — $120-$350
- Paint (low-VOC, earthy tones) — $30-$80
- Grout and Adhesive (for tile work) — $25-$50
- Caulk, Screws, and Fasteners — $20-$40
- Terracotta Pots (for herbs) — $25-$75
Step-by-Step Guide
Step 1: Plan Your Layout and Color Palette
Before touching anything, spend a weekend just... thinking. Pull inspiration from HGTV's boho home tours, Pinterest boards, even Instagram accounts dedicated to bohemian living. What colors call to you? Warm ochres? Dusty terracottas? Soft sage greens? Take photos of your current kitchen and sketch out where changes need to happen.
The boho kitchen is all about balance — you need contrast. Light walls with darker flooring, or vice versa. Texture against smoothness. Plan these combinations before you commit to anything permanent.
Step 2: Update Cabinet Hardware
This is the easiest win, and it's surprising how much impact it has. Swap out those standard silver knobs for warm brass or aged copper pieces. You'll need just a drill and a screwdriver — seriously, this takes maybe an hour for a full kitchen. Remove the old hardware, drill out any holes if needed, and install your new pieces. This is something everyone can handle, and Better Homes & Gardens & Gardens constantly features this hack because it genuinely transforms things.
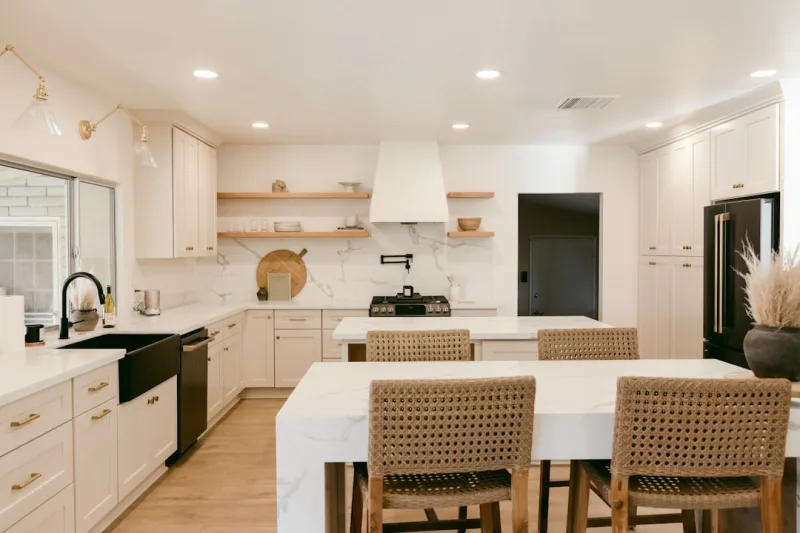
Step 3: Create Open Shelving or Modify Existing Cabinets
Open shelving is quintessential boho. If you don't have it, you can either remove some cabinet doors or install floating shelves on empty wall space. Measure carefully — seriously, use a level — and install your brackets first. Space them about 16 inches apart for proper support. Then place your reclaimed wood or natural wood planks on top.
Pro tip: don't go all-in on open shelving everywhere. Mix it with closed storage to avoid looking cluttered. The Home Depot has excellent tutorials on floating shelf installation if you need a visual reference.
Step 4: Install a Boho Backsplash
Here's where you get creative. Terracotta, cement tiles, or hand-painted tiles create that authentic boho vibe. Start by measuring your backsplash area and calculating how many tiles you need. Apply a thin-set adhesive to your wall with a notched trowel, press each tile carefully, and let it cure for 24 hours. Then grout between tiles, wipe away excess, and seal if necessary.
Take your time with this step. It's not hard, but rushing makes messy grout lines. Watch a couple YouTube videos beforehand — seeing it done really demystifies the process.
Step 5: Paint Walls and Refresh Your Base
Choose low-VOC paint in warm, earthy tones. Think creamy whites with golden undertones, soft terracottas, or dusty sage. Prime first, then paint two coats. While you're at it, consider painting the interior of open shelving a complementary shade — darker shelves behind lighter walls look stunning.
Step 6: Update Lighting with Boho Fixtures
 Budget Apartment Renovation: DIY Hacks That Actually Work
Swap out harsh overhead lights for rattan or woven pendant lights. If you're comfortable with basic electrical work, this is doable DIY. If not, hire an electrician — it's not expensive for a simple swap. Make sure your new fixtures have warm-toned bulbs (2700K color temperature) for that cozy feel.
Step 7: Style and Accessorize
Now comes the fun part. Arrange natural fiber baskets on open shelves for storage. Add potted herbs on windowsills. Hang a macramé wall hanging or woven textile. Place terracotta pots with trailing plants on shelves. The key is making everything look intentional but lived-in — not styled within an inch of its life.
Pro Tips
Layer Your Textures: Boho thrives on texture variation. Smooth ceramic alongside rough woven baskets, sleek brass hardware against weathered wood. This contrast is what makes the aesthetic feel sophisticated rather than chaotic.
Go Slow with Color: Invest in samples before committing to paint colors or large tile purchases. What looks warm and inviting in a can might feel overwhelming once it's on your walls. Paint large swatches and live with them for a few days.
Source Authentically: Check local antique shops, estate sales, and vintage markets for genuine boho elements. They're often cheaper than new "boho-inspired" items from big retailers, and they carry actual soul.
Don't Forget Function: Boho should never sacrifice functionality. Make sure your open shelving actually fits your daily workflow. If you can't easily grab a mug, you're going to resent the aesthetic pretty quickly.
Consider Your Flooring Last: It's tempting to start with flooring, but honestly, make other changes first. Your flooring choice will feel more natural once you've established your wall colors and style direction.
Cost Breakdown
← Scroll to see full table →
| Project Element | Budget Range | Time Required |
|---|---|---|
| Cabinet Hardware Update | $80-$200 | 2-3 hours |
| Paint (Walls & Shelving) | $30-$80 | 8-12 hours |
| Open Shelving Installation | $150-$400 | 4-6 hours |
| Tile Backsplash | $200-$600 | 6-10 hours |
| Pendant Lighting | $120-$350 | 2-4 hours |
| Accessories & Decor | $150-$350 | 3-4 hours |
| TOTAL ESTIMATE | $730-$1,980 | 25-39 hours |
FAQ
Q: Can I achieve a boho kitchen on a really tight budget?
A: Absolutely. Start with just hardware updates and painting — that alone costs under $200 and transforms your space. Add open shelving next. Save the backsplash and lighting for later. Boho is actually great for budget-conscious upgrades because so much of the aesthetic comes from styling and arrangement rather than expensive materials.
Q: Do I need to hire professionals for any of this?
A: The only part I'd genuinely recommend hiring out is electrical work if you're not comfortable with it. Everything else — tiling, painting, shelving, hardware — is totally doable for DIYers. Watch some tutorials, take your time, and you'll be fine.
Q: Will a boho kitchen feel dated by 2028 or 2029?
A: Boho has been around for decades and keeps evolving. The key is sticking with timeless elements — natural materials, warm colors, functional design —
📷 Photo by Jakob Owens on Unsplash


