Okay, so you've got this balcony that's just... there. Maybe it's been collecting dead plants and forgotten patio furniture for the better part of a year. Or maybe it's completely empty and kind of depressing. Either way, you're ready to actually use it — and I get that. A warm, inviting balcony is basically an extension of your home, and honestly, it doesn't have to be complicated or expensive to get it right.
Here's the thing: most beginners overthink this. They assume they need a professional designer or a massive budget to create something that feels cozy and Instagram-worthy. But that's just not true. With some thoughtful choices about lighting, textiles, and a few key pieces, you can completely transform your balcony into a space that actually feels warm — literally and emotionally.
I've walked through this process with plenty of first-timers, and I'm going to walk you through it too. We're keeping it simple, practical, and totally doable for someone who's never done this before.
What You'll Need
Before you start shopping (yes, the fun part!), let's talk materials. These are the items that'll make the biggest impact on your budget and your final result.
- Outdoor String Lights — $25-50 (Warm white is key here; check The The Home Depot for quality options)
- Outdoor Rug (5x7 or 4x6) — $40-120
- Weather-Resistant Throw Pillows (2-4) — $30-80
- Planter Pots with Soil — $25-60
- Potted Plants or Flowers — $20-50
- Outdoor Chair Cushions or Pads (if needed) — $20-40
- Lantern or Table Lamp (battery or solar) — $20-45
- Wooden Ladder Shelf or Side Table — $40-80
- Outdoor Curtain Rod and Sheer Curtains (optional) — $30-70
- Paint or Wood Stain for Railings (optional) — $15-30
Total budget for a complete makeover? Somewhere between $245 and $625 depending on what you already have and how much you splurge. That's genuinely reasonable for transforming an entire outdoor room.
Step-by-Step Guide
Step 1: Clean and Prep Your Space
I know, I know — nobody wants to hear "clean first." But trust me, you'll feel the difference immediately. Sweep out all the debris, wipe down the railings, and if your furniture is still there, give it a quick scrub. You're working with a clean slate here, which makes everything that comes next feel fresher and more intentional. This step costs you absolutely nothing except 30 minutes of your time.
Step 2: Choose Your Color Palette
This is honestly where the magic happens. When we talk about making a space feel "warm," we're talking about colors that embrace you — think warm neutrals, terracotta, deep oranges, burgundy, or rich golds. Skip the cool grays and icy blues if coziness is your goal. Grab your phone and scroll through Better Homes & Gardens & Gardens or HGTV for inspiration. Save three or four images that make you feel something. Your color palette should come directly from those photos.
Step 3: Lay Down an Outdoor Rug
This is the foundation of your whole vibe. A good outdoor rug immediately grounds the space and defines it as a "room" — it anchors your furniture and makes everything feel intentional. Choose warm tones: rust, terracotta, warm gray, or natural fiber like jute. If your balcony is small, go 4x6. Bigger balconies? A 5x7 rug does wonders. Place it first, before you add anything else.
Step 4: Add Seating and Cushions
Whether you're bringing out an old chair, buying a simple lounger, or investing in a small outdoor sofa, make it comfortable. This is where throw pillows come in. I usually recommend going with 2-4 pillows in coordinating warm tones — mix textures, throw in a striped one with a solid one. Quality matters here more than quantity. Your guests should actually want to sit down.
Step 5: Install Your Lighting
Here's where your space goes from "nice" to "warm." String lights are your secret weapon. Warm white lights — not cool white, not RGB color-changing (please) — create an atmosphere that makes people want to linger. Drape them overhead in a zigzag pattern, or wrap them around your railing. If you're renting or hesitant about installation, battery-operated options work great. Add a lantern or solar-powered table lamp too for layered, ambient lighting.
Step 6: Bring in Plants and Greenery
Plants add life literally and figuratively. You don't need a green thumb here — honestly, a few hardy plants like pothos, snake plants, or seasonal flowers do the job. Arrange them in different-sized pots (varying heights makes things more interesting) and place them around your seating area. They soften edges and make the space feel established, like you've actually cared for it.
Step 7: Add a Small Side Table or Shelf
A simple wooden ladder shelf or small side table gives you surfaces for drinks, candles, books, or your phone. This functional piece also adds another design layer. Style it loosely — a potted plant, a candle, a book. Don't overthink it.
Step 8: Layer in Soft Textures
 Budget Apartment Renovation: DIY Hacks That Actually Work
Throw blankets are underrated. Drape one over your chair. It looks inviting and gives people a reason to stay outside longer, even when it's slightly cool. Woven baskets can hold extra blankets or pillows too.
Pro Tips
Go vertical with limited space. If your balcony is tiny, use wall space. Hanging planters, wall-mounted shelves, and even curtains on railings make everything feel bigger without eating up square footage.
Invest in quality outdoor fabric. Cheap cushions fade and fall apart. Spend a bit more on weather-resistant materials, and your setup stays beautiful for years.
Test your lighting at night. String lights look amazing when the sun's down. Hang them before you commit to placement — the whole vibe changes after dark.
Keep it simple first. You can always add more later. Start with the essentials (rug, seating, lights) and see how you feel before buying extra stuff.
Use warm light bulbs everywhere. If you're adding any fixtures with bulbs, choose 2700K color temperature. It makes everything — including you — look better and feel cozier.
Cost Breakdown
← Scroll to see full table →
| Item | Budget (Low) | Budget (High) |
|---|---|---|
| Outdoor String Lights | $25 | $50 |
| Outdoor Rug | $40 | $120 |
| Throw Pillows (4) | $30 | $80 |
| Planter Pots & Soil | $25 | $60 |
| Plants & Flowers | $20 | $50 |
| Chair Cushions | $20 | $40 |
| Lantern or Lamp | $20 | $45 |
| Side Table or Shelf | $40 | $80 |
| Curtains & Rod (Optional) | $0 | $70 |
| TOTAL | $245 | $625 |
FAQ
Q: Can I do this on a super tight budget?
A: Absolutely. Start with the essentials: string lights ($25), a decent rug ($50), and pillows you already own. Add plants from a local nursery ($30-40) and boom — you're at about $110-120 and you've created real atmosphere. Build from there as funds allow.
Q: What if my balcony gets intense afternoon sun or wind?
A: Choose fade-resistant fabrics and secure everything. For sun, sheer outdoor curtains help without blocking the view. For wind, go heavy on plants and use heavier decor items that won't blow away. Stake things down.
Q: How do I make a rental-friendly balcony without damaging walls?
A: Command hooks and damage-free adhesive strips are your friends. Battery-operated lights need no installation. Freestanding furniture and potted plants don't require any commitments. You can literally move your entire setup when you leave.
Conclusion
Transforming your balcony into a warm, inviting space doesn't require designer expertise or a luxury budget. It takes intentional choices, a bit of creativity, and honestly — just deciding that your outdoor space matters. Once you set it up, you'll be
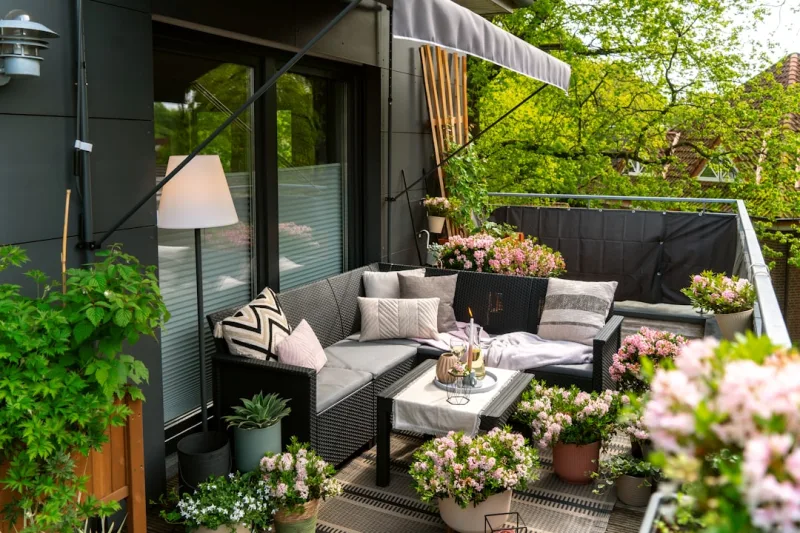
📷 Photo by Charlotte Cowell on Unsplash


