Transform Your Balcony into a Luxury Oasis: DIY Hacks That Actually Work
Listen, I get it. Your balcony probably looks like a forgotten corner of your home right now. Maybe it's got a couple of sad plastic chairs, some weathered planters, and a whole lot of neglected potential. But here's the thing — you're literally sitting on one of the most valuable outdoor real estate you own, and it doesn't take a massive budget or a team of contractors to turn it into something genuinely luxurious.
I've spent the last few years helping friends and clients transform their outdoor spaces, and I've learned that luxury doesn't always mean expensive. It means thoughtful. It means intentional. It means understanding how to layer textures, colors, and elements to create a space that feels like a five-star resort — minus the five-star price tag. The best part? Most of these hacks are things you can actually do yourself on a Saturday afternoon.
So grab your coffee, let's talk about how to make your balcony the place you actually want to spend time on. Because honestly, after 2024, don't we all deserve a little outdoor luxury in our own homes?
What You'll Need
Before we dive into the fun stuff, let's get real about what you'll actually need to pull this off. I've broken this down into categories because — trust me — knowing what you're buying makes the whole process less overwhelming.
Flooring & Base Layer
- Outdoor deck tiles or composite decking (8x8 ft area) — $150-$300 from The The Home Depot
- Waterproof outdoor rug (5x7 ft) — $80-$150
- Anti-slip coating or sealant — $25-$40
Furniture & Seating
- Woven outdoor chairs (set of 2) — $200-$400
- Side table or coffee table — $60-$120
- Outdoor cushions & pillows — $50-$100
Lighting & Ambiance
- String lights (warm LED, solar-powered) — $25-$50
- Lanterns or outdoor lamps — $40-$80
- Candles in glass holders — $15-$30
Greenery & Plants
- Large planters (ceramic or concrete, set of 3) — $60-$120
- Tall bamboo or ornamental grass — $20-$40
- Trailing ivy or climbing plants — $15-$35
- Potting soil & plant food — $20-$35
Accessories & Finishing Touches
- Outdoor throw blankets — $30-$60
- Decorative wall art or mirrors — $40-$80
- Privacy screen or trellis — $50-$150
- Outdoor speaker — $40-$100
Step-by-Step Guide
Step 1: Assess Your Space & Clean Everything
Okay, first things first. Take a hard look at your balcony. Measure it. Check the weight capacity. Look at the view — what are you working with? What's the sun exposure like? This stuff matters because it determines everything else you do.
Then clean. I mean really clean. Sweep, wash, power wash if you can. Get rid of the grime, the dust, the debris from last season. Trust me — you can't build luxury on a dirty foundation. It's the unsexy part, but it's absolutely essential. I usually spend a good hour on this, and it genuinely makes a difference in how the space feels when you're done.
Step 2: Create a Foundation with Flooring
This is where your balcony starts looking intentional. Whether you go with composite deck tiles from The Home Depot or an outdoor rug, this is about defining your space. I'm obsessed with deck tiles right now because they're so flexible — you can arrange them however you want, they hide imperfections, and they instantly elevate the whole vibe.
Lay them out, secure them properly, and add an anti-slip coating if you're in a rainy climate. This creates a visual anchor for everything else. It says "I care about this space," which honestly is half the battle.
Step 3: Layer Your Lighting
Here's where the magic happens. Lighting transforms an outdoor space from day use to evening use, and that's when luxury really shines. String lights overhead create that resort-y atmosphere — go warm white, never harsh white. Add some lanterns at ground level, maybe some candles in glass holders on your tables.
Pro move? Use solar-powered lights so you're not running extension cords everywhere. Modern ones are actually really good now. Better Homes & Gardens & Gardens has some gorgeous options that don't look cheap.
Step 4: Add Strategic Furniture
Don't overcrowd. This is key. Pick pieces that serve a purpose and look intentional. Two beautiful chairs, a small side table, maybe a bench if you have room. Quality beats quantity every single time. You want to be able to actually move around and breathe.
Add those outdoor cushions and throw pillows — they soften the space and make it feel inviting. Layer different textures: woven, linen, velvet if you can find outdoor versions.
Step 5: Bring in Greenery with Purpose
Plants don't just decorate — they transform. Tall plants give you privacy and height. Trailing plants add movement and elegance. Mix pot sizes and materials for that curated, high-end look.
 Budget Apartment Renovation: DIY Hacks That Actually Work
I always recommend starting with low-maintenance plants. Ornamental grasses, bamboo, ivy — things that can handle your specific light situation without needing constant attention. Check with your local nursery about what grows best in your area. They're usually super helpful.
Step 6: Add Finishing Touches
Throw blankets over your chairs. Add a mirror to reflect light and create depth. Maybe grab a small outdoor speaker for ambiance. These little details are what push it from "nice patio" to "I want to live out here."
Check out HGTV for inspiration — their outdoor living guides are solid for ideas on how to style these finishing touches.
Pro Tips
Think About Your Flow: Arrange furniture so people naturally move through the space. You want conversation areas, not obstacles. I like creating a little "seating zone" on one side and leaving clear space on the other.
Honestly, the biggest mistake I see is people cramming too much into a small space. Resist that urge. Luxury is often about negative space — breathing room.
Layer Your Textures: Mix smooth, rough, soft, and hard materials. Stone, wood, woven elements, metal accents. This is what makes spaces feel sophisticated rather than flat.
Go Vertical: Use your walls and railings. Hanging planters, wall-mounted shelves, trellises — this maximizes your space without crowding it. It's a game changer for small balconies.
Choose a Color Palette: Stick to 3-4 colors max. I'm partial to neutrals with pops of color through plants and cushions, but find what speaks to you. Consistency reads as luxury.
Invest in Quality Where It Counts: Splurge on furniture and lighting. Skimp on accessories. You can swap out pillows and decor seasonally without breaking the bank.
Maintenance Matters: A luxury space that's not maintained looks worse than a simple space that is. Clean regularly. Water your plants. This commitment is what actually makes it feel luxurious.
Cost Breakdown
← Scroll to see full table →
| Category | Items | Cost Range |
|---|---|---|
| Flooring & Base | Deck tiles, rug, sealant | $255-$490 |
| Furniture | Chairs, table, cushions | $310-$620 |
| Lighting | String lights, lanterns, candles | $80-$160 |
| Greenery | Planters, plants, soil | $115-$230 |
| Accessories | Blankets, art, privacy screen, speaker | $160-$390 |
| TOTAL ESTIMATED COST | $920-$1,890 | |
Obviously, you can do this for less if you're strategic with sales and DIY versions. You can also spend more if you want premium everything. The sweet spot for that luxury feel without going broke? Probably around $1,200-$1,500.
Frequently Asked Questions
Q: How long does a full balcony makeover actually take?
A: If you're doing it yourself, you're looking at 2-3 weekends of actual work. Day one is cleanup and planning. Day two is installing flooring and furniture. Day three is plants, lighting, and styling.
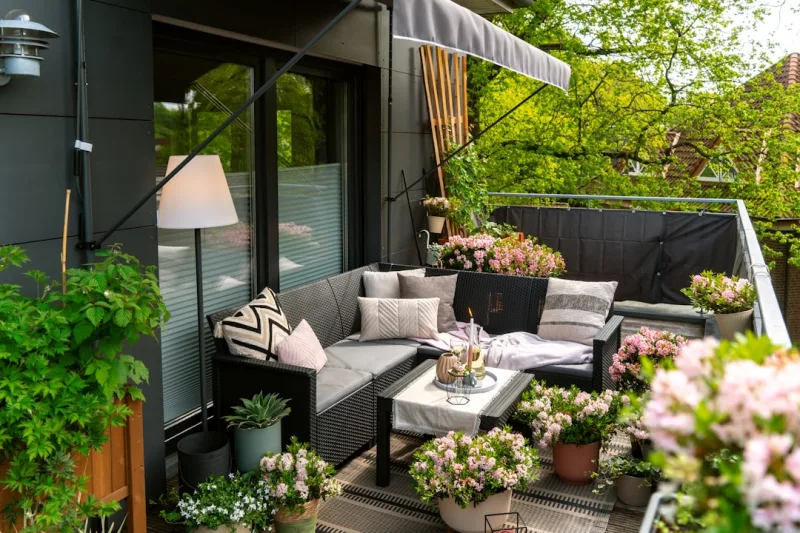
📷 Photo by Charlotte Cowell on Unsplash


