Luxury Closet Upgrade with Amazon Finds: Transform Your Space Without Breaking the Bank
Okay, so here's the thing — a luxury closet doesn't have to mean dropping thousands at high-end boutiques or hiring a professional organizer (though no judgment if you do). I've spent the last few years digging through Amazon's endless catalog, and honestly? Some of the best closet upgrades I've found are hiding right there at price points that won't make you wince. We're talking velvet hangers, elegant storage boxes, and lighting solutions that literally make your clothes look better.
I used to think luxury closets were reserved for celebrities and people with trust funds. Then I realized that luxury is really just about intention. It's about choosing quality pieces that make you feel good when you open that door. The fact that most of those pieces come from Amazon — well, that's just smart shopping. This guide will walk you through upgrading your closet with finds that actually work, actually last, and actually look expensive.
Whether you're working with a tiny apartment bedroom or a sprawling walk-in, the principles are the same: thoughtful organization, quality materials, and strategic lighting. Let's get into it.
What You'll Need
Materials & Amazon Finds with Prices (as of 2024):
- Velvet Hangers Set (50-pack) — approximately $25-35
- LED Strip Lighting (Motion-Activated) — approximately $20-30
- Fabric Storage Boxes with Labels (6-pack) — approximately $30-45
- Wooden Shelf Dividers — approximately $15-20
- Premium Hanging Organizer (Over-the-Door) — approximately $25-40
- Luxury Scented Sachets or Fragrance Spray — approximately $10-20
- Acrylic Drawer Dividers — approximately $15-25
- Full-Length Mirror with Lights — approximately $60-100
- Jewelry Organizer/Drawer Inserts — approximately $20-35
- Shoe Rack or Shelf Risers — approximately $30-50
Step-by-Step Guide
Step 1: Start with a Complete Closet Purge
I know, I know — this isn't fun. But honestly, you can't build something beautiful on a foundation of clutter. Pull everything out. And I mean everything. Try things on if you haven't worn them in a year. Be ruthless. The goal isn't just a pretty closet; it's a closet that actually serves you. According to HGTV's organization experts, most people wear about 20% of their wardrobe 80% of the time. Let that sink in.
As you're purging, create three piles: keep, donate, and sell. Your closet is about to get a major upgrade, and it deserves to house pieces you actually love.
Step 2: Install Lighting (This Changes Everything)
Seriously — lighting is the secret weapon of luxury closets. I wasn't convinced until I installed my first LED strip light, and suddenly my clothes looked more expensive just by being visible. Install motion-activated LED strips along the top of your closet or under shelves. They're energy-efficient, they don't produce heat, and they make getting dressed feel less like a chore in the dark.
If you have space, add a full-length mirror with integrated lighting. Yes, it's one of the pricier items on this list, but the ROI is real — you'll actually see your outfits before you leave the house.
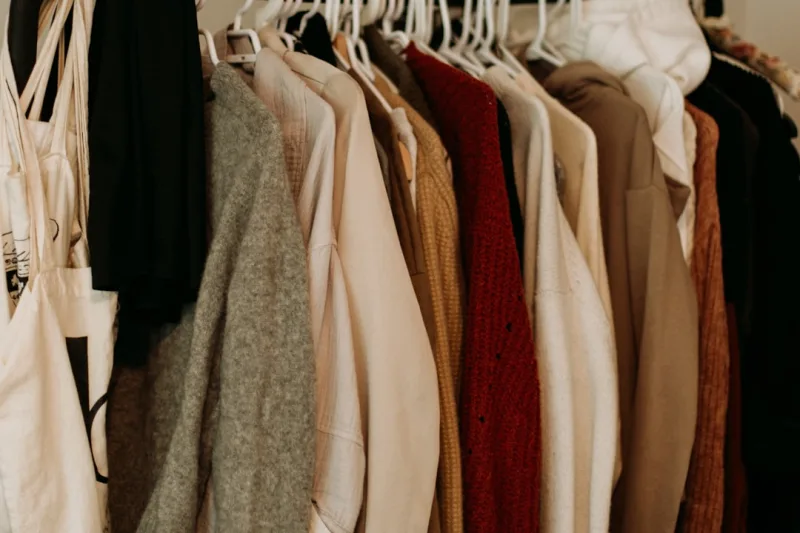
Step 3: Swap Out Your Hangers
This is where magic happens. Those plastic hangers from five years ago? Gone. Velvet hangers aren't just beautiful — they actually grip your clothes so nothing slips off. They take up less space than wooden hangers, and they make everything look intentional. Your blazers will thank you.
Organize your hangers by category: dresses, tops, bottoms, outerwear. Within each category, arrange by color if you're feeling fancy. It sounds excessive, but it genuinely saves time in the morning.
Step 4: Implement Vertical Storage
Here's the difference between an okay closet and a luxury closet: it uses vertical space. Add shelf dividers to prevent that annoying topple situation. Use drawer dividers for delicates and intimates — those acrylic ones look clean and keep everything visible. Hanging organizers are perfect for seasonal items or accessories you want to see at a glance.
The The Home Depot has some great resources on closet organization systems, and many of those principles can be applied with Amazon finds to create a custom setup that costs way less.
Step 5: Add Stylish Storage Solutions
Fabric storage boxes are your friend here. Choose neutral colors (whites, grays, creams, blacks) to maintain that luxury aesthetic. Label everything. I'm obsessed with labels — they cost almost nothing and make everything look more organized and intentional. Use these boxes for off-season clothing, extra blankets, or anything you need to store but want hidden.
 Boho DIY Room Makeover: Full Revamp Under $200
Shoe storage deserves its own moment. Tiered shelf risers or a dedicated shoe rack keeps footwear visible and accessible. No more digging through piles to find that one pair of heels.
Step 6: Style Your Shelves and Surfaces
This is the fun part. Fold and stack sweaters on higher shelves using the Marie Kondo method (you know, the ones that stand up). Place a luxury scented sachet nearby — your closet should smell expensive. Keep a small jewelry organizer on a shelf or use drawer inserts to prevent tangling.
Better Homes & Gardens & Gardens has amazing tips on making functional storage look like design, and it applies perfectly here. The goal is beauty and function living together peacefully.
Step 7: Final Touches and Maintenance
Step back and look at what you've created. Does it feel luxurious? Add a small decorative item if it feels too utilitarian — maybe a small plant, a framed photo, or a piece of art that makes you happy. Maintenance is key: return items to their designated spots immediately, and do a quick tidy each Sunday evening.
Pro Tips
Invest in Quality Basics: Now that your closet is organized, you'll see exactly what you're missing. Focus on quality basics — they'll last longer and look better. Amazon has some surprisingly solid options in neutral tones.
Use the Hanger Flip Trick: Hang all your hangers backward at the start of the season. As you wear items, flip the hanger forward. At season's end, anything still backward? You didn't wear it. Donate without guilt.
Group by Activity, Not Just Type: Create zones. Work clothes here, weekend wear there, exercise gear in its own section. It makes getting dressed so much easier — you're not searching through everything to find what you need.
Lighting is Non-Negotiable: Seriously, spend a bit extra on good lighting. A well-lit closet makes everything look better and helps you make better outfit decisions.
Don't Overstuff: Just because you can fit more doesn't mean you should. Your closet needs breathing room — literally and aesthetically. Overcrowding undermines that luxury feeling.
Cost Breakdown
← Scroll to see full table →
| Item | Estimated Cost | Priority Level |
|---|---|---|
| Velvet Hangers (50-pack) | $25-35 | High |
| LED Strip Lighting | $20-30 | High |
| Fabric Storage Boxes (6-pack) | $30-45 | Medium |
| Wooden Shelf Dividers | $15-20 | Medium |
| Hanging Organizer | $25-40 | Medium |
| Scented Sachets/Spray | $10-20 | Low |
| Acrylic Drawer Dividers | $15-25 | Medium |
| Full-Length Mirror with Lights | $60-100 | High |
| Jewelry Organizer | $20-35 | Low |
| Shoe Rack/Risers | $30-50 | Medium |
| Total Estimated Investment | $250-400 | - |
FAQ
Q: Can I really get a luxury-looking closet for under $400?
A: Absolutely. The key is strategic spending — invest in the basics that make the biggest visual impact (hangers, lighting, mirror) and fill in the gaps with affordable storage solutions. Luxury is about intentionality, not price tags. Most people spend more than this on clothes they never wear, so redirecting that toward organization makes total sense.
Q: What if I have a tiny closet with no natural light?
A: This is actually where lighting becomes even more crucial. Motion-activated LED strips are affordable and game-changing in small spaces. Use lighter-colored storage boxes to reflect light, and keep only what you actually wear to avoid the cramped feeling. Vertical storage is your best friend.
Q: Are velvet hangers really worth the upgrade?
A: Yes. They're not just prettier — they're functional. Clothes don't slip off, they take up less space, and they look cohesive. Once you switch, you won't go back. Plus, the price difference per hanger is minimal, and they last for years.


