Transform Your Closet Into an Aesthetic Sanctuary — A Modern Home Guide
Let's be honest — your closet is basically a second bedroom. It's where you start your day, where you panic at 7 AM looking for that one shirt, and where you probably have a pile of things you're "maybe going to wear again." If you're anything like me, you've scrolled through Pinterest for hours drooling over those perfectly organized celebrity closets, thinking there's no way you could ever achieve that level of zen.
But here's the thing: an aesthetic closet setup isn't just about making your space look Instagram-worthy (though that's definitely a bonus). It's about creating an environment that actually works with your lifestyle instead of against it. When your closet is organized, curated, and beautiful? Getting dressed becomes less stressful, and you actually wear the clothes you own. Revolutionary, right?
I've spent the last few years experimenting with different closet systems, color schemes, and organizational methods. Some things worked amazingly. Some things were absolute disasters. But I've learned what actually makes a modern closet both functional and gorgeous — and I'm here to walk you through it.
What You'll Need
Before we jump into the transformation, let's talk materials. You don't need to spend a fortune to create a stunning closet space. Here's what I recommend having on hand:
- Matching Hangers (wooden or sleek metal) — $30-60 for a set of 50
- Shelf Dividers (acrylic or wood) — $15-35
- Clear Storage Bins (various sizes) — $40-80
- Drawer Organizers (fabric or bamboo) — $20-50
- Hanging Shelves or Cubbies — $25-75
- LED Strip Lighting (optional but game-changing) — $15-40
- Baskets for Seasonal Items — $30-60
- Labels and Labeler — $10-20
- Hooks for Bags/Accessories — $15-30
- Quality Shoe Organizer — $25-50
The The Home Depot carries most of these items, and honestly, you can also find great options at Target or online. The key is investing in pieces that'll last and actually complement your space aesthetically.
Step-by-Step Guide
Step 1: Declutter Like You Mean It
This is where most people skip ahead, and it's a mistake. You cannot organize what you don't actually need. I know it sounds harsh, but that blazer you haven't worn in three years? It's taking up valuable real estate.
Go through everything. And I mean everything. Pull items off hangers, empty shelves, open drawers. Create three piles: keep, donate, and sell. Be honest with yourself. If it doesn't fit, if you don't love it, or if you'd never actually wear it — it goes. This step usually reduces what you have by 30-40%, which is honestly liberating.
Step 2: Assess Your Space and Plan Your Layout
Take a good look at your closet dimensions. Do you have more hanging space or more shelf space? Are there awkward corners? Understanding your actual layout is crucial before you buy anything.
I like to sketch a quick plan — nothing fancy, just noting where things will go. Hanging items near the door, shoes on a shelf or organizer, accessories grouped together. Think about your daily routine. What do you need to grab quickly? That should be at eye level or within easy reach.
Step 3: Install Lighting (If You Haven't Already)
This is legitimately life-changing. Most closets have terrible overhead lighting that makes everything look gloomy and gray. LED strip lights are affordable, easy to install, and they'll completely transform how your space looks and feels.
I mounted mine along the top shelf and at the back of the hanging rod. It took literally 15 minutes and cost about $20. Your future self will thank you every single morning.
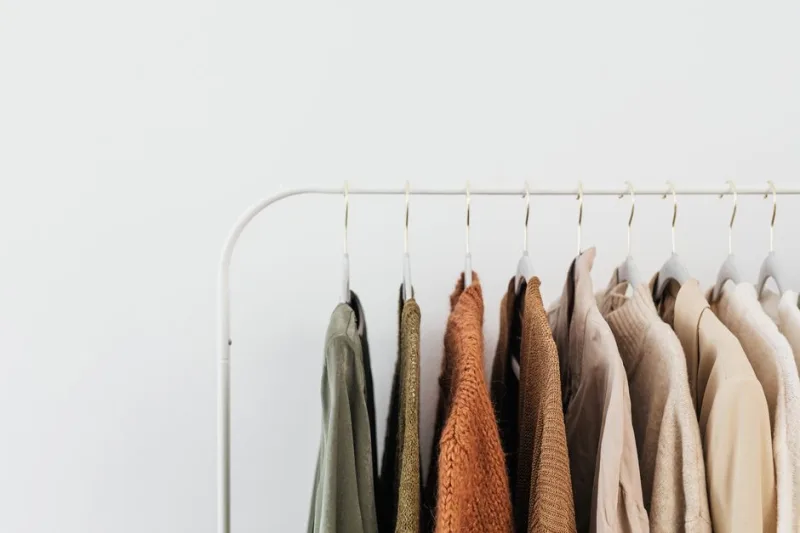
Step 4: Upgrade Your Hangers
Mismatched hangers make even an organized closet look chaotic. Choose one style — I personally love the slim wooden hangers because they're elegant and save space. Get rid of every other hanger you own. Yes, that means those wire ones from the dry cleaner too.
Same direction, same hangers, same color scheme. This single change is honestly 60% of what makes a closet look aesthetic.
Step 5: Organize by Category, Then by Color
 Boho DIY Room Makeover: Full Revamp Under $200
Group similar items together — all the sweaters, all the pants, all the dresses. This makes getting dressed so much faster. Within each category, organize by color. Going from light to dark (or dark to light, whatever you prefer) creates a visual flow that's both practical and beautiful.
Check out HGTV's closet organization guides if you want more inspo on category systems. Their approach is super practical for real life.
Step 6: Style Your Shelves and Cubbies
Folded items should be stored in layers or stacks. Use shelf dividers to keep everything from sliding around. Store heavier items on lower shelves. For upper shelves, consider using clear bins so you can see what's inside without opening them.
Leave a little breathing room — don't cram things in so tight that you can't grab what you need. It actually makes your space look smaller and feel more stressful.
Step 7: Create Zones for Accessories
Your scarves, belts, jewelry, and bags deserve their own designated areas. Use hooks for bags (I mounted mine on the inside of the closet door), drawer organizers for jewelry, and those cool scarf hangers or hooks for — you guessed it — scarves.
Better Homes & Gardens & Gardens has some fantastic ideas for small-space accessory storage. Their minimalist approach really resonates with modern aesthetics.
Step 8: Label Everything
Get a label maker and label your bins and organizers. I know it sounds extra, but it keeps you accountable. You're way less likely to shove random items into a clearly labeled bin. Plus, it looks incredibly put-together.
Pro Tips
Invest in Quality Basics: Before you organize, make sure you actually have a solid foundation of pieces that work together. Five neutrals you love will serve you better than twenty items that don't coordinate.
Use Vertical Space: Most of us ignore the walls. Add hooks, shelves, or even a tall narrow bookcase to maximize storage. Honestly, going vertical changed my whole closet game.
Rotate Seasonal Items: You don't need winter coats taking up space in July. Store off-season items in labeled bins on a higher shelf or under the bed. It actually makes your active closet feel less cluttered.
Keep a "Maybe" Box: Before you donate something, put it in a box and wait three months. If you haven't grabbed it, it's gone. This takes the guilt out of decluttering.
Maintenance is Key: Spend 15 minutes every Sunday tidying up. Put things back where they belong, rehang items that got yanked, fold things that got wrinkled. It's way easier than a total overhaul once a year.
Cost Breakdown
← Scroll to see full table →
| Item | Quantity | Unit Price | Total Cost |
|---|---|---|---|
| Matching Hangers | 1 set of 50 | $45 | $45 |
| Shelf Dividers | 2 sets | $20 | $40 |
| Clear Storage Bins | 4 units | $15 | $60 |
| Drawer Organizers | 1 set | $35 | $35 |
| Hanging Shelves | 1 unit | $50 | $50 |
| LED Strip Lighting | 1 pack | $25 | $25 |
| Baskets for Seasonal Items | 2 units | $40 | $80 |
| Labels and Labeler | 1 set | $15 | $15 |
| Hooks for Bags | 4 hooks | $6 | $24 |
| Shoe Organizer | 1 unit | $40 | $40 |
| TOTAL ESTIMATED COST | $414 | ||
Note: You can absolutely do this for less if you're strategic about sales and check out budget-friendly retailers. Start with essentials and build over time.


